 Pin it
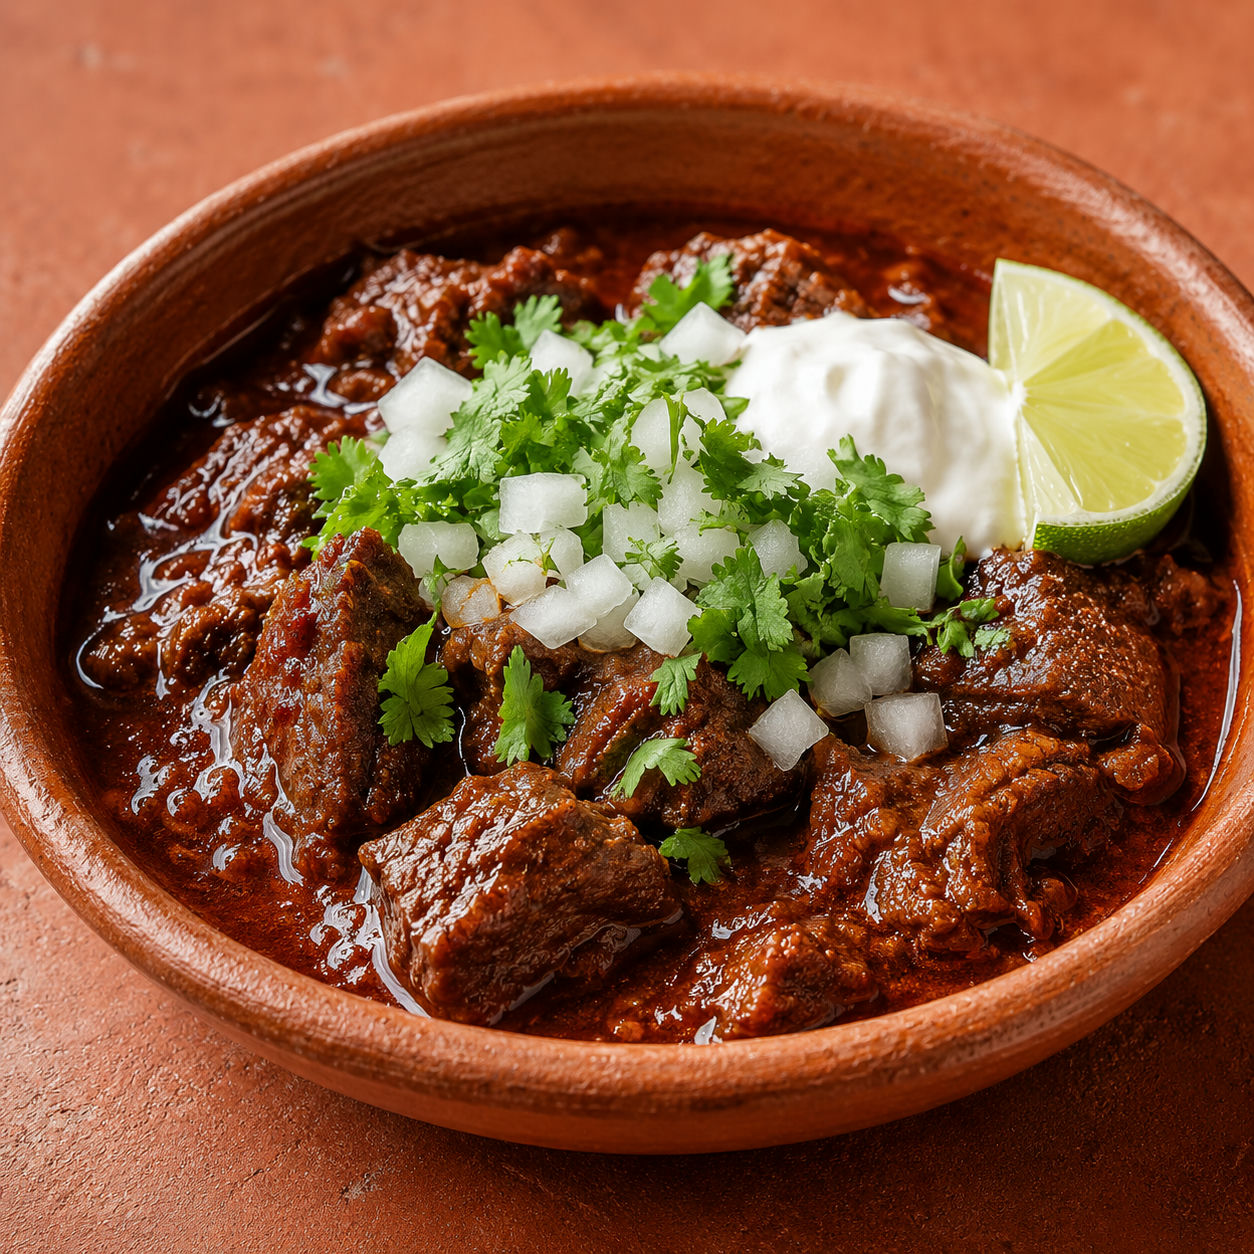
This isn't the chili from a packet. It's built on a base of real dried chiles (guajillo for mild fruity depth, ancho for a hint of chocolate and raisin, chipotle for smoke), blended into a thick sauce that coats every piece of beef and deepens as it cooks. The technique takes about 15 extra minutes compared to a weeknight chili, and the result is something genuinely different.
I first made a version of this after buying a bag of dried guajillos at the market with no real plan. One afternoon later, the kitchen smelled like the best taqueria in town. The beef goes in cubed and comes out pull-apart tender, and the sauce thickens into something you want to eat with a spoon straight from the pot.
There are no beans in the base recipe, just beef and chile sauce, so this lands closer to a Mexican guisado than a Tex-Mex chili. Serve it over rice, wrapped in a warm tortilla, or in a bowl with fresh toppings. Each way works.
The dried chiles and everything else
The three dried chiles carry the flavor here. Look for them at any Latin grocery or in the international aisle of a well-stocked supermarket. Pliable and deeply colored is what you want. Brittle, dusty, or nearly black means they've been sitting too long and will taste flat.
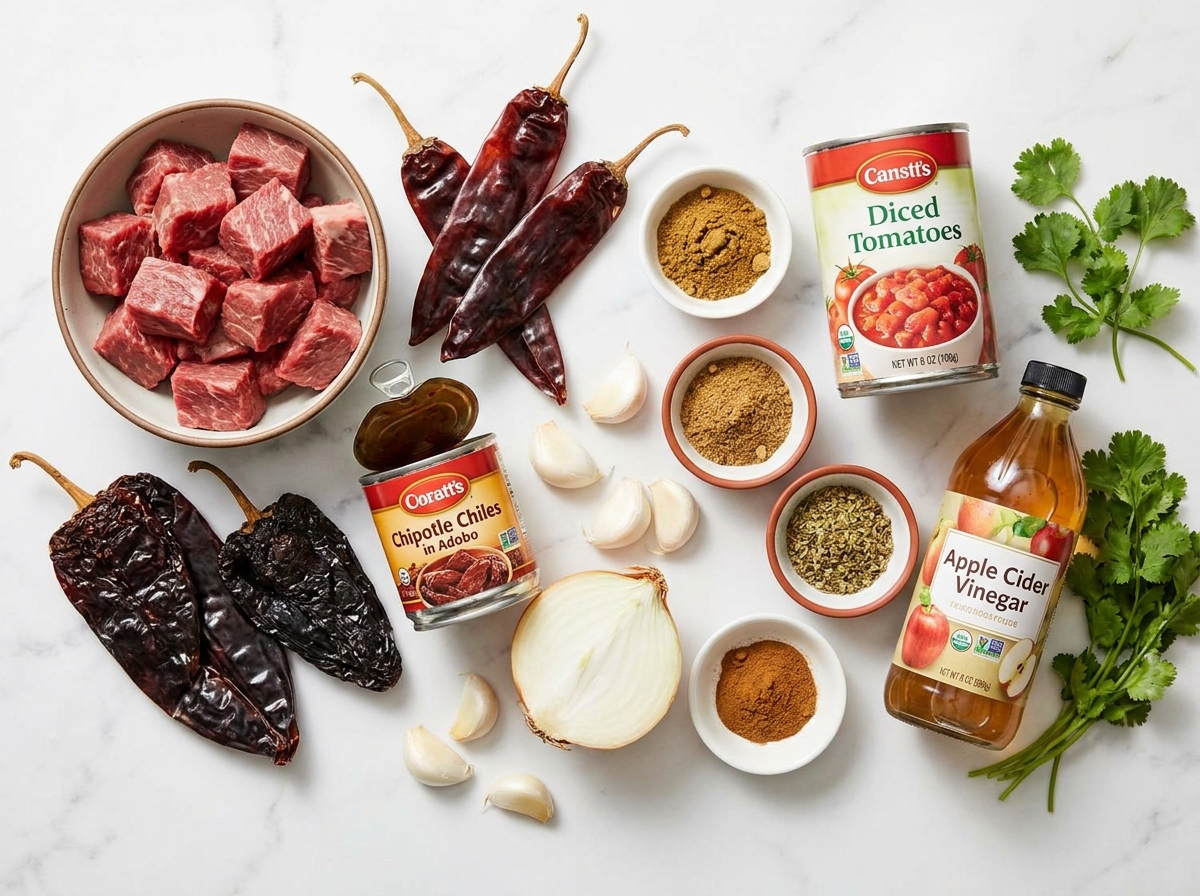
- Dried guajillo chiles. Mild, fruity, and the backbone of the sauce. They give it a clean brick-red color and a bright chile flavor without excessive heat.
- Dried ancho chiles. Dried poblanos with a faint raisin and chocolate note that adds depth and gentle sweetness to the base.
- Chipotle chiles in adobo. Smoked jalapeños packed in tangy tomato sauce. One or two adds all the smoke and controlled kick this chili needs.
- Beef chuck. The right cut for long, slow cooking. The fat and connective tissue render down and make the sauce silky while the meat becomes pull-apart tender.
- Canned diced tomatoes. Adds acidity that lifts the sauce and keeps the richness from going flat.
- Mexican oregano. More citrusy and assertive than Mediterranean oregano. Worth seeking out, though the Mediterranean version works in a pinch.
- Cumin, coriander, and cinnamon. The trio that grounds the spice profile and ties the chile sauce together without any one flavor dominating.
- Apple cider vinegar. A small amount stirred in at the end brightens the finished sauce and pulls the flavors into focus.
From a cold pan to the finished pot
- Toast the dried chiles. In a dry skillet over medium heat, press each guajillo and ancho chile flat for 20 to 30 seconds per side until fragrant and slightly darkened. Transfer immediately to a heatproof bowl. Cover with hot water and soak 20 to 25 minutes until soft and pliable.
- Sear the beef. Pat the beef cubes very dry and season generously with salt and pepper. Heat the oil in a Dutch oven over high heat. Sear in batches without crowding, 3 to 4 minutes per batch, until browned on at least two sides. Set aside on a plate.
- Sauté the aromatics. Reduce the heat to medium. Add the onion to the same pot and cook for 5 minutes, scraping up the browned bits from the bottom. Add the garlic and cook 2 more minutes until fragrant.
- Blend and strain the sauce. Drain the soaked chiles. Add them to a blender with the canned tomatoes, chipotle chiles and their adobo sauce, cumin, coriander, oregano, cinnamon, and half a cup of beef broth. Blend until completely smooth. Strain through a fine mesh sieve into the pot with the aromatics, pressing on the solids. Discard the solids.
- Braise low and slow. Return the seared beef and any resting juices to the pot. Add the remaining broth and the bay leaf. Bring to a boil, then reduce to a low simmer. Cover and cook for 1 hour 45 minutes to 2 hours, stirring occasionally, until the beef pulls apart easily when pressed.
- Finish and serve. Remove the bay leaf. Stir in the apple cider vinegar and taste for salt. Simmer uncovered for 10 to 15 more minutes if you want a thicker sauce. Serve in bowls with your choice of toppings.
Why you toast the dried chiles
Pressing dried chiles flat in a hot dry pan for about 30 seconds per side wakes up the volatile oils and transforms the flavor from one-dimensional heat into something earthy and complex. Skip this step and the sauce tastes raw and slightly dusty. According to Serious Eats' guide to dried chiles, toasting also develops the complex flavor compounds that make each variety distinct from the next. This is the same foundational technique behind authentic Mexican salsa roja, where toasted dried chiles build the entire base.
The soak that follows softens the flesh so the blender can do its job properly. Blend undipped chiles and the sauce turns gritty. Twenty minutes in hot water is the minimum. Thirty is better if you have an extra few minutes to spare.
Choosing and braising the beef
Chuck is the right cut here because it needs time and rewards it. The collagen in chuck dissolves into gelatin during a long braise, which gives both the meat and the sauce a silky, almost glossy body that no other cut replicates at the same price. Brisket or bone-in short ribs work just as well. Avoid lean cuts like sirloin or round. They turn dry and grainy when cooked this long regardless of how carefully you manage the heat.
The sear before braising isn't optional if you want a complex, layered sauce. Brown meat adds depth through the Maillard reaction that no amount of extra spice can replicate. The USDA recommends cooking beef to at least 145°F internally. A low braise like this goes well past that over time, so the meat is both safe and tender. Dry the beef thoroughly before it hits the pan. Surface moisture creates steam instead of a crust.
Three mistakes that hurt this dish
Burning the dried chiles is the most common one. Thirty seconds per side is usually enough. A burnt chile turns bitter and there's no fixing the sauce once it's blended in. Keep the heat at medium and don't walk away.
Not straining the blended sauce is the second. Even a powerful blender leaves small bits of tough chile skin. Straining takes two minutes and makes the difference between a smooth, restaurant-quality sauce and a slightly rough one.
Rushing the braise is the third. If the beef is still chewy after an hour, the connective tissue hasn't had time to convert. Give it another 30 to 45 minutes before you check again. Lifting the lid repeatedly slows things down more than it helps.
Storing, reheating, and freezing
This chili tastes better the next day. The spices meld and the sauce deepens overnight in the fridge. Keep it covered for up to 4 days. To freeze, cool it completely first, then seal in portions for up to 3 months. Reheat on the stovetop over medium-low with a splash of broth stirred in to loosen the sauce. Avoid hard boiling on reheat since the beef can break apart too much. This recipe pairs naturally with the one pot homemade chili approach if you like making a double batch and freezing half for a later week.
Serving ideas worth knowing
The simplest way is in a bowl with warm corn tortillas for dipping. It's also excellent spooned over white rice, used as a burrito filling, or ladled over a bowl of homemade refried beans. The standard toppings are diced white onion, fresh cilantro, a squeeze of lime, sour cream, and a crumble of cotija or shredded cheddar. For a full Mexican table, add a side of authentic Mexican red rice. This chili also holds well in a low oven at 200°F for up to 2 hours, which makes it practical for feeding a crowd without last-minute reheating.
FAQs
- Can I make this Mexican beef chili in a slow cooker?
Yes. After searing the beef and blending the chile sauce, pour everything into a slow cooker and cook on low for 6 to 8 hours or on high for 3 to 4 hours. The beef will be just as tender and the sauce develops a lovely depth over the long cook. Skim any fat from the surface before serving.
- What can I substitute if I can't find dried guajillo chiles?
New Mexico chiles or California chiles are the closest swap for guajillo, with a similar mild and slightly fruity character. In a real pinch, a tablespoon of good chili powder plus a pinch of smoked paprika will keep the dish flavorful, though you'll lose some of the fresh, bright chile note that real dried pods bring.
- How do I make this chili less spicy?
The chipotle chiles carry most of the heat. Use just one chipotle instead of two, or skip them entirely and add half a teaspoon of smoked paprika for smoke without much kick. Guajillo and ancho are both mild chiles, so reducing those will mostly lower the depth of the sauce rather than the heat level.
- Can I add beans to this chili?
Absolutely. Stir in one or two cans of drained and rinsed pinto or black beans in the last 20 minutes of simmering. They just need time to warm through and absorb a little of the sauce. Check out the Mexican style chili beans recipe if you want a version where the beans take center stage.
- How long does leftover Mexican beef chili keep?
Covered in the fridge, it keeps well for up to 4 days and the flavor actually improves overnight as the spices meld. You can also freeze it in sealed containers for up to 3 months. Thaw overnight in the fridge and reheat gently on the stovetop with a splash of broth stirred in to loosen the sauce back to its original consistency.
- What goes well alongside this chili?
Warm corn tortillas and white rice are the natural pairings since both soak up the sauce well. For toppings, diced white onion, fresh cilantro, a squeeze of lime, sour cream, and cotija cheese all balance the richness. For a fuller spread, serve alongside authentic Mexican red rice and a bowl of homemade bacon refried beans.
- Can I use ground beef instead of beef chuck?
You can, and it cuts the cook time to about 30 minutes. Brown the ground beef first, then proceed with the sauce the same way. The texture will be looser and the sauce won't have the silky, gelatin-rich body that a long-braised chuck gives you, but it's a solid weeknight option when time is short.
