
 Pin it
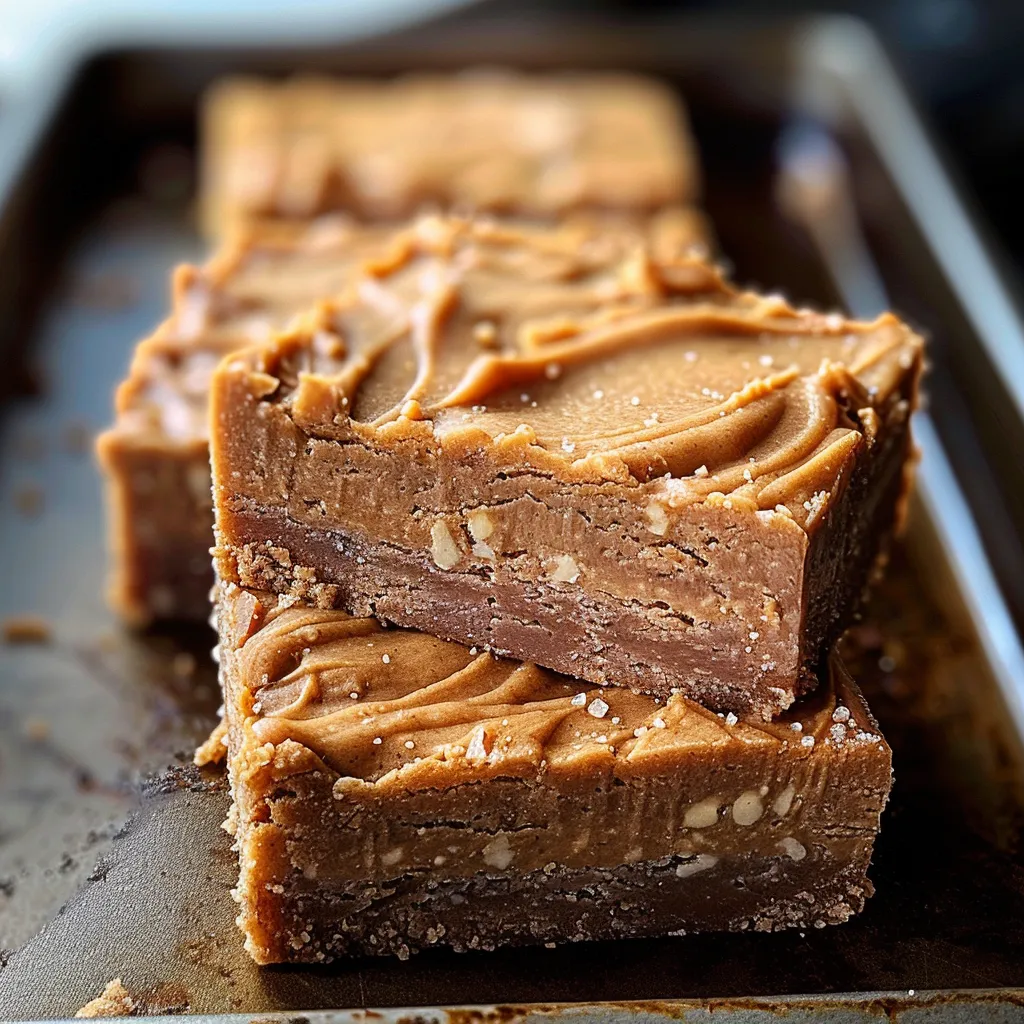
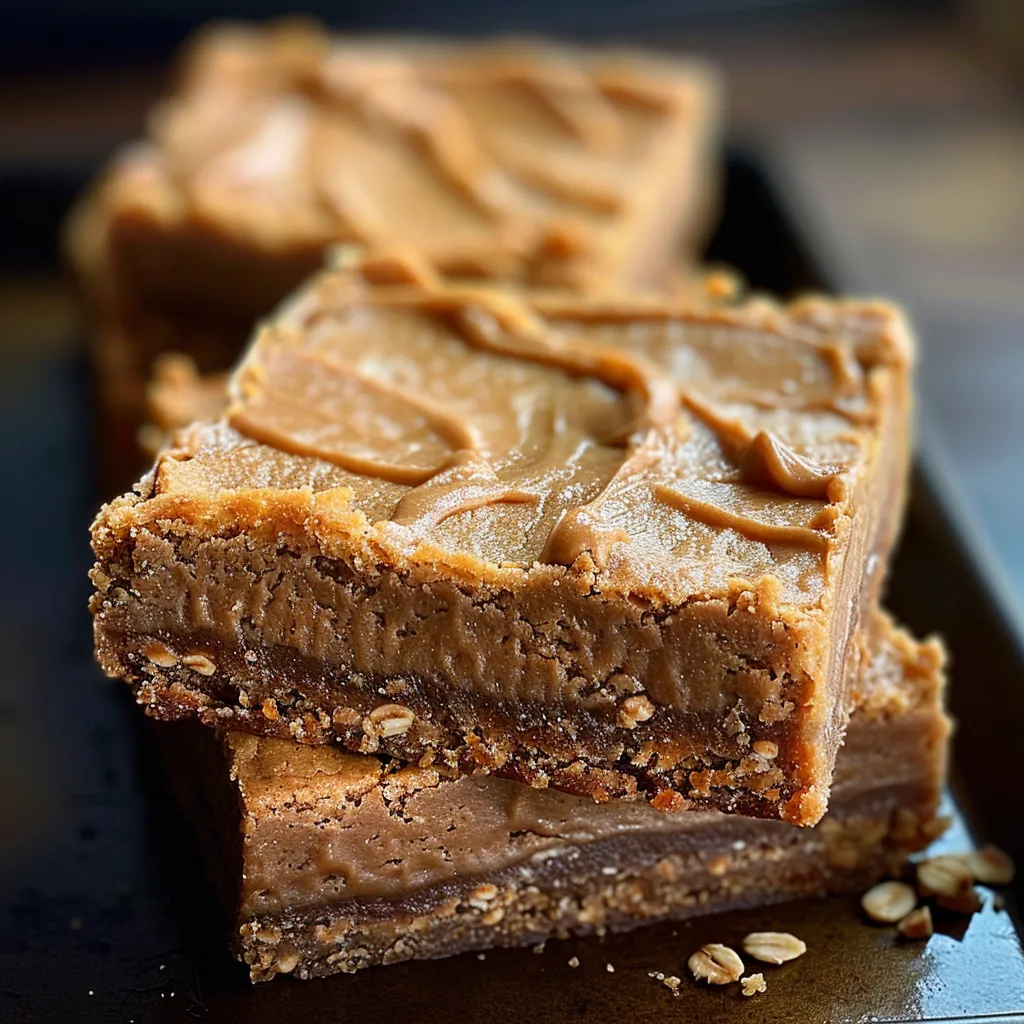
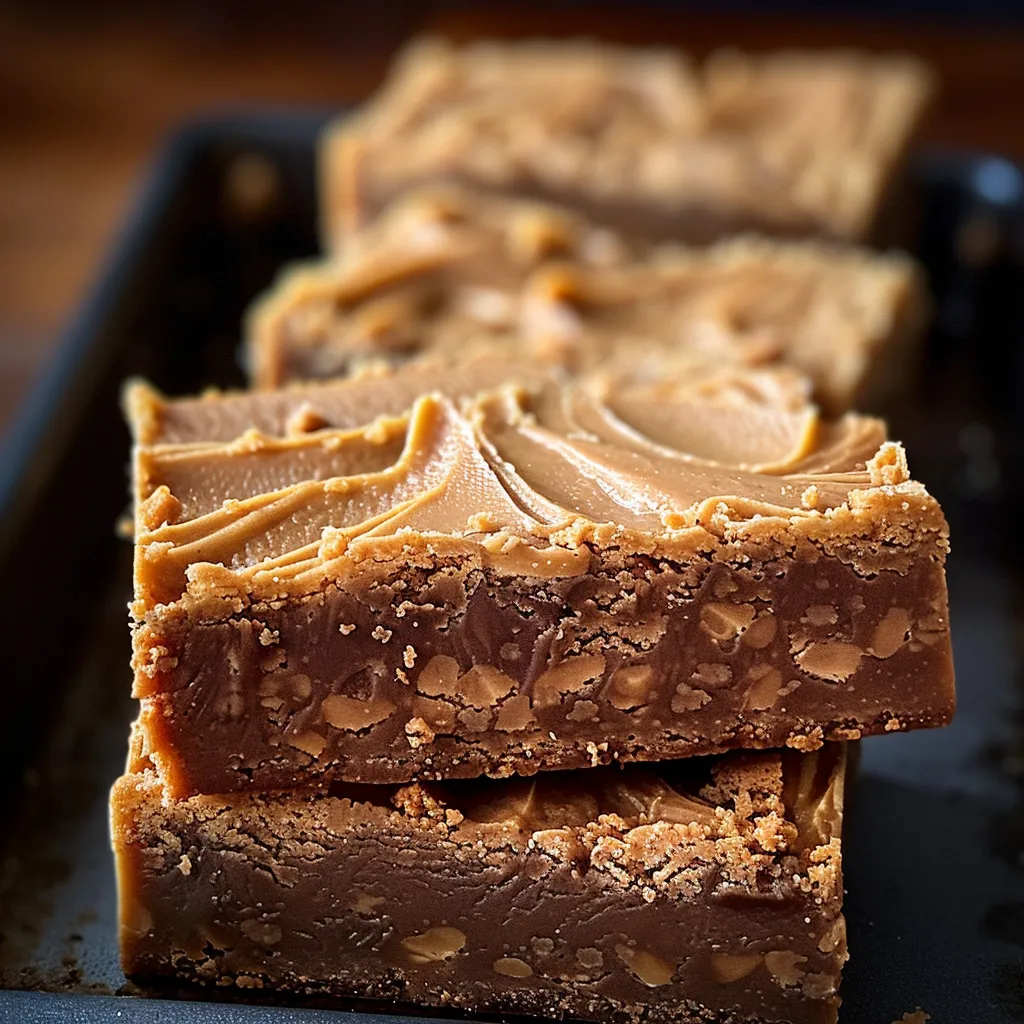
This classic peanut butter lunch lady cookie bar recipe brings me straight back to my school cafeteria days, but with a homemade twist that makes them even better than the original. The combination of creamy peanut butter, hearty oats, and the perfect chewy texture creates an irresistible treat that's equally perfect for lunchboxes, after-school snacks, or anytime you need a nostalgic sweet fix.
I first made these bars for my children's school bake sale, and they disappeared faster than any other treat on the table. Since then, they've become our go-to recipe whenever we need to bring something sweet to gatherings or when my kids have friends over.
Ingredients
- Unsalted butter: Softened to room temperature gives these bars their tender crumb and rich flavor. Quality butter makes a difference here.
- Granulated sugar: Provides sweetness and helps create those slightly crisp edges everyone loves.
- Brown sugar: Adds moisture and a deeper caramel flavor that pairs perfectly with peanut butter.
- Creamy peanut butter: Forms the backbone of these bars. I recommend using a commercial brand like Jif or Skippy for consistent results.
- Large eggs: Bind everything together and provide structure. Room temperature eggs incorporate better.
- Vanilla extract: Enhances all the other flavors. Pure vanilla extract offers the best flavor.
- All-purpose flour: Creates the perfect structure. Measuring accurately is key.
- Baking soda: Gives just the right amount of lift for that perfect chewy texture.
- Salt: Balances the sweetness and enhances the peanut butter flavor.
- Quick oats: Add wonderful texture and heartiness. They incorporate more smoothly than old-fashioned oats.
Step-by-Step Instructions
- Preheat and Prep:
- Turn your oven to 350°F and take a moment to properly grease your 9x13 baking dish. I like to use a little butter for this, making sure to get into all the corners. This step ensures your bars will release easily after baking.
- Cream Butter and Sugars:
- Using either a stand mixer or hand mixer, beat together your softened butter with both sugars for a full 3 minutes. This incorporates air into the mixture, creating a lighter texture in your finished bars. The mixture should be noticeably lighter in color and fluffy in texture when done correctly.
- Mix Wet Ingredients:
- Add your peanut butter, eggs, and vanilla to the creamed butter mixture. Beat on medium speed until everything is thoroughly combined. The mixture should be smooth and uniform. Make sure to scrape down the sides of the bowl with a spatula to incorporate all ingredients evenly.
- Prepare Dry Ingredients:
- Whisking together the flour, baking soda, and salt in a separate bowl ensures these ingredients are evenly distributed throughout the dough. This prevents any pockets of salt or baking soda in your finished bars.
- Combine Everything:
- Add your dry ingredients to the wet ingredients gradually, about a third at a time, mixing on low speed just until incorporated. Overmixing at this stage can make your bars tough. When the flour is mostly incorporated, add the oats and mix until just combined. The dough will be thick and sticky.
- Bake:
- Spread the dough evenly in your prepared pan, using a spatula to press it into the corners and create a smooth top. Bake in your preheated oven for 20 to 25 minutes. You want the edges to be golden brown and slightly pulled away from the sides of the pan. A toothpick inserted in the center should come out clean or with a few moist crumbs, but no wet batter.
 Pin it
My absolute favorite thing about these cookie bars is how they bring together simple ingredients to create something truly special. My grandmother used to make a similar version when I was growing up, and she always said the secret was in being patient while creaming the butter and sugar. That extra minute or two of mixing creates the perfect foundation for everything else.
Perfecting the Texture
The baking time is crucial for these bars. At 20 minutes, you'll have a softer, more gooey center that's perfect for those who love a slightly underdone cookie. At 25 minutes, the bars will be more set throughout with a chewier texture. I recommend checking at the 18 minute mark and then watching closely. Remember that the bars will continue to set as they cool, so removing them when the center is just set will give you that perfect lunch lady texture.
Creative Variations
While the classic recipe is perfect on its own, these bars welcome customization. Try adding 1 cup of chocolate chips for a peanut butter chocolate version that rivals any candy bar. White chocolate chips and dried cranberries create a festive holiday variation. For extra crunch and protein, fold in 1/2 cup chopped peanuts or walnuts. You can even drizzle the cooled bars with melted chocolate or a simple powdered sugar glaze for special occasions.
Storage Solutions
These bars store exceptionally well. Once completely cooled, cut them into squares and store in an airtight container at room temperature for up to 5 days. Place parchment paper between layers to prevent sticking. For longer storage, wrap individual bars in plastic wrap and freeze for up to 3 months. Thaw at room temperature for about an hour before serving, or pack frozen in lunchboxes to thaw by lunchtime.
 Pin it
Enjoy these nostalgic treats and share them with those you love.
Frequently Asked Questions
- → Can I use natural peanut butter for this recipe?
Yes, natural peanut butter works, but make sure to stir it well before using to ensure a smooth, even texture in the bars.
- → How do I store peanut butter cookie bars?
Keep the bars in an airtight container at room temperature for up to 3 days, or refrigerate them for up to a week for longer freshness.
- → Can I freeze these cookie bars?
Absolutely! Wrap them tightly and place them in a freezer-safe container. They can be frozen for up to 3 months. Thaw at room temperature before enjoying.
- → Can I use old-fashioned oats instead of quick oats?
Yes, but the bars will have a slightly chewier texture. Quick oats give a softer, more uniform bite.
- → What can I add to customize these cookie bars?
Mix in chocolate chips, chopped nuts, or drizzle melted chocolate over the top for extra flavor and variety.