
 Pin it
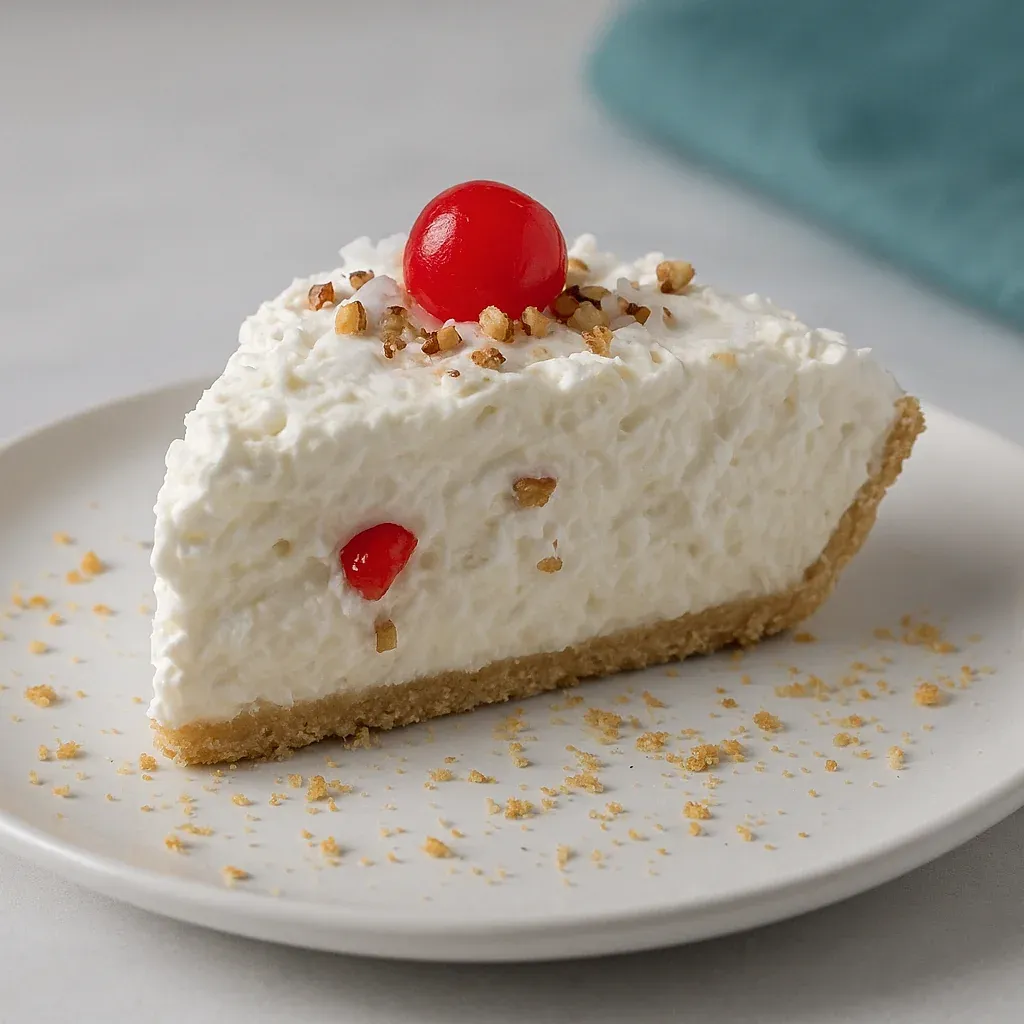
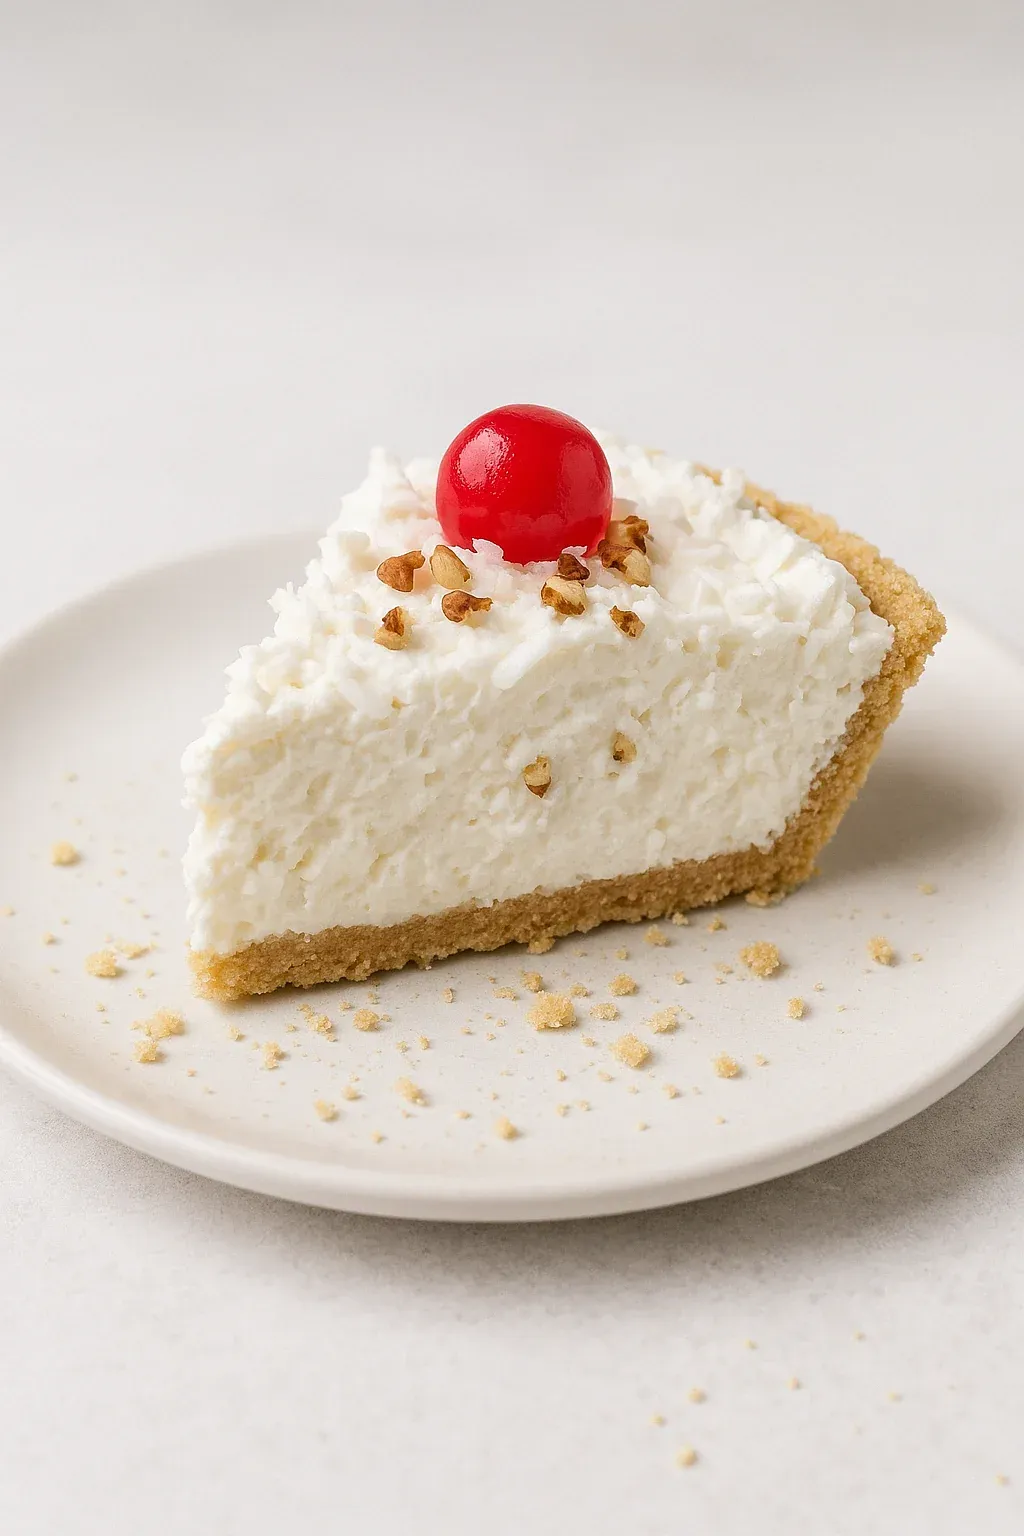
This heavenly no-bake dessert combines tropical flavors with creamy sweetness for a treat that truly lives up to its wealthy name. Each bite delivers a perfect balance of juicy pineapple, chewy coconut, and crunchy pecans in a cloud-like filling that melts in your mouth. Nestled in a buttery graham cracker crust and topped with bright maraschino cherries, this pie makes an impressive dessert with hardly any effort. I've been making this treasured family recipe for over twenty years, and it never fails to disappear within minutes at any gathering.
The first time I served this pie at a neighborhood potluck, three people asked for the recipe before the evening was over. My aunt Judy introduced me to this Southern classic when I was just learning to cook, and I've been grateful ever since. It's become my go-to for last-minute company, summer cookouts, and holiday gatherings when I need something impressive but don't have hours to spend in the kitchen. The best part? People always think you worked much harder than you actually did!
Ingredients You'll Need
- 20-ounce can crushed pineapple: Provides the fruity backbone of this dessert. Be sure to drain it thoroughly, as excess juice will make your filling runny. I prefer crushed pineapple for the most even distribution throughout the pie, though tidbits work well too if you prefer larger pieces. The natural sweetness and tropical flavor of pineapple makes this pie distinctive.
- Chopped pecans: Adds a necessary textural contrast and nutty flavor. The slight bitterness of pecans balances the sweetness of the other ingredients perfectly. Choose pieces that are fresh and not rancid—storing nuts in the freezer helps preserve their flavor. Toast them lightly before adding for enhanced flavor if you have a few extra minutes.
- 14-ounce can sweetened condensed milk: Creates the rich, creamy base that gives this pie its luxurious texture. This ingredient is non-negotiable and cannot be substituted with regular milk. The thick, sweet milk combines with the lemon juice to create a subtle custard-like texture without any cooking. Eagle Brand is traditional, but any quality brand works well.
- Sweetened shredded coconut: Delivers tropical flavor and distinctive chewy texture. The sweetened variety melds perfectly with the other ingredients, though unsweetened can be used if you prefer a less sweet dessert. The coconut distributes throughout the filling, adding little pockets of texture and flavor in every bite.
- Fresh lemon juice: Balances the sweetness and adds brightness to the filling. Fresh is strongly preferred over bottled for the cleanest flavor. The acidity also helps thicken the sweetened condensed milk slightly, creating a more stable filling. This touch of tartness makes all the difference in preventing the pie from becoming cloyingly sweet.
- 8-ounce container non-dairy whipped topping: Lightens the filling to create that cloudlike texture. Make sure it's completely thawed before folding in. While homemade whipped cream can be substituted, the stabilizers in commercial whipped topping help the pie maintain its texture longer, especially if you plan to freeze it.
- Graham cracker crusts: Provides the perfect crunchy, sweet foundation. Store-bought crusts save time, but homemade crusts offer better flavor if you have a few extra minutes. The honey notes in graham crackers complement the tropical filling beautifully. The recipe makes enough filling for two standard 9-inch pies.
- Maraschino cherries: Adds a pop of color and nostalgic flavor. These bright red garnishes aren't just decorative—they provide a lovely flavor contrast when you get one in your bite. Pat them dry with paper towels before placing on the pie to prevent color bleeding.
Step-by-Step Cooking Instructions
- Step 1:
- Prepare your work area properly – Gather all ingredients before starting and make sure your whipped topping is completely thawed. Having everything ready makes this quick recipe even faster. Allow about 15-20 minutes for the frozen whipped topping to thaw naturally, or defrost according to package directions.
- Step 2:
- Drain the pineapple thoroughly – Empty the can of pineapple into a fine-mesh strainer and press gently with the back of a spoon to remove excess juice. For ultra-insurance against a soggy pie, you can even pat the pineapple with paper towels. The drier your pineapple, the more stable your pie filling will be. Save the juice for smoothies or cocktails if desired.
- Step 3:
- Begin the filling mixture – In a large mixing bowl, combine the sweetened condensed milk and fresh lemon juice, stirring until smooth and well blended. The mixture will thicken slightly as you stir. This creates the rich base that will hold all your other ingredients. Make sure to scrape the sides of the bowl to incorporate all the condensed milk.
- Step 4:
- Add the drained pineapple – Fold in the well-drained crushed pineapple, distributing it evenly throughout the sweetened condensed milk mixture. Use a gentle hand when folding to maintain as much texture as possible. The pineapple should be evenly distributed with no clumps or concentrations in any one area.
- Step 5:
- Incorporate the coconut and pecans – Add the sweetened shredded coconut and chopped pecans to the bowl, reserving a small amount of pecans for garnishing the tops if desired. Fold these in gently until just combined. Over-mixing can make the filling dense, so use a light touch with your spatula or spoon.
- Step 6:
- Fold in the whipped topping – Add the completely thawed non-dairy whipped topping to the bowl. Using a rubber spatula, gently fold it into the mixture with a down-and-over motion rather than stirring, which would deflate the air bubbles. This technique preserves the light, fluffy texture that makes this pie special. Continue folding just until no white streaks remain.
- Step 7:
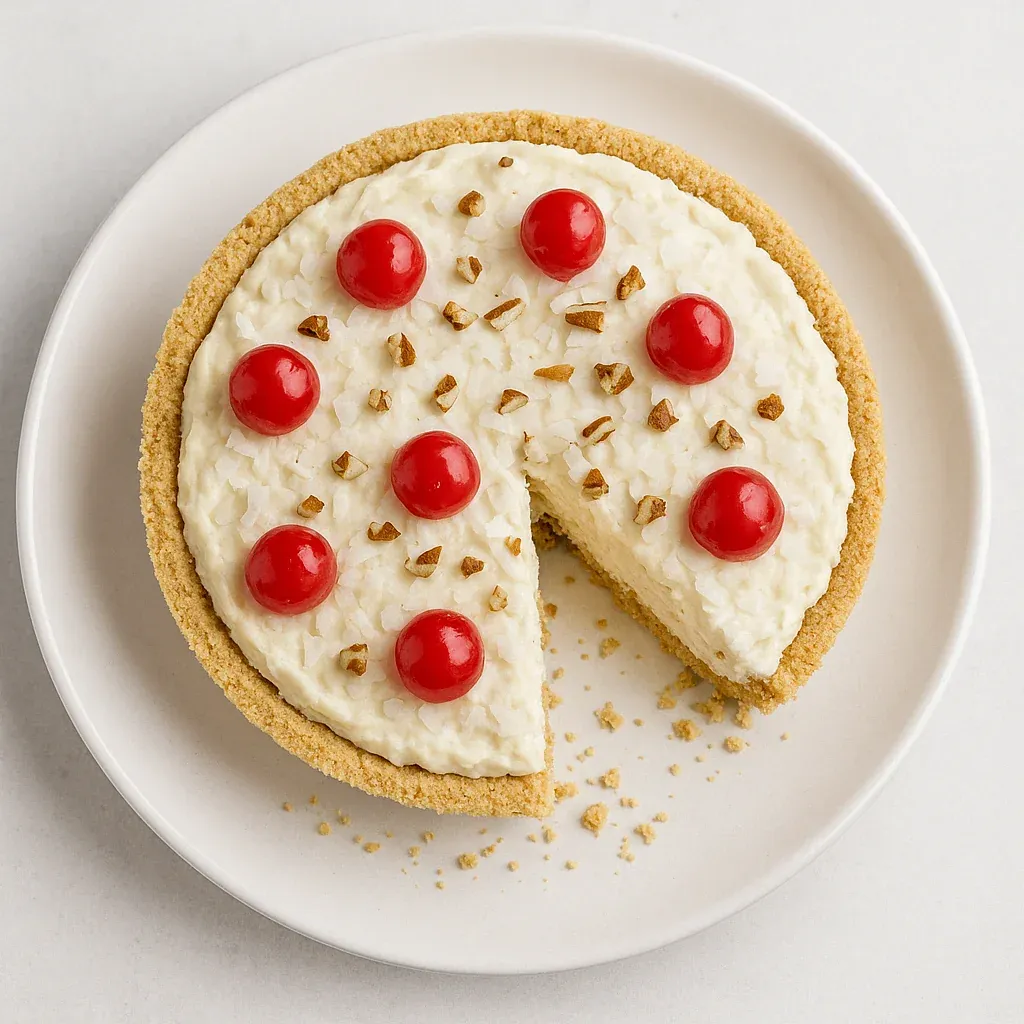
- Fill the pie crusts evenly – Divide the filling mixture evenly between the two graham cracker crusts, creating a slight mound in the center. Use an offset spatula or the back of a spoon to smooth the top into an even dome. Be careful not to compress the filling, which would make it dense rather than airy.
- Step 8:
- Add the garnishes – Place maraschino cherries decoratively on top of each pie. If using reserved pecans, sprinkle them between the cherries. For an extra special touch, add some lightly toasted coconut around the edges. These garnishes hint at the flavors inside while making the pie look professionally finished.
- Step 9:
- Chill thoroughly before serving – Place the pies in the refrigerator for at least 4 hours to set properly, or in the freezer for 2-3 hours if you prefer a more ice-cream-like consistency. The chilling time allows the flavors to meld and the texture to stabilize. Don't skip this step, as the pie needs time to firm up properly.
- Step 10:
- Slice and serve with care – For clean slices, dip a sharp knife in hot water and wipe dry between cuts. If the pie has been frozen, allow it to stand at room temperature for 10-15 minutes before slicing for easier cutting. Serve with additional whipped topping if desired for an extra-indulgent presentation.
 Pin it
The Story Behind Million Dollar Pie
I've always been fascinated by the origin of this beloved dessert. It originated in the American South at Furr's Cafeteria, where it quickly became a signature item. Legend has it that the pie was so rich and delicious that it tasted 'like a million dollars,' hence the name. The original version didn't include cherries, which were a later addition. There was also a 'Billionaire Pie' that incorporated cherry pie filling into the base recipe, upping the luxury factor even further.
Perfect for Holiday Gatherings
This pie has saved my holiday dessert table more times than I can count. Between the golden-hued filling and the bright red cherries, it already looks festive without any extra effort. For Christmas celebrations, I sometimes add green maraschino cherries alongside the red for a more intentional holiday appearance. The make-ahead nature of this dessert is perfect for busy holiday preparations – I often make it up to three days before the big event and keep it in the freezer until needed.
Summer Potluck Star
While many associate this pie with holiday gatherings, it truly shines during summer cookouts and picnics. The cool, creamy texture and tropical flavors are perfect after a meal of grilled foods. I've found that keeping it in a cooler with ice packs maintains the ideal texture for outdoor serving. Guests always appreciate something cool and sweet that doesn't involve turning on the oven during hot weather, and the bright flavors feel particularly appropriate for summer gatherings.
Family-Friendly Dessert Activity
One of the unexpected joys of this recipe has been making it with my children and now grandchildren. Since there's no baking or cooking involved, even very young helpers can participate safely. My five-year-old granddaughter takes particular pride in arranging the cherries 'just so' on top of the pie. Creating cooking memories without the stress of precise measurements or techniques has made this recipe a favorite for multi-generational kitchen time in our family.
Lighter Variations
While the original recipe is unapologetically rich, I've developed some variations for times when we're being more mindful about desserts. Substituting light whipped topping and fat-free sweetened condensed milk reduces calories without sacrificing much flavor. Using unsweetened coconut and adding a zero-calorie sweetener helps control the sugar content while maintaining the distinctive texture. These adaptations make it possible to enjoy this beloved dessert even when watching calories or sugar intake.
My grandmother taught me the importance of properly draining pineapple after a disastrous first attempt where my pie never set up properly. 'Treat that pineapple like it owes you money,' she'd say, showing me how to press every drop of juice out with the back of a spoon. When I make this pie now, I always hear her voice and smile, knowing that passing down these little kitchen tricks is as important as sharing the recipe itself.
 Pin it
I discovered the toasted coconut trick during a kitchen mishap. I was multitasking and accidentally left some coconut in the oven a minute too long – not burned, but deeply golden. Rather than waste it, I used it in my Million Dollar Pie and was amazed at how the toasting transformed the flavor, adding notes of caramel and nuttiness that elevated the entire dessert. Sometimes the best cooking discoveries come from near-disasters!
This Million Dollar Pie has earned its place in my recipe collection not just because it's delicious, but because it connects me to generations of home cooks who valued creating joyful experiences around the table without unnecessary complexity. In our busy world, there's something deeply satisfying about a dessert that delivers impressive results with minimal effort. Whether you're making it for a special occasion or simply because it's Tuesday, this pie delivers a taste experience that feels like a splurge but comes together with everyday ingredients and just a few minutes of your time.
Frequently Asked Questions
- → Can I use fresh pineapple instead of canned?
- Fresh pineapple isn't recommended for this recipe as it contains enzymes that can prevent the pie from setting properly. Stick with canned crushed pineapple, making sure to drain it thoroughly.
- → How can I make this pie lighter or lower in calories?
- For a lighter version, use fat-free sweetened condensed milk, lite Cool Whip, and reduce the amount of pecans. You could also use a reduced-fat graham cracker crust.
- → Can I make this pie ahead of time?
- Yes! This is an excellent make-ahead dessert. It can be stored in the freezer for up to a week if well-wrapped. Just thaw for about 20-30 minutes before serving.
- → What if I don't like coconut?
- You can omit the coconut and add a bit more crushed pineapple or chopped nuts instead. The texture will be slightly different but still delicious.
- → Can I use a different type of crust?
- Absolutely! A vanilla wafer crust or shortbread crust would work well. For a nutty variation, try a pecan crust to complement the pecans in the filling.