
 Pin it
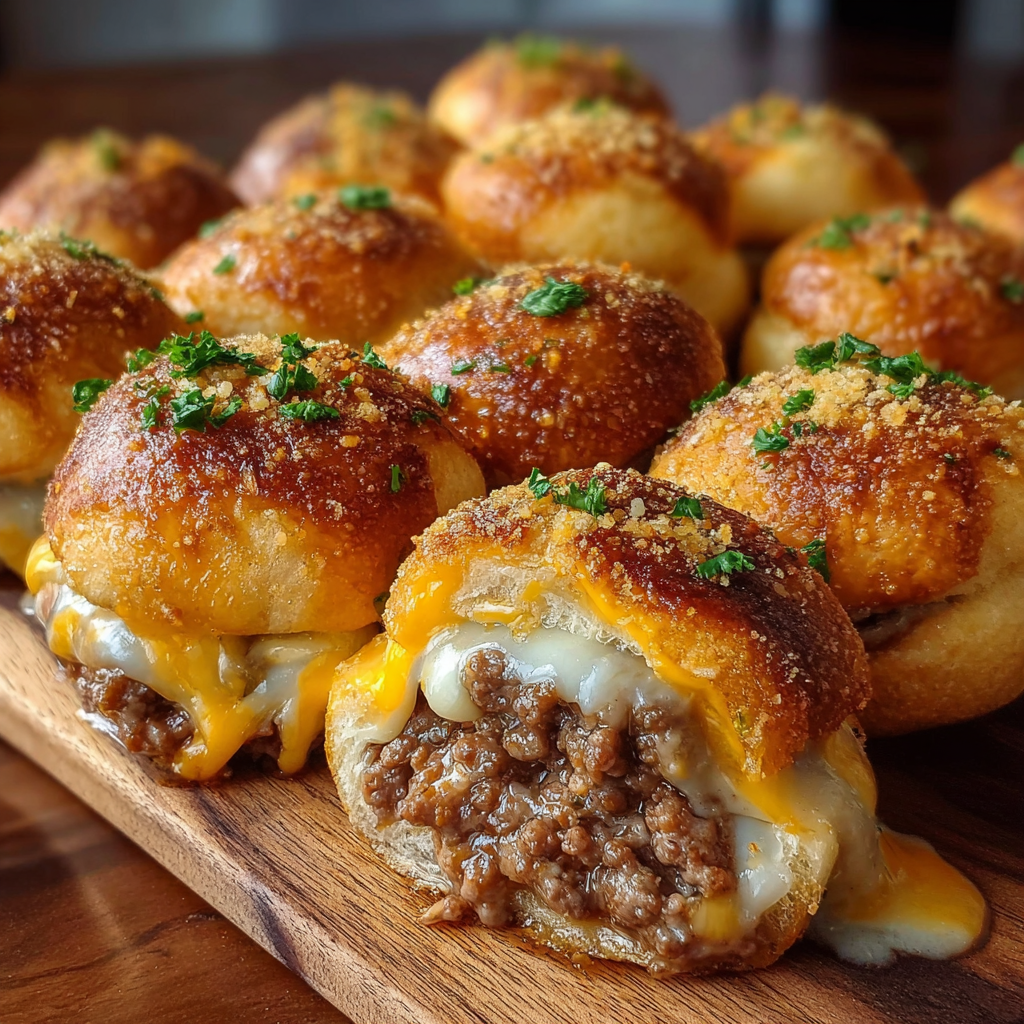
Garlic Parmesan Cheeseburger Bombs became my go to party snack when I needed something fun and easy that feeds a hungry crowd The combination of juicy beef cheesy filling and buttery garlic topping always disappears fast and they are way simpler to make than they look
I whipped these up for a birthday party once as a last minute idea and now everyone asks for cheeseburger bombs by name My kids love helping wrap up the dough and we all argue over who gets the cheesiest one
Ingredients
- Ground beef: adds classic cheeseburger flavor Choose 80 or 85 percent lean for juicy filling
- Salt pepper garlic powder onion powder: deliver that burger seasoning hit Use fresh ground pepper for best taste
- Worcestershire sauce: boosts umami and rich taste Look for original Lea and Perrins if possible
- Shredded cheddar or mozzarella cheese: creamy melty goodness Always shred it yourself for better melt
- Optional bacon pickles or caramelized onions: add fun flavor twists Crisp up the bacon or caramelize onions fully for sweetest taste
- Refrigerated biscuit or pizza dough: super easy shortcut Chilled dough handles best and gives perfect texture
- Butter: brings richness essential for the golden finish Go for real butter not margarine for best results
- Minced garlic or garlic powder: amps up the savory topping Fresh garlic gives boldest punch
- Parmesan cheese: for a salty nutty finish freshly grated always packs the most flavor
- Fresh parsley: makes the tops pretty and bright Newly chopped herbs add fresh bite right before serving
Instructions
- Prepare the Burger Filling:
- Brown your ground beef in a heavy skillet over medium heat Use a potato masher to break up any clumps and cook until no pink remains Drain off excess fat This step ensures the burger filling is flavorful not greasy Season generously while the beef is hot with salt pepper garlic powder onion powder and Worcestershire sauce Stir well to coat every bit of meat Let this cool to room temperature before adding your cheese
- Stuff the Bombs:
- Divide your chilled biscuit or pizza dough into 8 to 12 rough rounds Flatten each one to a 4 inch circle with your hands or a rolling pin Working one at a time add 1 or 2 tablespoons of the cooled meat and cheese mixture into the center Pinch the dough edges over the top and seal well Roll gently between your palms to make a sealed smooth ball so the cheesy filling stays inside
- Arrange on Baking Tray:
- Place each stuffed dough ball seam side down onto a parchment lined sheet pan Leave two fingers space between each for even browning Mix the melted butter with minced garlic then paint it generously over each bomb Top them with a shower of grated Parmesan
- Bake to Golden Perfection:
- Heat your oven to 375F Slide the tray in and bake for 15 to 18 minutes The dough should be deep golden with bubbling cheese showing through Cool on the tray for a few minutes before moving
- Finish with Garlic Butter:
- While still warm brush again with extra melted garlic butter for shine and extra flavor Sprinkle on the fresh parsley Serve hot for the best cheese pull and maximum flavor Try a creamy ranch or spicy mayo for dipping
 Pin it
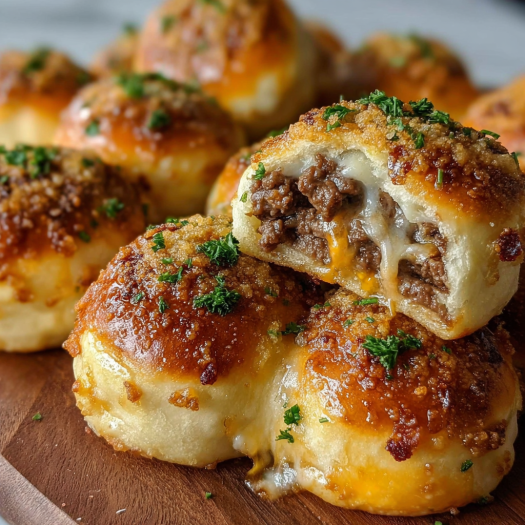
Sometimes I add lots of caramelized onion because my dad is an onion lover and these always turn out extra savory The butter garlic topping is my personal favorite part and watching the kids sneak the extra cheesy ones is always a highlight
Storage Tips
Let the bombs cool completely before transferring to an airtight container They will keep in the fridge for up to three days For longer storage freeze individually on a tray then seal in a freezer bag and keep up to two months Reheat in a hot oven so the pastry gets crispy again
Ingredient Substitutions
No biscuit dough on hand Use pizza dough rolled thin Crescent roll dough works in a pinch For the cheese try a sharp cheddar for punch or provolone or Swiss for a milder melt If Worcestershire is missing soy sauce with a splash of balsamic adds depth
Serving Suggestions
Serve as party appetizers alongside toothpicks and multiple dipping sauces They make a fun lunch paired with salad or crunchy pickles I love packing a few for picnic lunches or topping each bomb with a spicy jalapeno slice before baking for a little extra heat
Cultural Roots
Cheeseburger bombs borrow their soul from classic American burger flavors wrapped up in the convenience of a hand pie This mash up makes them both nostalgic and fun The trend of burger inspired bakes has spread through potlucks and family gatherings across the country Everyone loves discovering gooey cheese hidden in a golden pillow of bread
 Pin it
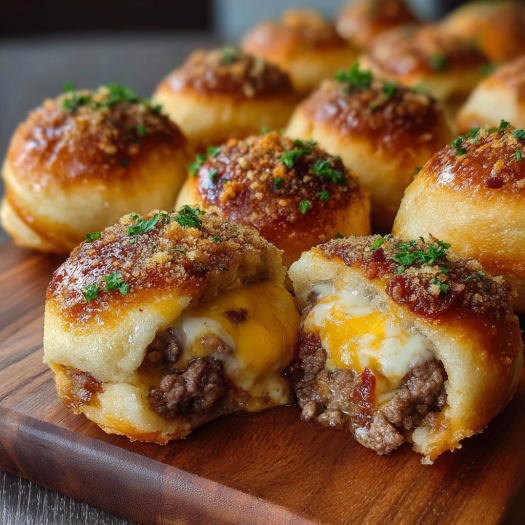
No matter the season these cheeseburger bombs are a true crowd pleaser and a clever twist on burger night Kids love helping assemble and everyone loves pulling them apart at the table
Frequently Asked Questions
- → Can I add extra fillings to the beef center?
Yes! Try crisply cooked bacon, pickles, or caramelized onions to personalize each bomb.
- → What kind of cheese works best?
Cheddar brings sharpness, while mozzarella melts smoothly. Use either or combine both for extra flavor.
- → Is homemade dough required?
Refrigerated biscuit or pizza dough is quick and convenient, but homemade dough also works great if desired.
- → How do I prevent them from leaking?
Ensure dough edges are well sealed and fully encase the filling before baking for best results.
- → What sauces pair well for dipping?
Ranch, garlic aioli, and spicy mayo all complement the savory cheesy filling.
- → Can these be made ahead?
Assemble and refrigerate unbaked bombs for a few hours in advance; bake just before serving.