
 Pin it
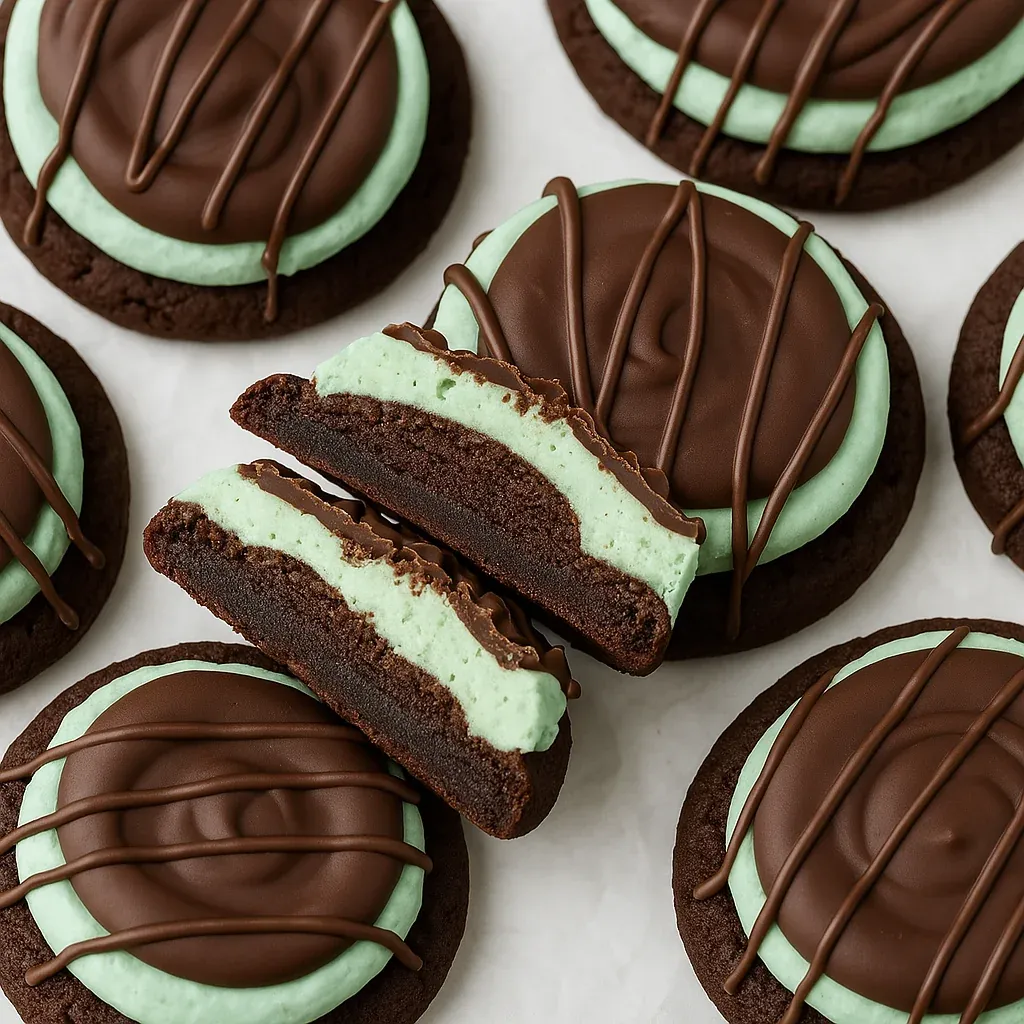
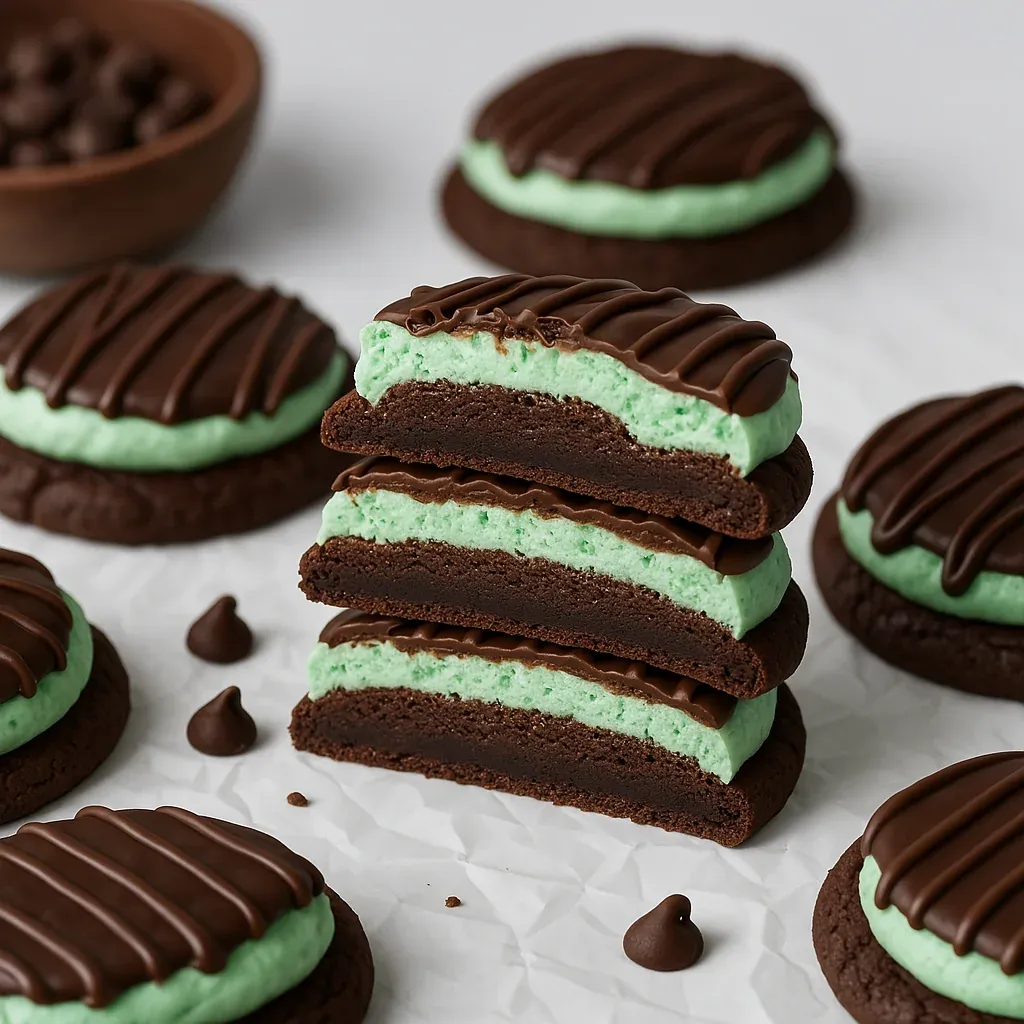
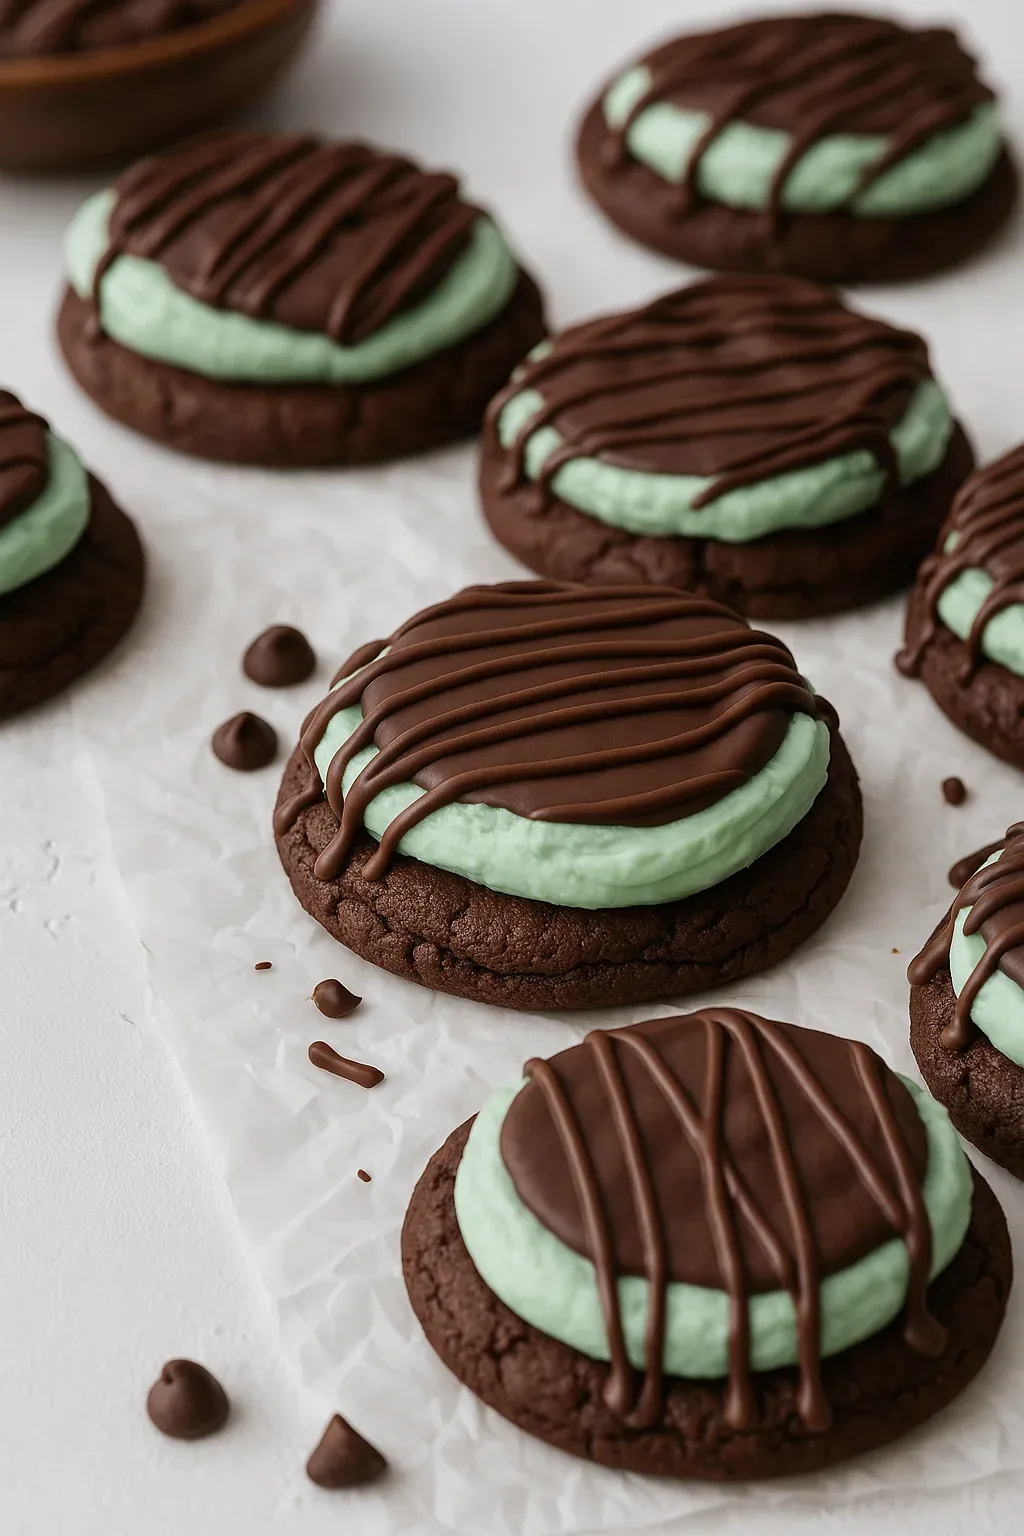
The first bite of these chocolate mint cookies reveals a perfect harmony of fudgy chocolate and cool mint wrapped in contrasting textures - from the chewy cookie base to the smooth frosting and snappy ganache top. One batch never seems to last long enough in my house, especially around the holidays when everyone's looking for that special cookie that stands out from the usual offerings.
I made these for a neighborhood cookie exchange last December and ended up having to share the recipe with seven different people who couldn't believe they weren't from a bakery. My son, who typically avoids mint desserts, ate four in one sitting and declared them "the best cookies ever."
Essential Ingredients
- Unsalted Butter - Using unsalted allows you to control the exact amount of salt in the recipe; make sure it's softened but not melty for the perfect cookie texture
- Granulated Sugar - Creates that perfect chewy texture in the cookie base; don't substitute with other sweeteners
- All-Purpose Flour - The backbone of our cookie structure; measure by spooning into cups and leveling for accuracy
- Unsweetened Cocoa Powder - Provides deep chocolate flavor without added sweetness; Dutch-processed works best here for rich color and flavor
- Mint Extract - The star flavoring agent; a little goes a long way, so measure carefully to avoid overwhelming mintiness
- Powdered Sugar - Creates that smooth, melt-in-your-mouth frosting texture; sift it first to avoid lumps
- Semisweet Chocolate Chips - Forms the base of the ganache topping; chocolate bars chopped fine also work beautifully here
- Green Food Coloring - While optional, it adds that visual cue that makes these cookies instantly recognizable
After trying different brands of mint extract, I've found that pure peppermint extract gives the cleanest, most refreshing flavor. Some of the artificial mint flavorings can leave an unusual aftertaste that competes with the chocolate.
Step-by-Step Cooking Instructions
- Step 1:
- Prepare your workspace properly - Preheat your oven to 350°F and line two baking sheets with parchment paper. Take butter out of the refrigerator at least 30 minutes before beginning to ensure it's properly softened. Measure all ingredients before starting to make the process smoother.
- Step 2:
- Create the cookie base foundation - In a large mixing bowl, beat 1/2 cup softened unsalted butter and 1 cup granulated sugar together until light and fluffy, about 2-3 minutes. Don't rush this step - the creaming process incorporates air into the dough for a better texture.
- Step 3:
- Add the wet ingredients carefully - Beat in 1 teaspoon vanilla extract and 1 large egg until completely incorporated, scraping down the sides of the bowl with a rubber spatula to ensure even mixing.
- Step 4:
- Incorporate dry ingredients properly - In a separate bowl, whisk together 1 1/2 cups all-purpose flour, 1/2 cup unsweetened cocoa powder, 1 teaspoon baking soda, and 1/4 teaspoon salt until evenly combined. Add this mixture to the wet ingredients gradually, mixing on low speed just until no dry streaks remain. Overmixing at this stage can make your cookies tough.
- Step 5:
- Shape with precision - Using a medium cookie scoop or tablespoon, portion the dough into balls about 1 1/2 inches in diameter. Place them on the prepared baking sheets about 2 inches apart as they will spread during baking. Slightly flatten each ball with the palm of your hand.
- Step 6:
- Bake to the perfect doneness - Place in the preheated oven and bake for 8-10 minutes, just until the edges are set but the centers still look slightly underbaked. They'll continue cooking on the hot baking sheet after removal. Allow them to cool on the baking sheet for 5 minutes before transferring to a wire rack to cool completely.
- Step 7:
- Create the mint frosting layer - While the cookies cool, beat 1/4 cup softened unsalted butter until creamy. Gradually add 2 cups of powdered sugar, alternating with 1-2 tablespoons of milk until smooth and spreadable. Mix in 1/2 teaspoon mint extract and a few drops of green food coloring until you achieve your desired shade of green.
- Step 8:
- Apply the frosting with care - Once cookies are completely cool, spread a generous layer of mint frosting over each cookie, creating a flat, even surface. Place the frosted cookies on a baking sheet lined with parchment paper and freeze for about 15 minutes to set the frosting.
- Step 9:
- Make the glossy chocolate topping - While the cookies chill, place 1 cup of semisweet chocolate chips and 1 tablespoon of vegetable oil in a microwave-safe bowl. Heat in 30-second intervals, stirring between each, until completely melted and smooth.
- Step 10:
- Finish with the ganache layer - Remove the cookies from the freezer and spoon a small amount of the chocolate ganache over each frosted cookie, using the back of the spoon to spread it to the edges, completely covering the green frosting. The cold frosting will help the chocolate set quickly. Allow the ganache to set completely before serving.
The first time I made these, I rushed the cooling process and spread the frosting on warm cookies. Big mistake! The frosting melted and slid right off. Now I make sure the cookies are completely cool before frosting, and I always do the freezer step to set the frosting before adding the ganache.
 Pin it
My grandmother kept a special tin of mint chocolates in her living room cabinet that only came out during the holidays. These cookies always bring back memories of sneaking an extra chocolate when the adults weren't looking. Now I keep these cookies in a similar tin for my own grandchildren to discover.
Storage and Make-Ahead Options
These cookies stay fresh in an airtight container at room temperature for up to 3 days, but they'll last over a week if refrigerated. The cool temperature actually enhances the mint flavor and keeps the ganache perfectly set.
For make-ahead options, you can prepare the cookie dough and freeze it in balls for up to 3 months. When ready to bake, simply place the frozen dough balls on a baking sheet and add 1-2 minutes to the baking time - no thawing necessary.
You can also freeze the completely finished cookies for up to 2 months. To prevent them from sticking together, place them in a single layer on a baking sheet until frozen solid, then transfer to a container with parchment paper between layers.
 Pin it
Serving Suggestions and Pairings
While delicious on their own, these cookies are elevated to new heights when paired with a glass of cold milk or hot coffee. The contrast of temperatures and the way the dairy complements the chocolate is simply divine.
For an elegant dessert plate, serve a cookie alongside a small scoop of vanilla ice cream with a drizzle of hot fudge sauce. The warm-cold-room temperature combination creates an exciting textural experience.
I've been perfecting these cookies for over ten years, bringing them to every holiday gathering and watching as they disappear faster than any other dessert. There's something magical about the way the cool mint cuts through the rich chocolate, creating a balanced treat that isn't too sweet or too heavy. When I see people's eyes light up at that first bite, it reminds me why I love baking - it's not just about the food, but the joy it brings to those you share it with.
Frequently Asked Questions
- → Can I make these cookies ahead of time?
- Yes! These cookies store well in the refrigerator for up to a week or in the freezer for up to 2 months. Just make sure to place parchment paper between layers if stacking to prevent sticking.
- → How strong is the mint flavor in these cookies?
- You can control the mint intensity by adjusting the amount of extract you use. The recipe recommends ½-1 teaspoon depending on your preference. Start with less if you prefer a subtle mint flavor.
- → Can I make these cookies without dairy?
- Yes, you can substitute the butter with hard vegan margarine and use dairy-free chocolate for the ganache to make these cookies dairy-free.
- → Do I have to use green food coloring in the frosting?
- No, the green food coloring is completely optional. It gives the cookies that classic mint visual cue, but they'll taste just as delicious without it.
- → Why do I need to freeze the cookies before adding the ganache?
- Freezing the frosted cookies makes it much easier to apply the ganache without it running off the sides. The cold frosting helps set the warm ganache quickly for a neater appearance.