 Pin it
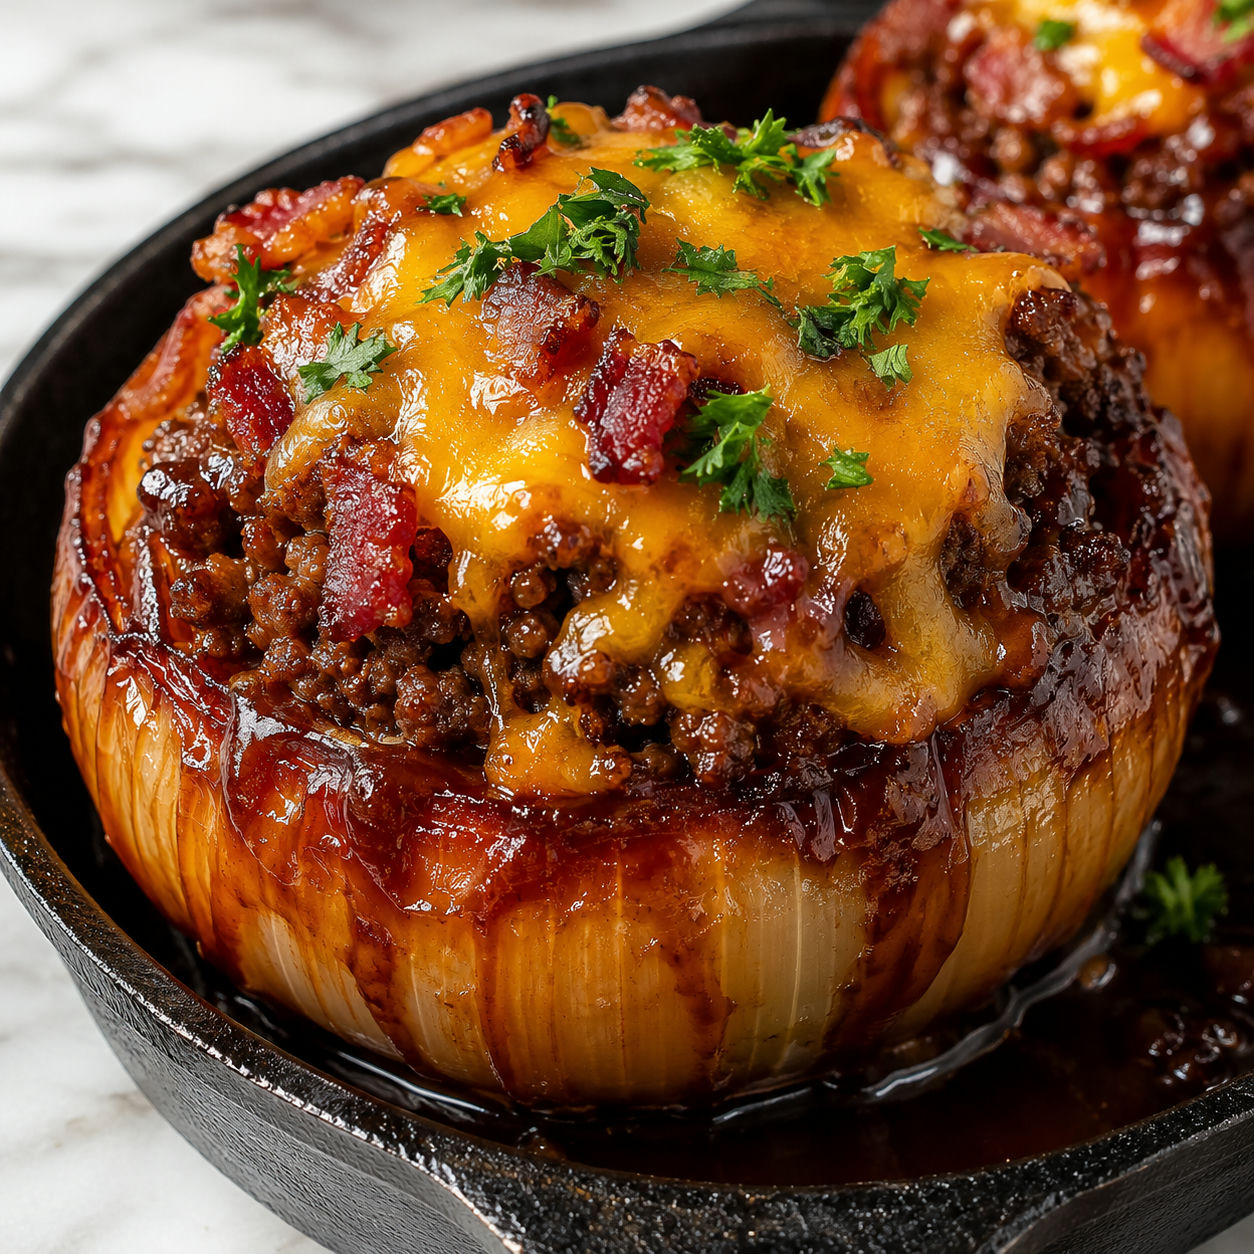
These started as a backyard experiment and ended up on permanent rotation. A large sweet onion does everything a bun does. It holds the filling, adds natural sweetness, and picks up that BBQ char during roasting without becoming mushy or falling apart.
The filling has real cheeseburger DNA. Worcestershire and Dijon give it depth you can taste but can't quite place. The bacon goes in crumbled so you get a hit of smoke and salt in every bite. Jalapeño adds just enough heat to keep things interesting without turning this into a spicy dish.
The technique is straightforward. Parboil the onions first so they're pliable and easy to hollow out, then let the oven do the work. You can have these assembled hours ahead of time, which makes them great for parties or a stress-free family dinner.
The Short List Behind the Big Flavor
You don't need much to pull this off. Big, good-quality sweet onions are the foundation. Look for ones roughly the size of a large apple, firm with no soft spots. Sharp cheddar is worth buying in a block and shredding yourself since it melts far more smoothly than the bagged kind.

- Sweet onions. Vidalia or large sweet yellow onions become naturally caramelized and tender after roasting. They act as an edible bowl that adds flavor rather than just holding the filling.
- 80/20 ground beef. The fat keeps the filling juicy throughout the longer bake time. Leaner beef tends to dry out inside the onion shell.
- Thick-cut bacon. Cook it until crisp before dicing. Soft bacon disappears into the filling and you lose the texture contrast you're after.
- Sharp cheddar cheese. Goes into the filling and again on top as a final melted layer. Freshly shredded melts into gooey pools rather than clumping.
- Worcestershire sauce. Adds savory depth that reads as "really good burger" without standing out on its own.
- Dijon mustard. A tablespoon punches up the cheeseburger flavors without any mustard heat coming through in the finished dish.
- Smoked paprika. Brings a quiet smokiness that ties the filling to the BBQ glaze on the outside.
- Jalapeño. Optional but recommended. It adds gentle heat and a fresh note that cuts through the richness of beef and cheese.
- BBQ sauce and butter. Mixed together for the glaze. Use a smoky, slightly sweet BBQ sauce for the best result.
Building the Stuffed Onions from Scratch
- Parboil the onions. Peel the onions and trim both flat ends just enough so they sit upright without rocking. Boil in a large pot of salted water for 10 minutes until slightly softened but still holding their shape. Drain and cool until you can handle them comfortably.
- Hollow the shells. Use a spoon or melon baller to scoop out the inner layers, leaving two to three outer layers intact with walls about half an inch thick. Finely chop the scooped-out onion and set it aside for the filling.
- Brown the beef filling. Cook the ground beef in a large skillet over medium-high heat, breaking it apart until fully browned. Drain the excess fat. Add the reserved chopped onion and jalapeño and cook for 3 to 4 minutes until softened. Stir in the Worcestershire sauce, Dijon mustard, smoked paprika, garlic powder, bacon, and 1 cup of the shredded cheddar. Season with salt and pepper and remove from heat. Preheat your oven to 375°F (190°C).
- Fill the onion shells. Pack the beef mixture firmly into each onion shell, pressing down so it's compact and mounded slightly above the rim. Place the filled onions snugly in a lightly greased baking dish or cast-iron skillet.
- Glaze and bake covered. Whisk together the BBQ sauce and melted butter in a small bowl. Brush generously over the tops and sides of each stuffed onion. Cover loosely with foil and bake for 30 minutes.
- Finish with cheese. Remove the foil, scatter the remaining 1 cup of cheddar over the tops, and bake uncovered for 15 to 20 minutes until the cheese is melted and lightly browned. For extra caramelization, broil for 2 to 3 minutes. Watch closely because it goes from golden to burnt fast.
- Garnish and serve. Scatter chopped fresh parsley over the tops and bring them to the table with extra BBQ sauce for dipping.
Why Parboiling the Onions Actually Matters
Skipping the parboil is the most common mistake with stuffed onions. Raw onions are too firm to hollow cleanly and they take much longer to soften in the oven, which means your filling overcooks while the shell is still tough. Ten minutes in boiling water is all it takes. The onion layers separate cleanly, the shells hold their shape during filling and baking, and the roasting time becomes about developing flavor rather than cooking through raw vegetable.
If you're working with unusually large onions, give them 12 minutes. You want them pliable when you press gently but not falling apart. If you enjoy stuffed vegetable recipes, the Greek stuffed onions on this site use a similar parboiling technique with a completely different Mediterranean flavor profile and are worth trying next.
Getting the Filling Texture Exactly Right
The filling should feel dense and cohesive, not loose and crumbly. Three things help with that. First, drain the beef well after browning. Excess grease makes the filling sag and pull away from the onion walls during baking. Second, press the filling firmly into each shell so it doesn't collapse when you cut into the finished onion. Third, the cheddar mixed into the filling acts as a binder once it melts and sets slightly.
For an even more dramatic cheese moment, try this: pack half the filling in, add a small handful of shredded cheese right in the center, then press the remaining filling on top before glazing. You end up with a molten cheese pocket in the middle of every bite. If you love this stuffed-and-glazed approach, the cheddar-stuffed BBQ bacon bombs are built on the same concept and make a great party appetizer alongside these onions.
Serving This Dish Without Overcomplicating Things
These are a complete meal on their own, but a few sides round things out without competing with the main event. A simple green salad keeps it light. Coleslaw adds crunch and a creamy contrast to the rich filling. Roasted potatoes or corn on the cob work well if you want something more substantial. Extra BBQ sauce on the side for dipping is genuinely important here, not optional.
For a party setup, these work well as individual servings. One stuffed onion per person looks impressive and stays self-contained on the plate. If you're feeding a crowd and want a handheld option alongside, the BBQ bacon cheeseburger sliders carry the same smoky flavor DNA and are easy to multiply.
Storing and Reheating Without Losing Quality
Leftovers hold up surprisingly well. Store them in an airtight container in the fridge for up to four days. The onion shells stay intact and the filling keeps its flavor. For reheating, cover with foil and warm at 350°F (175°C) for 15 to 20 minutes. The microwave works in a pinch but can make the onion slightly rubbery around the edges.
To freeze, let the baked onions cool completely, then wrap each one individually in foil and place in a freezer bag. They keep for up to two months. Thaw overnight in the fridge and reheat in the oven. The texture after freezing is slightly softer than fresh, but the flavors hold up well. If you're into make-ahead BBQ dinner ideas, the low carb bacon cheeseburger casserole is another solid option that actually freezes even better than stuffed onions.
FAQs
- Can I grill these instead of baking them?
Yes. Set up your grill for indirect heat at around 375°F (190°C) and cook the stuffed onions for 35 to 45 minutes with the lid closed. Add the remaining cheese during the last 10 minutes so it melts without burning. You'll get a little more smoke flavor from the grill, which works beautifully with the BBQ glaze.
- Can I swap out the ground beef?
Absolutely. Ground turkey or ground chicken work well and produce a lighter filling. Ground pork is a good option if you want something richer. For safety, cook poultry to an internal temperature of 165°F and ground beef to 160°F. The USDA safe temperature chart is worth bookmarking for reference.
- What cheese can I use besides sharp cheddar?
Sharp cheddar is the classic choice because it melts well and has enough flavor to stand up to the beef and bacon. Monterey Jack, Pepper Jack, Colby-Jack, or smoked Gouda all melt beautifully here. Avoid pre-shredded blends since the anti-caking coating makes them melt unevenly and turn slightly grainy on top.
- Can I make these ahead of time?
Yes, and they're actually great for it. Assemble the stuffed onions fully, apply the glaze, cover tightly with foil, and refrigerate for up to 24 hours before baking. Pull them from the fridge about 20 minutes before they go in the oven so they cook evenly. Add the final cheese layer during the last 15 to 20 minutes of baking as usual.
- Which onion variety works best for this recipe?
Vidalia onions are the top pick. They're large enough to hold a generous filling and their natural sweetness intensifies beautifully during roasting. Other sweet yellow onions work just as well. Avoid sharp white or red onions here. Their flavor turns harsh once roasted rather than sweet, and they're usually smaller than you need. Vidalia onions are typically available spring through summer at most grocery stores and at specialty grocers year-round.
- How do I store and reheat leftovers?
Refrigerate leftovers in an airtight container for up to four days. For reheating, cover with foil and warm at 350°F (175°C) for 15 to 20 minutes so the onion heats through without drying out. The microwave works in a pinch but can make the onion slightly rubbery. To freeze, wrap each stuffed onion individually in foil and store in a freezer bag for up to two months. Thaw overnight in the fridge before reheating in the oven.
- My filling seems greasy after baking. What went wrong?
This almost always means the beef wasn't drained after browning. After cooking the ground beef, tilt the pan and spoon off the excess fat before adding the rest of the filling ingredients. Using 85/15 or 90/10 ground beef will also reduce the grease while keeping the filling moist and flavorful throughout the bake.
