
 Pin it
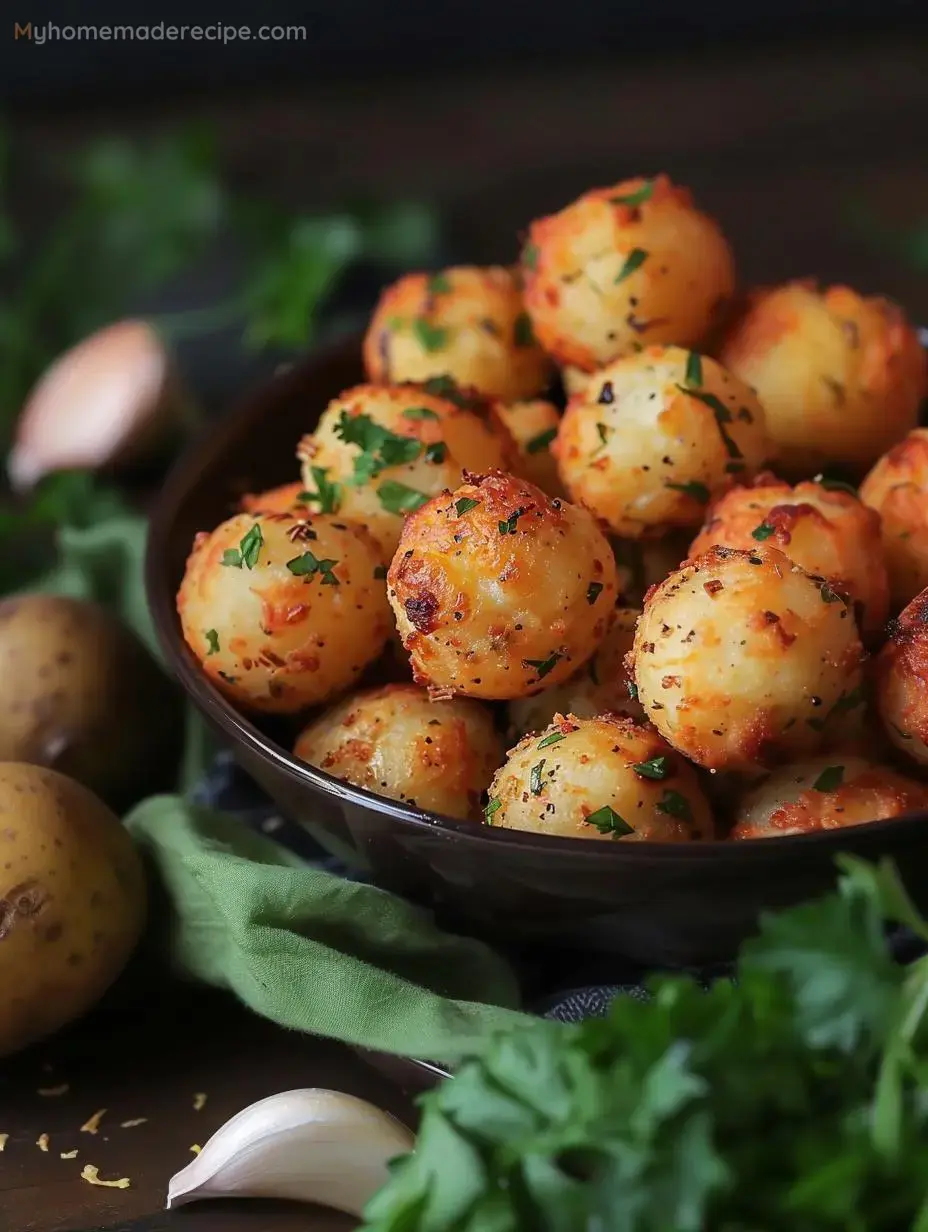
Garlic Potato Pops Recipe: Crispy, Flavorful, and Irresistible
Looking for a crowd-pleasing appetizer or a delightful snack? These Garlic Potato Pops are the perfect solution. Combining the comforting taste of mashed potatoes with a crispy exterior and a rich garlic butter coating, this recipe is a guaranteed hit. Whether you're hosting a party, preparing a family dinner, or simply craving a tasty treat, these Garlic Potato Pops will not disappoint.
Ingredients
- 2 large potatoes (peeled and cubed): The base of our pops, providing a fluffy interior.
- 1 tsp garlic granules: Adds a robust garlic flavor.
- 1 tsp onion granules: Enhances the savory taste.
- 1 tsp paprika: Provides a subtle smoky flavor and color.
- Salt and pepper (to taste): Essential seasonings to balance the flavors.
- 4 tbsp cornflour (add more as needed): Helps bind the mixture and create a crispy texture.
- Cooking oil spray: Ensures the potato pops become crispy without sticking to the air fryer.
For the Garlic Butter
- 100 g butter: The base of the garlic butter, adding richness and flavor.
- 2 tsp garlic granules: Intensifies the garlic flavor in the butter.
- Fresh parsley (a handful, chopped): Adds freshness and a hint of color.
Instructions
- Step 1: Prepare the Potatoes
- Peel and cube 2 large potatoes. Boil them in a pot of water until fork-tender, about 10-15 minutes. Drain and let cool slightly.
- Step 2: Seasoning and Mashing
- Mash the boiled potatoes in a bowl with garlic granules, onion granules, paprika, salt, and pepper. Gradually mix in cornflour until a thick, firm dough forms.
- Step 3: Creating Potato Balls
- Roll the mashed potato mixture into small balls. Place them in an air fryer basket, ensuring they don’t touch. Spray lightly with cooking oil.
- Step 4: Air-Frying
- Preheat the air fryer to 200°C (392°F). Cook the potato balls for 15-20 minutes, shaking the basket regularly, until golden and crispy.
- Step 5: Preparing Garlic Butter
- In a microwave-safe bowl, melt butter with garlic granules and parsley, stirring in 30-second intervals until combined.
- Step 6: Finishing
- Toss the crispy potato pops in the melted garlic butter until evenly coated.
- Step 7: Serving
- Serve the Garlic Potato Pops immediately, drizzling any remaining garlic butter over them for extra flavor.
Serving and Storage Tips
- Serving Suggestions: Serve hot with dipping sauces like sour cream, garlic aioli, or ketchup. Garnish with extra parsley for a fresh touch.
- Storage: Store leftovers in an airtight container in the refrigerator for up to 3 days. Reheat in the air fryer to restore crispiness.
Helpful Notes and Variations
- Cheesy Option: Add grated Parmesan or cheddar cheese to the mashed potato mixture for extra flavor.
- Spicy Variation: Mix in a pinch of cayenne pepper or red chili flakes for a spicy kick.
- Baking Option: Bake in a preheated oven at 200°C (392°F) for 20-25 minutes, flipping halfway, until crispy.
- Herbal Twist: Swap parsley for chives or dill in the garlic butter for a different flavor profile.