 Pin it
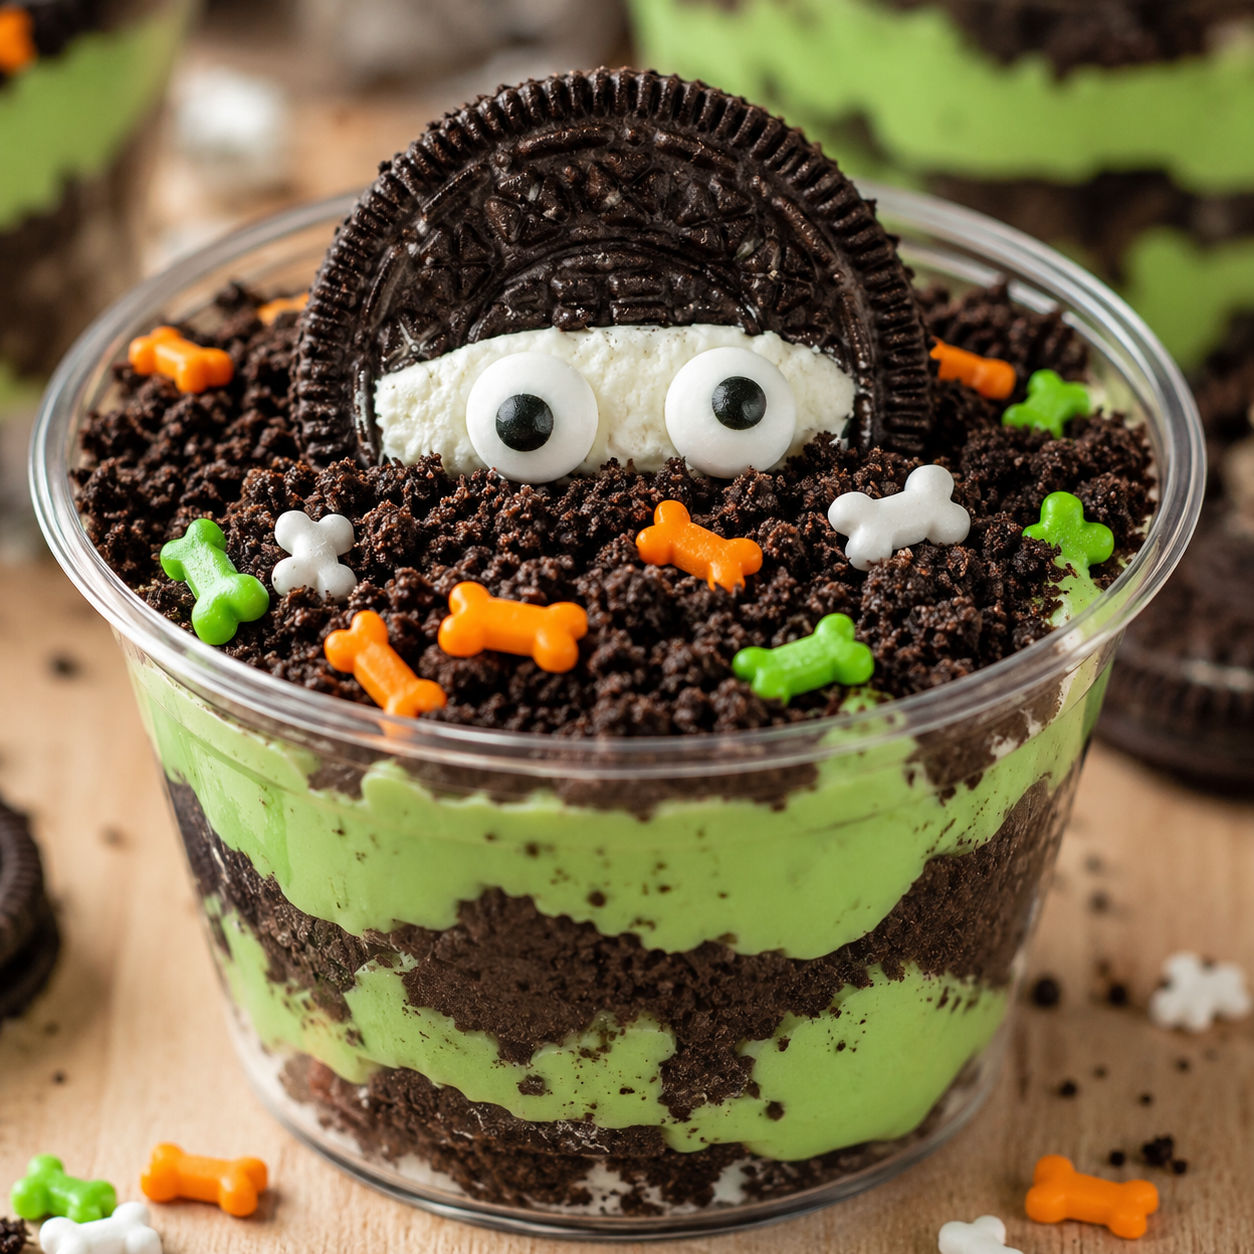
I make these zombie dirt pudding cups every October because they get the exact reaction I want. Kids lean in close to stare at the candy eyeballs, and adults ask for the recipe before the party ends. They are layers of mint Oreo dirt and green-tinted pudding in a clear cup, topped with a cookie that looks like it crawled out of a graveyard.
The whole thing is no-bake and takes about fifteen minutes of actual work. The hardest part is waiting for them to chill.
The minty dirt and green pudding
You only need a handful of items from the grocery store. The mint Oreo cookies give you both the dirt and the zombie face in one package. Look for the green gel food coloring in the baking aisle. It gives a brighter color than the liquid kind.
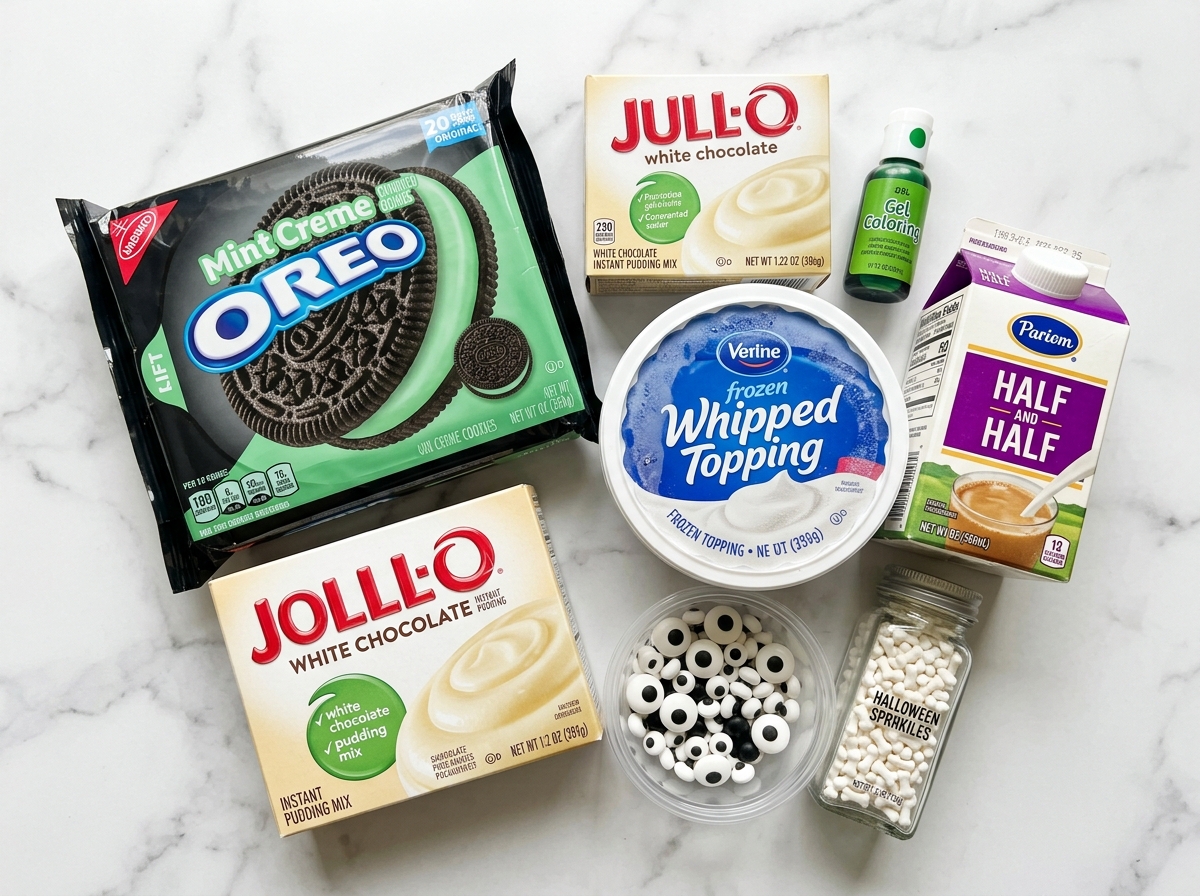
- Mint Creme Oreo cookies. One family-size package supplies both the crumbly dirt layers and the cookie toppers with filling intact.
- White chocolate instant pudding mix. It sets up thick and gives you a blank canvas for the green dye. Vanilla works if you cannot find white chocolate.
- Half-and-half or whole milk. The fat helps the pudding set creamy and thick. Skim milk will give you a runny layer.
- Green gel food coloring. Six to eight drops turns the pudding a vivid swampy green without watering it down.
- Frozen whipped topping. Folded in after the pudding thickens to make the filling light and fluffy.
- Edible candy eyeballs. One large and one small per cup pressed into the Oreo filling makes the zombie stare.
- Halloween sprinkles. Bone or skeleton shapes are optional but add a fun extra crunch on top.
How the layers come together
- Split the cookies. Gently twist apart twelve Oreo cookies so the mint filling stays on one half. Set those filling-side halves aside for the zombie toppers. Crush the rest of the cookies plus the plain halves into fine crumbs using a food processor or a sealed bag and a rolling pin.
- Mix the green pudding. Whisk the instant pudding mix with the half-and-half and green food coloring for one to two minutes until it begins to thicken. Let it sit for five minutes so it can set up properly.
- Fold in the fluff. Stir the thawed whipped topping into the green pudding until no streaks remain. The mixture should look like pale green frosting.
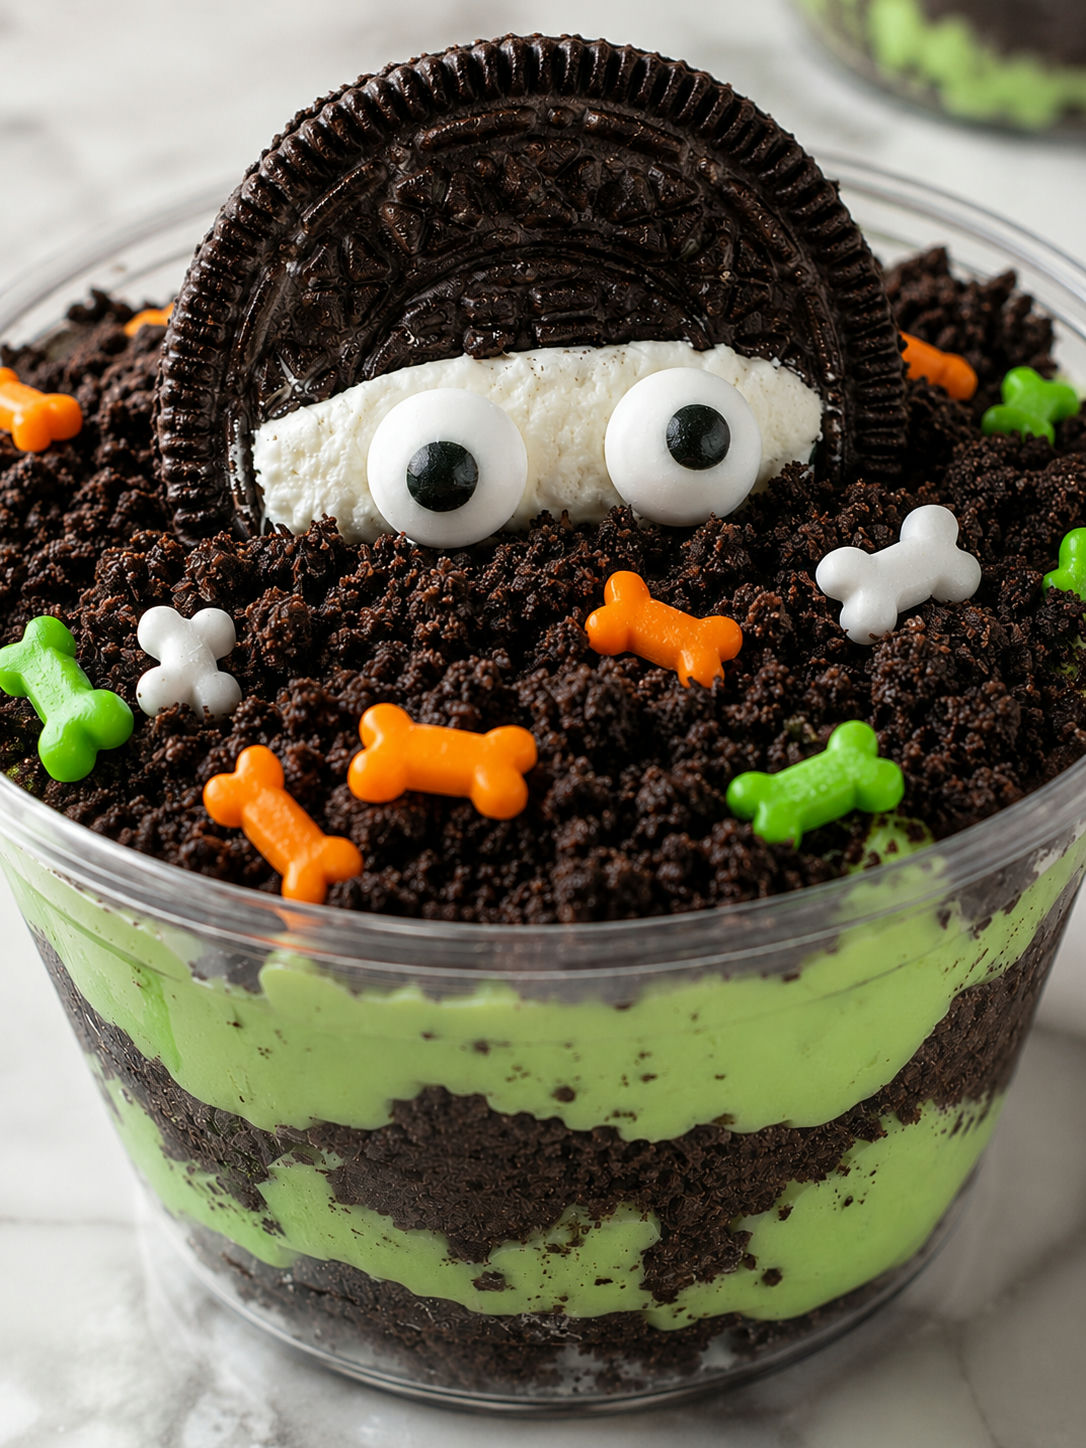
- Layer the cups. Sprinkle two tablespoons of cookie crumbs into the bottom of each clear cup. Add a layer of pudding mixture. Repeat until the cup is nearly full, ending with a cookie crumb layer on top so the dirt shows through.
- Chill to set. Cover the cups and refrigerate for at least one hour so the pudding firms up and the layers hold their shape when you dig in.
- Create the zombies. Press one large candy eyeball and one small candy eyeball into the exposed mint filling of each reserved cookie half. Stand the cookie upright on top of each cup just before serving so the zombie stares back at your guests.
Getting the pudding thick enough
The biggest mistake I see is using skim or one-percent milk and ending up with soup. The pudding needs fat to set firm inside a cold cup. Half-and-half is ideal, but whole milk is the minimum I would use. If you only have two-percent, reduce the milk by a tablespoon and hope for the best.
Another pitfall is adding the Cool Whip too early. If you fold it in while the pudding is still loose, the whole mixture turns runny and the layers bleed together. Let the pudding rest for the full five minutes after whisking so it thickens on its own first. Then fold gently rather than stirring hard. You want to keep the air in the whipped topping so the filling stays mousse-like rather than dense.
If you are making these with kids, put them in charge of crushing the Oreos while the pudding sets. It keeps little hands busy and gives them ownership of the dirt.
Swapping colors and cookies
If mint is not your thing, regular Oreo cookies work perfectly. You lose the green tint in the filling but the dirt looks exactly the same. For a different holiday theme, swap the green food coloring for orange or purple. Neon gel colors give the brightest result. The U.S. FDA offers guidance on certified food color additives at their overview page on food colors.
White chocolate pudding is my favorite here because it is sweeter and creamier than vanilla, but vanilla instant pudding is easy to find and still takes dye beautifully. If you want a from-scratch route, you could use homemade chocolate pudding and skip the food coloring entirely for classic chocolate dirt pie cups.
For another seasonal twist, our Easter dirt pudding jars use the same layering idea with pastel colors and bunny decorations. The technique is identical, so once you master these zombie cups you can adapt them to any holiday.
Making them ahead of time
You can assemble the layered cups up to twenty-four hours ahead and keep them covered in the refrigerator. The cookie crumbs soften slightly but still hold a pleasant texture against the creamy pudding. I actually think they taste better after a few hours because the mint from the Oreos seeps into the pudding.
Do not add the zombie cookie toppers until right before serving. If they sit on top in the fridge, the moisture from the pudding turns the cookies soggy and the eyeballs can slide off the filling. Keep the reserved Oreo halves and candy eyeballs in a small sealed container at room temperature and assemble the faces as you set the cups out on the table.
If you need to transport them to a party, layer them in cups with tight-fitting lids or cover each cup tightly with plastic wrap. Place them in a shallow box so they stay upright in the car.
Setting up a spooky dessert table
Clear plastic or glass cups are the way to go here. The layers of dark cookie dirt and green pudding are half the fun, and nobody can see them in an opaque container. Five-ounce cups give you the best ratio of layers to topping. If you use larger nine-ounce cups, you might want to double the recipe or accept shorter layers.
These cups pair naturally with other no-bake Halloween treats on a dessert table. Set them next to a batch of graveyard dirt cake or a pan of our classic dirt cake for a full dirt-themed spread that kids will talk about for weeks. Keep a small bowl of extra candy eyeballs nearby. Someone always wants to add a third eye to their zombie.
Serve them straight from the fridge with small spoons. The cold pudding holds its shape better and the contrast with the crunchy cookie top is at its best when chilled.

FAQs
- Can I use regular Oreos instead of Mint Creme?
Yes. Regular Oreos give you the same dirt texture and the cookie toppers work the same way. You will lose the subtle mint flavor in the crumb layers, but the dessert still tastes great. Some people prefer the classic chocolate version.
- How far ahead can I make zombie dirt pudding cups?
Assemble the layered cups up to one day ahead and refrigerate them covered. Wait to add the zombie cookie toppers with candy eyeballs until just before serving so the cookies stay crisp and the eyeballs stick firmly in the filling.
- Can I use homemade whipped cream instead of frozen whipped topping?
You can, but it needs to be stabilized whipped cream so it does not weep and thin out the pudding. Regular whipped cream deflates after a few hours. If you go this route, add a little powdered sugar and gelatin to help it hold.
- What size cups work best?
Small clear cups between five and nine ounces are ideal. They let you build visible layers and keep the portion kid-friendly. Larger cups require more filling, so you may get fewer servings than the recipe estimates.
- Can I make these dairy-free?
It is possible but requires several swaps. Use a dairy-free pudding mix and a plant-based whipped topping. Oreo cookies are generally dairy-free by ingredient, though they do have cross-contact warnings. Always check labels if allergies are a concern.
- Why did my pudding turn out runny?
Runny pudding usually means the milk was too low in fat or the mixture was not whisked long enough. Use whole milk or half-and-half, and whisk for a full two minutes. Let it rest five minutes before folding in the whipped topping.
