 Pin it
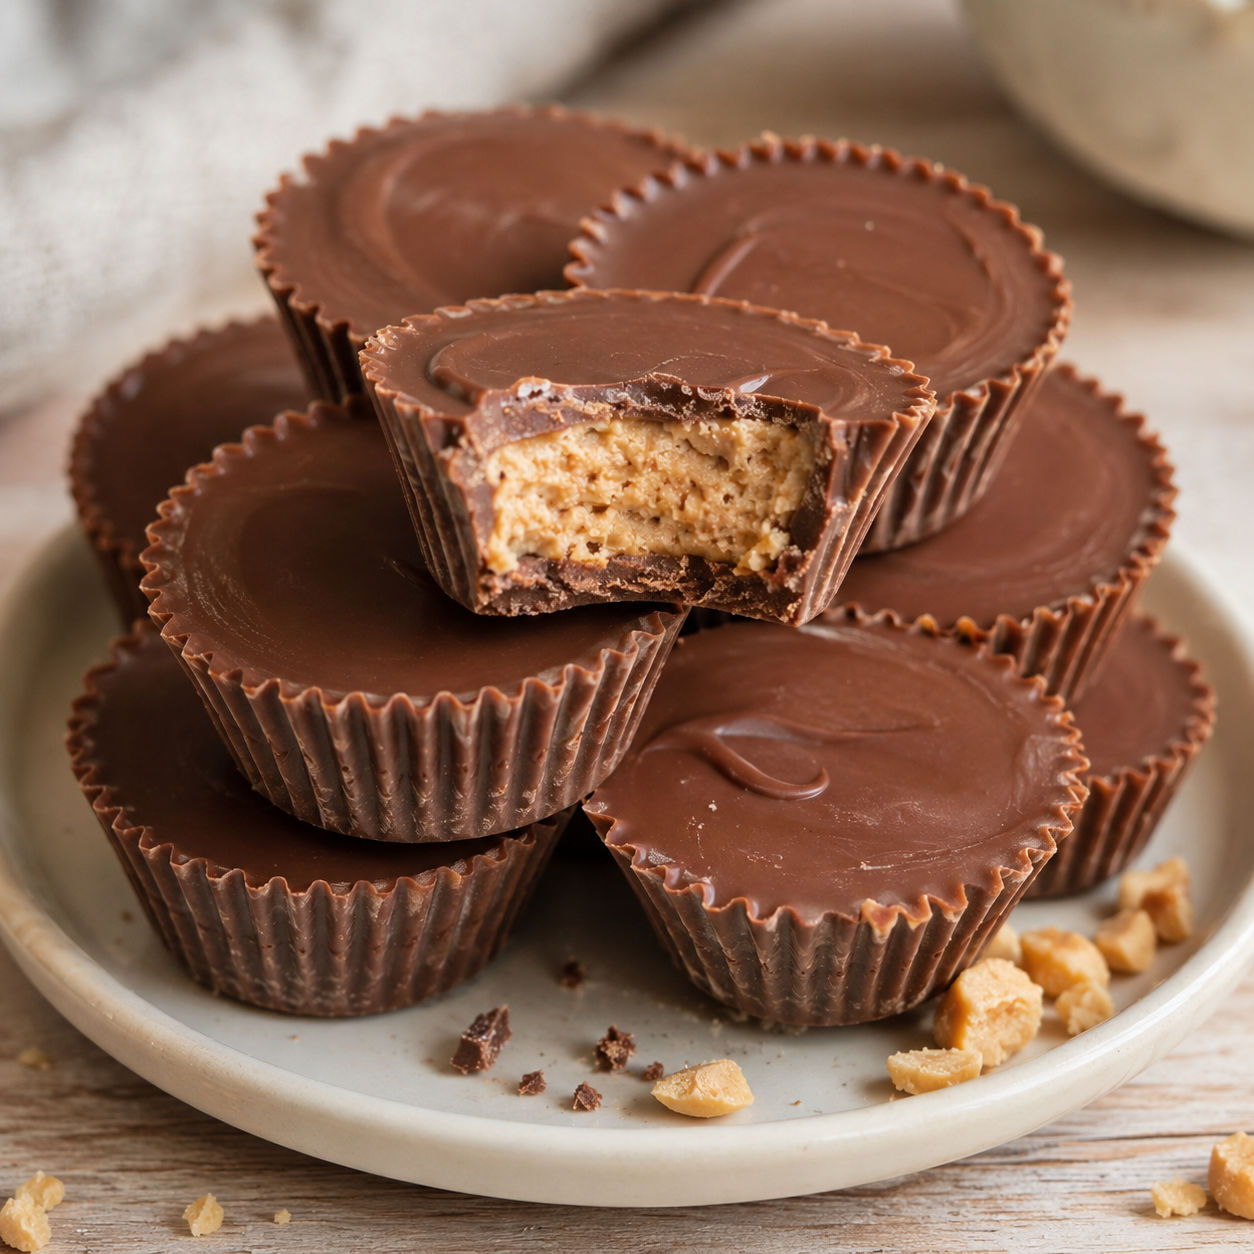
Reese's Peanut Butter Chocolate Cups are one of those treats that make sense the second you bite in. Soft peanut butter, sweet milk chocolate, and a tiny salty edge do all the work.
This homemade version keeps the candy simple. The filling is firm enough to hold its shape but still creamy when you bite it. A little graham cracker crumb gives it that familiar candy-shop texture without making it dry.
The Candy Cup Lineup
Use chocolate you like eating on its own because it is the first flavor you taste. Creamy peanut butter works best here, and the filling should be thick enough to roll between your fingers without sticking everywhere.
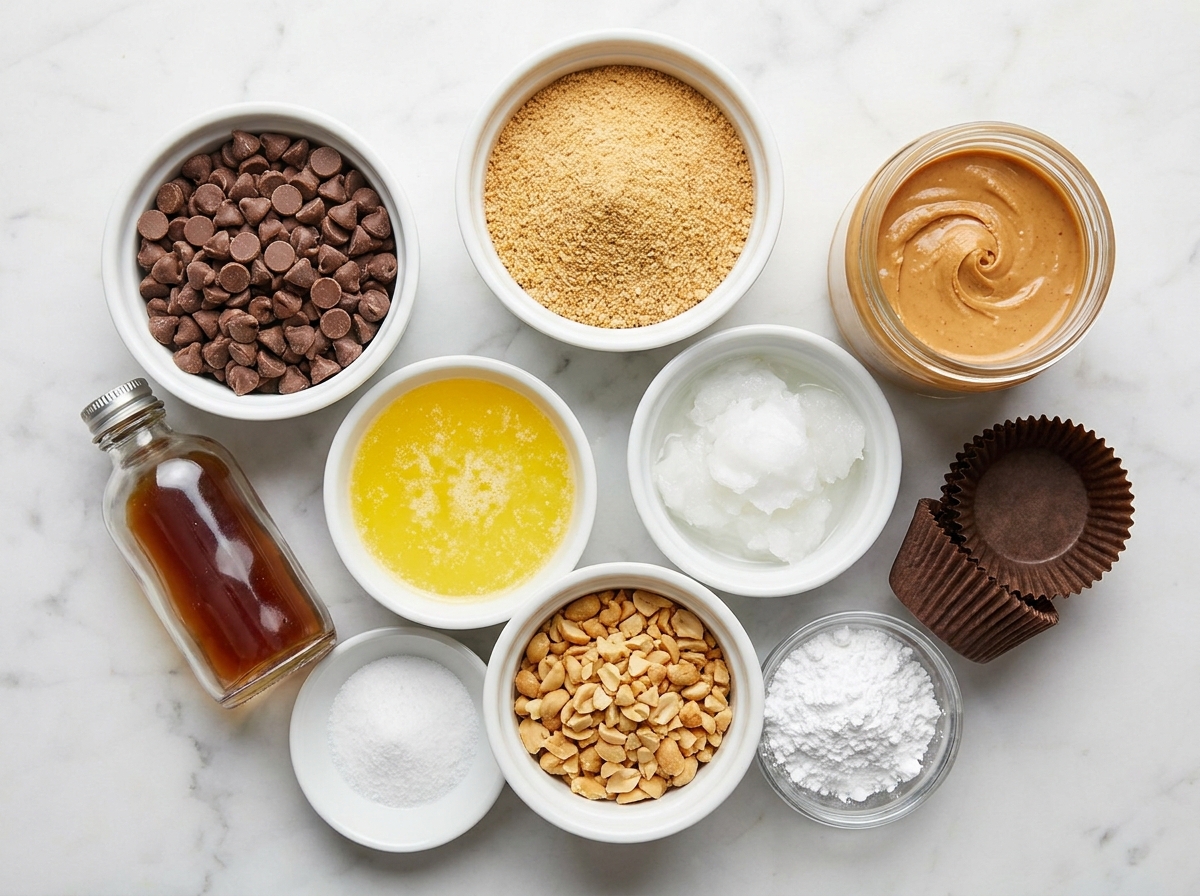
- Milk chocolate. Makes a soft, sweet shell that tastes close to the candy everyone knows.
- Coconut oil. Helps the chocolate melt smoothly and gives the finished cups a cleaner bite.
- Creamy peanut butter. Forms the rich center and keeps the filling soft after chilling.
- Powdered sugar. Thickens the peanut butter without leaving grit.
- Graham cracker crumbs. Add a faint sandy texture that keeps the filling from feeling like plain peanut butter.
- Unsalted butter. Rounds out the filling and helps it set.
- Fine salt. Makes the peanut butter taste fuller and balances the sweet chocolate.
- Vanilla. Adds a warm bakery note in the background.
Reese s Peanut Butter Chocolate Method
- Line the pan. Set mini paper liners in a mini muffin pan so the cups keep their shape while they chill.
- Melt the chocolate. Warm the milk chocolate with coconut oil in short bursts, stirring often, until smooth and glossy.
- Make the bottom shells. Spoon chocolate into each liner, then nudge it slightly up the sides so the filling will be covered.
- Chill until firm. Refrigerate the pan for 10 minutes, just until the chocolate loses its shine.
- Mix the filling. Stir peanut butter, powdered sugar, graham crumbs, melted butter, salt, and vanilla until thick and smooth.
- Fill and cover. Add a small flattened scoop of filling to each shell, cover with more chocolate, tap the pan, and chill until set.
Keep The Chocolate Smooth
Chocolate is the only fussy part, and even that is manageable. Heat it gently and stir more than you think you need to. If you microwave it, use 20-second bursts after the first melt and stop before every chip has disappeared. The leftover heat will finish the job.
For a homemade candy like this, you do not have to fully temper the chocolate. The cups will be chilled and eaten from the fridge, so a simple melt works well. If you want a firmer snap and a shinier finish for gifting, the Serious Eats chocolate tempering guide is a useful deep dive.
The Filling Should Hold
The peanut butter center should feel like soft dough. If it slumps when you flatten it, add powdered sugar one tablespoon at a time. If it cracks or feels dry, work in a small spoonful of peanut butter. This small adjustment matters because peanut butter brands vary a lot.
The graham crumbs are not there to make the candy taste like crust. They give the filling a light, familiar texture and help it sit neatly inside the chocolate. For more peanut butter desserts with a softer bite, try easy peanut butter fudge or these peanut butter chocolate chip cookie bars.
Swaps That Still Taste Right
Semisweet chocolate makes these less sweet, which some people prefer. Dark chocolate gives a firmer shell and a stronger cocoa flavor. The federal standard for milk chocolate includes minimum milk and chocolate components, which is why it melts and tastes different from darker types. You can read the technical definition in the U.S. chocolate standards.
For crunch, stir in finely chopped roasted peanuts. For a party tray, press a few candy pieces into the top before the chocolate sets. If you like bark-style treats, Reese's Pieces peanut butter white chocolate bark hits the same sweet-salty lane.
Chill, Store, Serve
These cups set fastest in the refrigerator. Once firm, move them to a lidded container and keep parchment between layers if you stack them. They can sit at cool room temperature for a short dessert table, but the fridge gives the neatest texture.
Cold cups are firm and snappy. Room temperature cups are softer and more like classic candy. I like to pull them out about 10 minutes before serving so the peanut butter center relaxes a little. For a bigger dessert with the same flavor pairing, serve them beside fudgy peanut butter brownies.
How To Gift Them
Let the cups chill until fully firm before packing. If the chocolate is even slightly soft, fingerprints and smudges show up right away. Tuck each cup into a clean liner, then pack them in a shallow tin with parchment between layers.
For gifting, keep the toppings simple. A tiny pinch of flaky salt or a few chopped peanuts looks finished without making the candy messy. Avoid warm car rides if you can. Chocolate softens quickly, and these are at their best when the shell stays smooth and the filling keeps its shape.
FAQs
- Can I make Reese's Peanut Butter Chocolate Cups without graham crumbs?
Yes. Use the same amount of powdered sugar instead, or swap in finely crushed gluten-free cookies if you want the same gentle texture. The filling will be smoother without crumbs and a little more like peanut butter fudge.
- What chocolate tastes closest to Reese's cups?
Milk chocolate gives the closest sweet, creamy flavor. Semisweet chocolate works too, but the cups will taste darker and a bit less like the classic candy.
- How long do homemade peanut butter cups last?
They keep well in an airtight container in the refrigerator for about 2 weeks. For the cleanest bite, let them sit at room temperature for 5-10 minutes before serving.
- Can I freeze these peanut butter chocolate cups?
Yes. Freeze them in a sealed container with parchment between layers for up to 2 months. Thaw in the refrigerator so the chocolate does not sweat as much.
- Why did my chocolate turn streaky?
Streaks usually come from chocolate getting too hot or cooling unevenly. It is still fine to eat. Melt gently and stop heating while a few small pieces remain, then stir until smooth.
- Can I make these in a regular muffin pan?
Yes, but the cups will be much larger. Use about 1 tablespoon of chocolate for the bottom layer, 1 tablespoon of filling, and enough chocolate to cover. The recipe will make about 10-12 large cups.
