
 Pin it
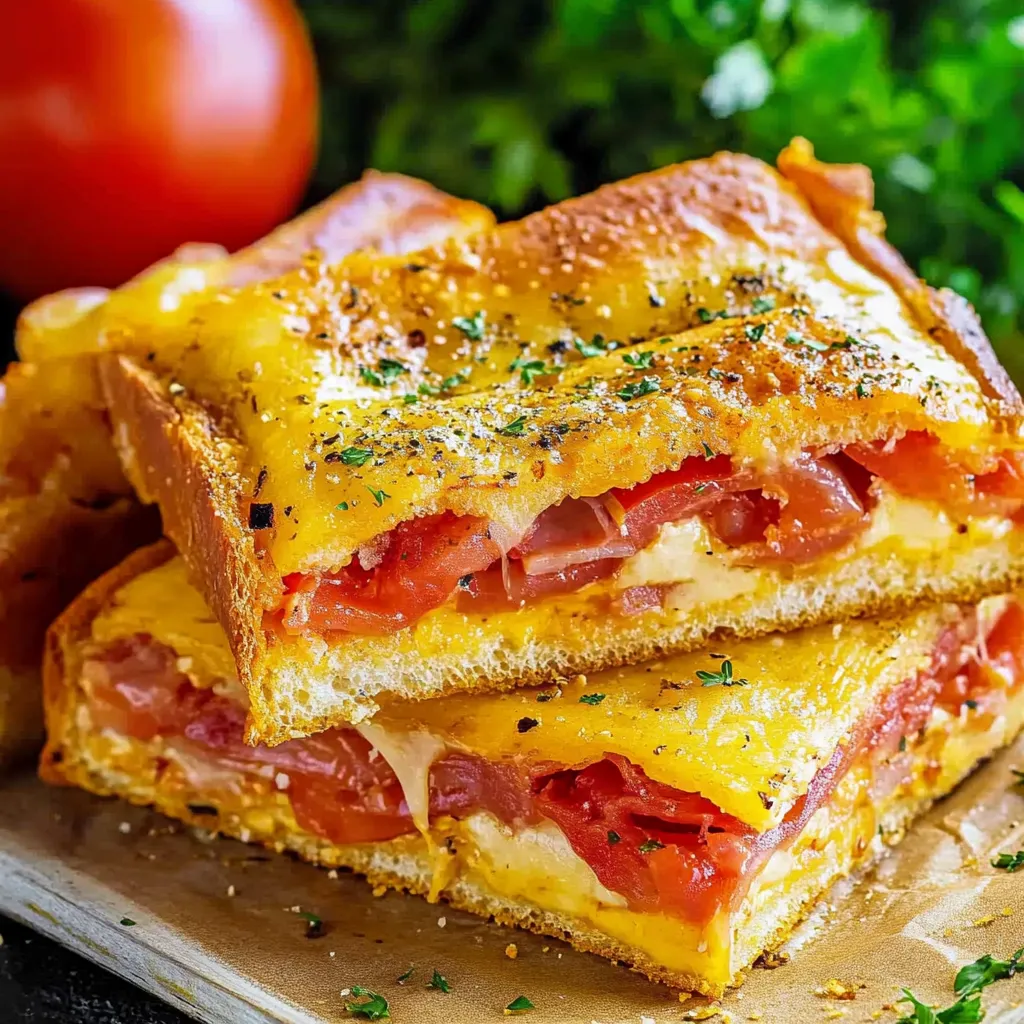
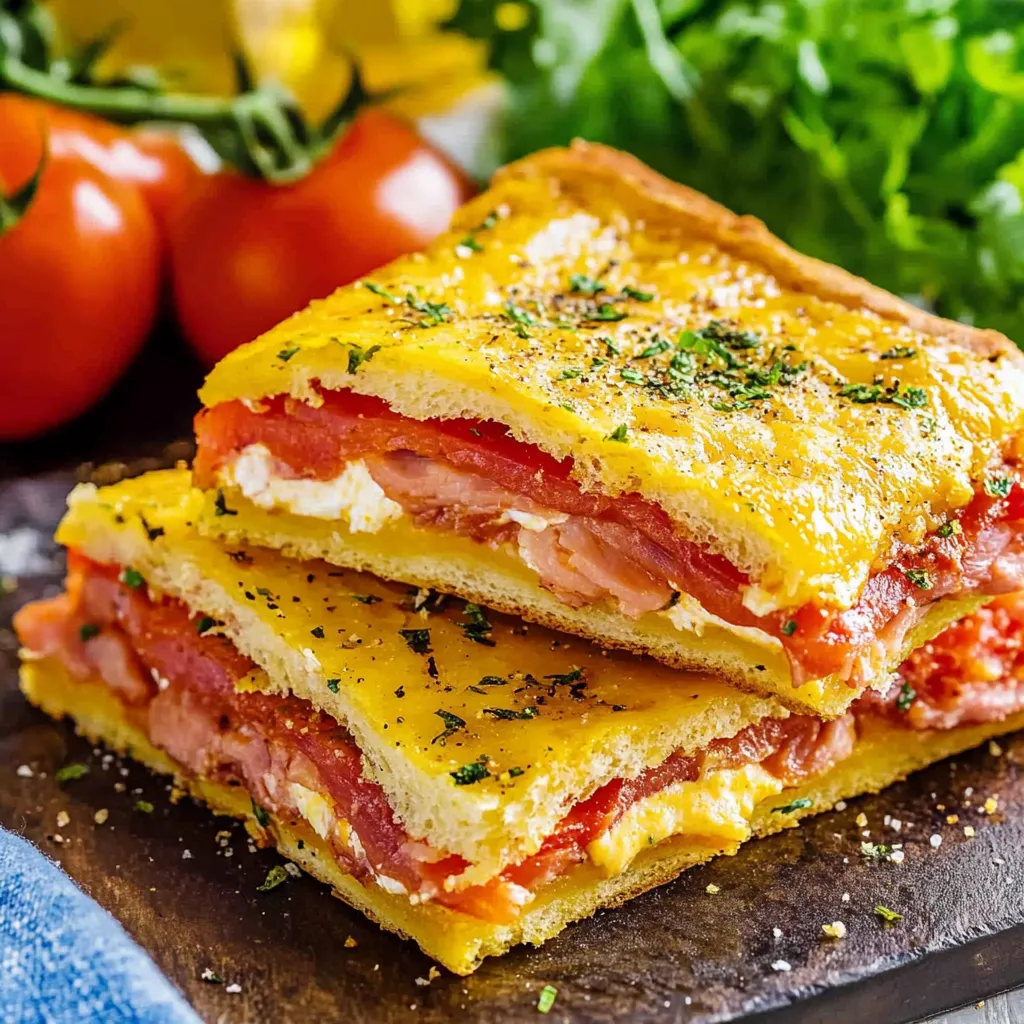
Imagine biting into a warm, golden square filled with layers of Italian meats, melted provolone, and tangy pepperoncini. These Italian Sub Squares reinvent the classic sandwich into something even more craveable. Each piece delivers perfectly balanced flavors in a convenient, party ready form that combines the best elements of a traditional Italian sub with an innovative presentation.
In my kitchen adventures, these squares have become my go to for everything from game day gatherings to casual family dinners. The inspiration came from wanting to serve Italian subs to a crowd without the mess of individual sandwiches. The result exceeded all expectations, creating a new family favorite.
Essential Ingredients Guide
- Crescent roll dough sheets: create a perfectly flaky, golden crust
- Provolone cheese: provides rich, authentic Italian flavor and perfect melt
- Quality Italian meats: including pepperoni, ham, and genoa salami for authentic taste
- Roasted red peppers: add sweet, smoky notes
- Pepperoncini: brings the perfect tangy bite
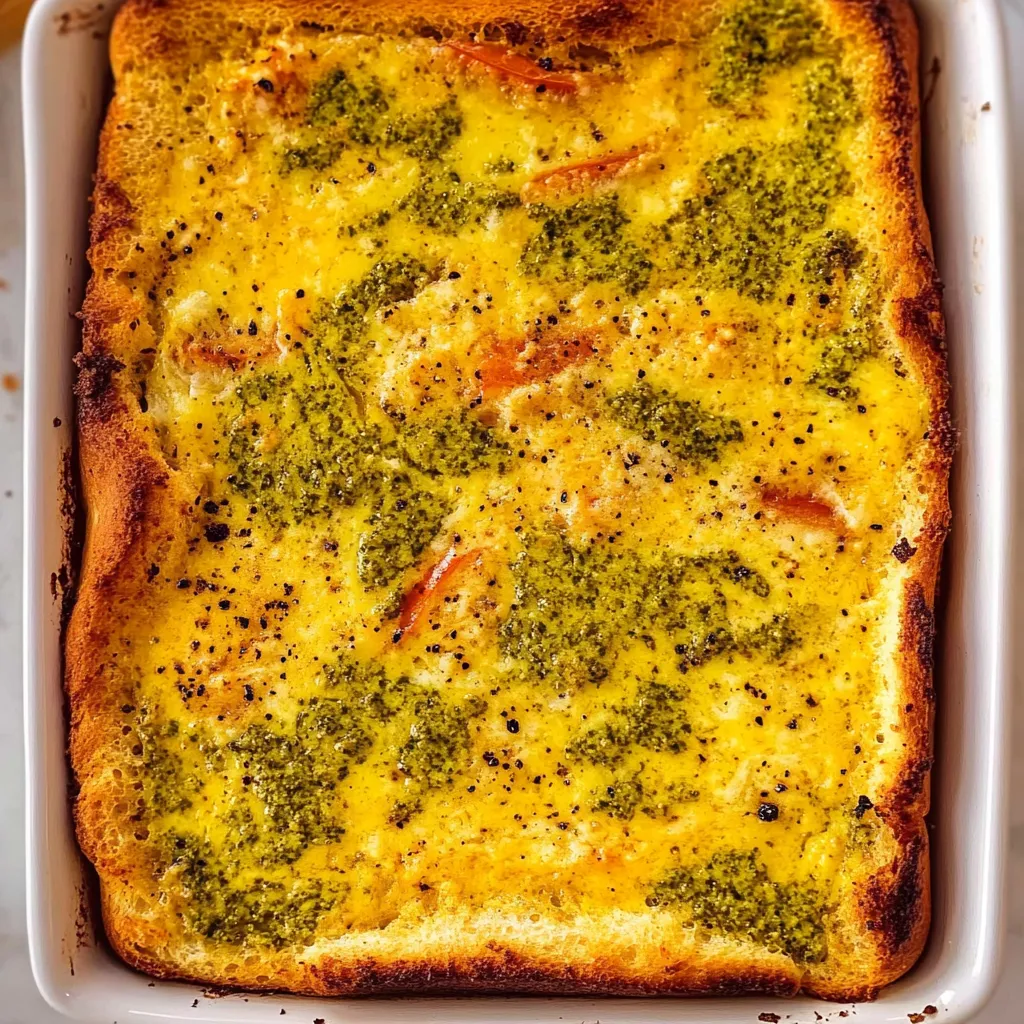
- Fresh pesto: creates an aromatic, flavorful top crust
- Parmesan cheese: adds nutty depth and perfect browning
Creating Your Perfect Squares
- The Foundation Layer:
- Begin with room temperature crescent dough for easier handling. Press it carefully into your baking dish, ensuring even coverage up the sides. Take time to create a solid base without tears or thin spots. This bottom layer needs to support all your delicious fillings without breaking. Work the dough gently but firmly into the corners for proper support.
- Building Perfect Layers:
- Start with a generous layer of provolone cheese directly on the dough. This creates a moisture barrier that keeps your bottom crust crispy. Layer your meats in a specific order, starting with pepperoni, then ham, finishing with salami. Each meat should overlap slightly to ensure every bite contains the full flavor profile. Distribute roasted peppers and pepperoncini evenly for consistent taste throughout.
- Creating The Perfect Seal:
- The top layer of dough requires careful attention. Stretch it gently to cover all fillings, then pinch and seal edges thoroughly. This seal prevents fillings from escaping during baking and creates that perfect enclosed pocket of flavors.
 Pin it
My first attempt at these squares taught me valuable lessons about patience and proper layering. Now they have become my signature potluck dish, with friends requesting them for every gathering.
Serving Suggestions
Serve these squares with a side of pepperoncini and extra pesto for dipping. A crisp Italian salad makes the perfect accompaniment. For casual gatherings, provide marinara sauce on the side for those who enjoy extra flavor.
Creative Variations
Transform the basic recipe by using different combinations of Italian meats. Add fresh spinach leaves for extra nutrition. Create a spicier version with hot capicola or calabrese salami.
Storage Success
Keep leftover squares in an airtight container in the refrigerator. Reheat in the oven rather than microwave to maintain the crispy crust. For best results, warm at 350°F for about 10 minutes.
Through countless batches of these squares, I've discovered they're more than just a recipe. They bring people together, creating moments of joy around the table. Whether served at a party or packed for lunch, these Italian Sub Squares never fail to impress.
 Pin it
Frequently Asked Questions
- → Can I make these ahead?
- You can assemble ahead and refrigerate before baking, but they're best served warm from the oven.
- → Can I use different meats or cheeses?
- Yes! Feel free to substitute with your favorite Italian deli meats and cheeses.
- → Why cover with foil first?
- Covering helps the middle cook through without the top getting too brown too quickly.
- → How should I store leftovers?
- Store in an airtight container in the refrigerator for up to 3 days. Reheat in the oven for best results.
- → Why let them cool before cutting?
- The 10-minute cooling period allows the filling to set, making cleaner cuts possible.