
 Pin it
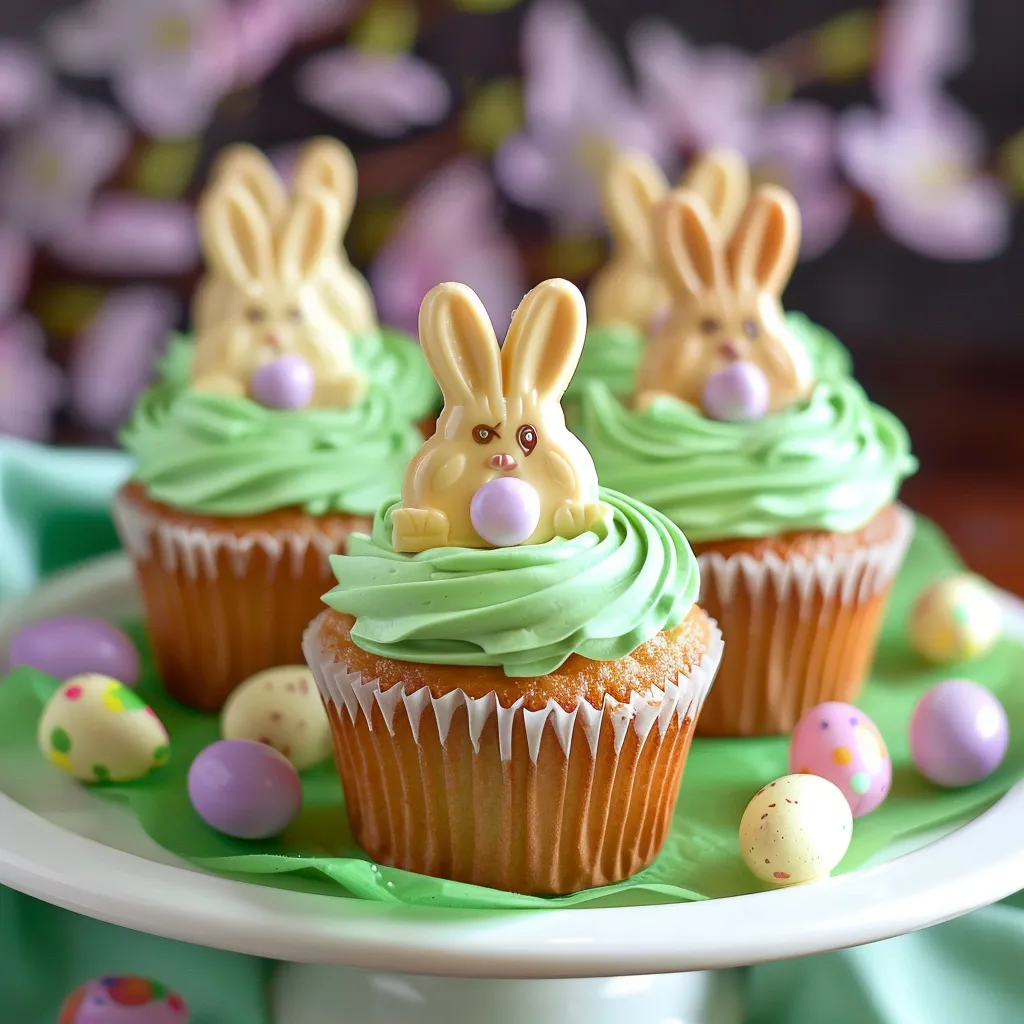
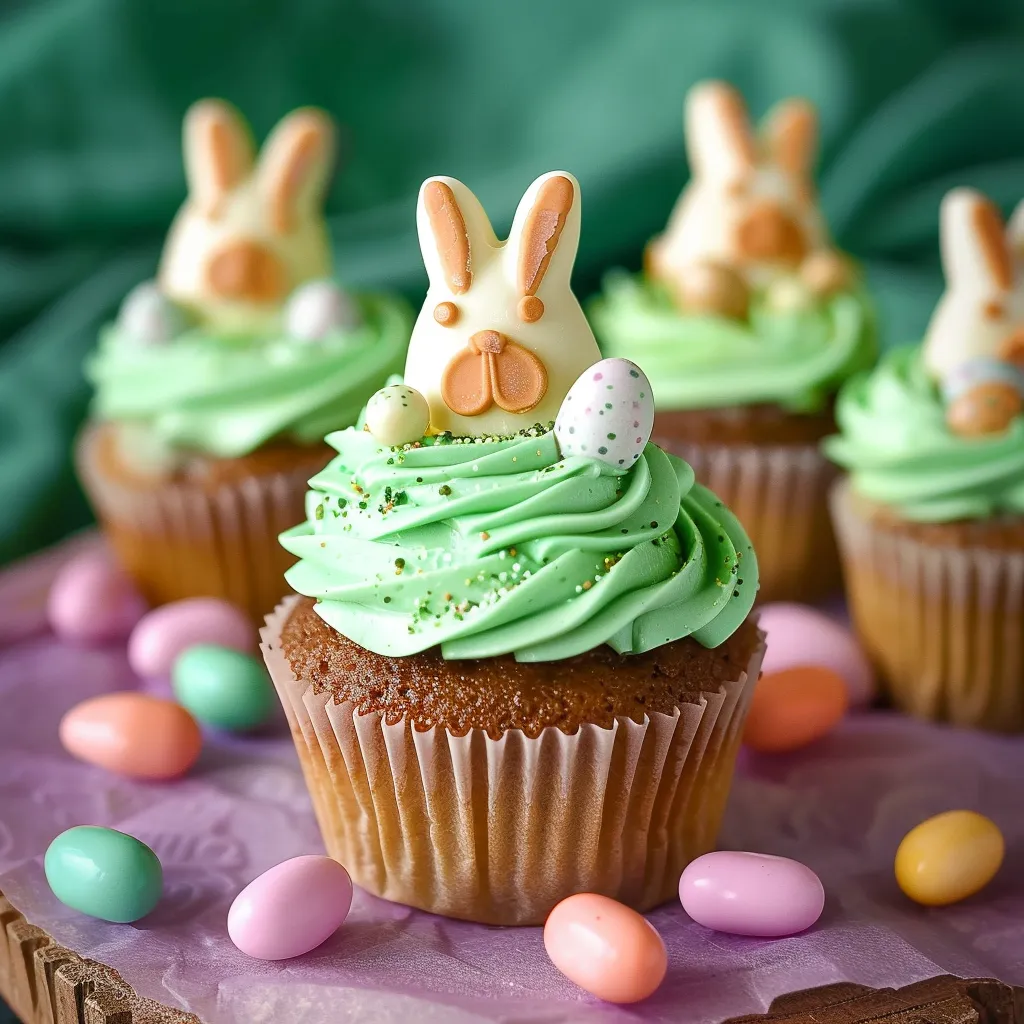
The moment you set these Easter Bunny Cupcakes on the table, you'll hear squeals of delight from children and adults alike. The whimsical sight of chocolate bunnies peeking out from vibrant green "grass" frosting creates an instant centerpiece for your Easter celebration. What I love most about these cupcakes is how they transform a simple dessert into something magical and memorable without requiring advanced baking skills. After years of making holiday treats with my family, I've found that these charming cupcakes offer the perfect balance of impressive presentation and easy execution.
Last Easter, I made these with my niece who had never decorated cupcakes before. Her eyes lit up when she saw the finished product, and she proudly carried them to the family dinner table. Even my brother-in-law, who typically passes on dessert, couldn't resist these cute treats. The secret to their appeal? They bring out the child in all of us while still satisfying grown-up taste buds.
Essential Ingredients and Selection Tips
- Cupcakes: Whether you choose boxed mix or homemade, opt for a sturdy recipe that won't crumble when you insert the bunnies. I've found that a slightly denser cake works better than a super light and airy one. White cake delivers a beautiful contrast with the green frosting, but chocolate is equally delicious
- Frosting: Creating the perfect grassy texture depends on using frosting with the right consistency. If making homemade, aim for a medium-stiff frosting that will hold its shape when piped. If using store-bought, choose a high-quality brand that's not too soft
- Chocolate Bunnies: Look for solid chocolate bunnies rather than hollow ones, as they're easier to trim and insert without breaking. Size matters here – ideally, you want bunnies that are 3-4 inches tall with prominent ears for maximum visual impact
- Decorative Candies: Choose candies that maintain their color when in contact with frosting. I prefer mini candy-coated chocolate eggs because they don't bleed color and they add a satisfying crunch
 Pin it
I've learned through trial and error that the quality of your chocolate bunnies makes a big difference. Premium chocolate not only tastes better but also cuts more cleanly without crumbling. Sometimes I'll splurge on higher-quality chocolate bunnies for these cupcakes even if I use a simple box mix for the cake portion – it's where you'll get the most flavor impact.
Detailed Cooking Instructions
- Perfect Your Cupcake Base:
- Begin by preparing your cupcakes according to your chosen recipe. For consistently sized cupcakes, use an ice cream scoop to portion the batter. Fill each liner about 2/3 full to allow room for rising without overflowing. Bake until a toothpick inserted in the center comes out with just a few moist crumbs – overbaking will result in dry cupcakes that won't complement the creamy frosting. Once baked, transfer to a wire rack and allow to cool completely before decorating. This cooling step is non-negotiable – even slightly warm cupcakes will cause your frosting to melt and lose its shape.
- Create Vibrant Green Frosting:
- If making homemade frosting, start with a basic buttercream by beating 1 cup of unsalted butter until fluffy, then gradually add 4 cups of powdered sugar, 2 tablespoons of milk or heavy cream, and 1 teaspoon of vanilla extract. Beat until smooth and creamy. For the perfect grassy green color, use gel food coloring rather than liquid drops – it provides more intense color without thinning your frosting. Add small amounts at a time, mixing thoroughly between additions until you achieve a fresh spring green shade. For a more natural look, use two slightly different green tones, mixing a deeper forest green with a brighter lime green.
- Master the Grass Piping Technique:
- Fit a piping bag with a multi-opening grass tip (#233 or #234 work well) or a small open star tip in a pinch. Fill the bag with your green frosting, being careful not to overfill, which makes it difficult to control. To create realistic grass, hold the piping bag perpendicular to the cupcake surface, apply gentle pressure, and then pull up quickly to create pointed tips. Start from the outside edge and work your way toward the center, covering the entire surface. Vary the length of your "grass" strands for a more natural appearance. If you don't have piping tips, you can use a zip-top bag with a small corner snipped off – the grass won't be as defined, but it will still create a textured effect.
- Prepare Your Chocolate Bunnies:
- Using a sharp knife warmed under hot water and dried, carefully trim about an inch from the bottom of each chocolate bunny. Make this cut at a slight angle to create a stable base. The angled cut helps the bunny stand upright when inserted into the cupcake. If your bunnies are stubborn to cut, refrigerate them for about 10 minutes first – cold chocolate cuts more cleanly. Save those trimmed bunny bottoms; they make a tasty snack for the baker!
- Create Perfect Bunny Homes:
- Use a small, sharp knife to cut a slit in the center of each frosted cupcake. The slit should be just wide enough and deep enough to accommodate your trimmed bunny without causing the cupcake to split. I find that making an "X" cut rather than a single slit provides more stability for the bunny. Don't cut more than halfway through the cupcake – you want the bunny to stand securely, not sink into the cake.
- Insert Bunnies with Care:
- Gently press each trimmed chocolate bunny into its prepared spot on the cupcake, making sure it stands upright. If the bunny seems unstable, you can use a bit of extra frosting at the base to help "glue" it in place. Position all bunnies facing the same direction for a unified presentation, or vary their positions for a more playful effect. The ears should stand tall above the grassy frosting for maximum visual impact.
- Add Final Decorative Touches:
- Strategically place candy eggs or jelly beans around each bunny, nestling them into the frosting "grass." For the most natural effect, use odd numbers of candies (3 or 5) and vary their placement. Some cupcakes can have eggs clustered together, while others might have them scattered more randomly. This creates visual interest across the entire display. For extra charm, you can add tiny fondant flowers or butterfly sprinkles to suggest a spring garden scene.
My first attempt at these cupcakes taught me the importance of proportion. I initially used bunnies that were too large, and they overwhelmed the cupcakes, toppling over at the slightest bump. Finding the right balance between bunny size and cupcake size makes all the difference in both presentation and stability.
Make-Ahead Strategies
While these cupcakes look best when freshly assembled, busy holiday schedules often require advance preparation. Unfrosted cupcakes can be made 1-2 days ahead and stored in an airtight container at room temperature. Frosting can be prepared up to 3 days in advance and refrigerated in a sealed container – just bring it to room temperature and rewhip before using to restore its fluffy texture. For the final assembly, I recommend decorating no more than 4-6 hours before serving for the freshest appearance. If you must prepare them further in advance, store in the refrigerator in a container tall enough to accommodate the bunny ears without crushing them.
Kid-Friendly Decorating Party
These cupcakes make a wonderful activity for Easter gatherings with children. Set up a decorating station with pre-baked cupcakes, piping bags filled with green frosting (secured with rubber bands at the top), pre-cut chocolate bunnies, and various candy decorations. Even young children can successfully create their own bunny scenes with minimal assistance. Consider offering a few example cupcakes for inspiration but encourage creativity – some of the most charming results come from unpredictable combinations that children create. This activity keeps little hands busy while creating memorable holiday traditions.
Presentation Ideas
For maximum impact, display these cupcakes on a tiered stand dressed with Easter grass or fresh spring flowers around the base. Alternatively, arrange them on a flat platter in a circular pattern with the bunnies facing outward, creating a "bunny committee" effect that never fails to delight guests. For individual servings at a formal dinner, place a single cupcake on a small dessert plate with a fresh mint sprig or edible flower beside it. The contrast between the whimsical cupcake and elegant plating creates a sophisticated yet playful dessert course.
I discovered these refinements after making these cupcakes for several Easter celebrations, including one memorable year when I attempted to transport fully assembled cupcakes over bumpy roads. After arriving with a box of toppled bunnies, I now know to insert the chocolate pieces on site rather than before the journey!
The joy of these Easter Bunny Cupcakes extends far beyond their taste – they create memories that linger long after the last crumb is gone. There's something magical about the combination of childhood whimsy and delicious flavors that makes these treats special. Whether they're starring at your Easter dessert table, delighting children at a spring celebration, or simply brightening an ordinary April afternoon, these cupcakes capture the playful spirit of the season in each adorable bite.
 Pin it
Frequently Asked Questions
- → What type of cupcakes work best for this recipe?
- Any flavor cupcake works well for this recipe. Chocolate pairs nicely with the chocolate bunnies, while vanilla or carrot cake cupcakes offer a nice contrast. Use your favorite recipe or even store-bought cupcakes to save time.
- → What piping tip creates the best grass effect?
- A small open star tip (such as Wilton #21) or a multi-opening grass tip (Wilton #233) works best for creating realistic-looking grass. For a more textured look, use the grass tip and pull upward as you pipe to create taller 'blades' of grass.
- → What kind of chocolate bunnies should I use?
- Look for solid chocolate bunnies about 3-4 inches tall, often sold as foil-wrapped Easter candies. Hollow bunnies may crack when inserted into the cupcake, so solid ones work better. Small chocolate bunny figures from the baking section also work well.
- → Can I make these cupcakes in advance?
- Yes, you can prepare these cupcakes up to a day in advance. Store them in a cool place in a covered container. If your kitchen is warm, refrigerate them but bring to room temperature before serving for the best flavor and texture.
- → What other decorations work well with Easter bunny cupcakes?
- Besides candy eggs and jelly beans, you can use pastel sprinkles, edible flower decorations, coconut tinted green for additional texture in the 'grass', or even small chocolate carrots to complete the Easter theme.