
 Pin it
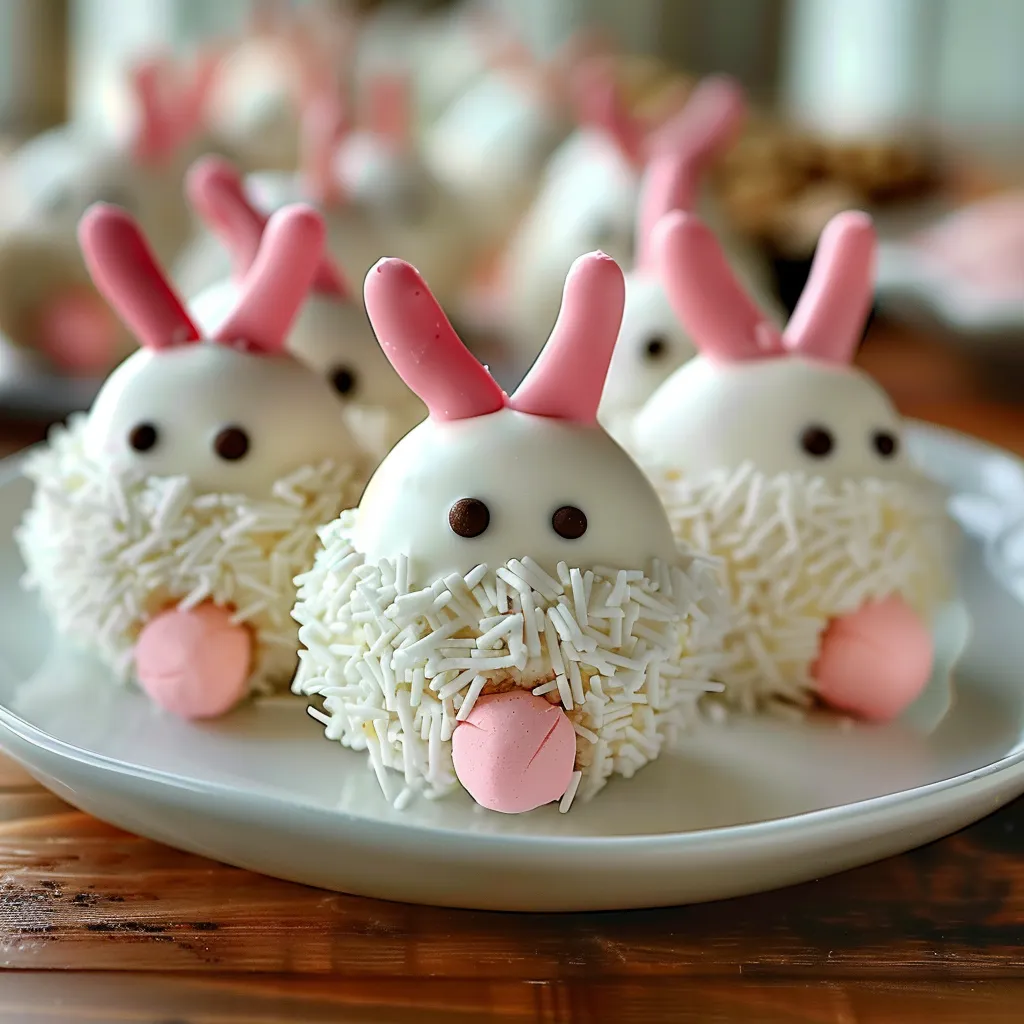
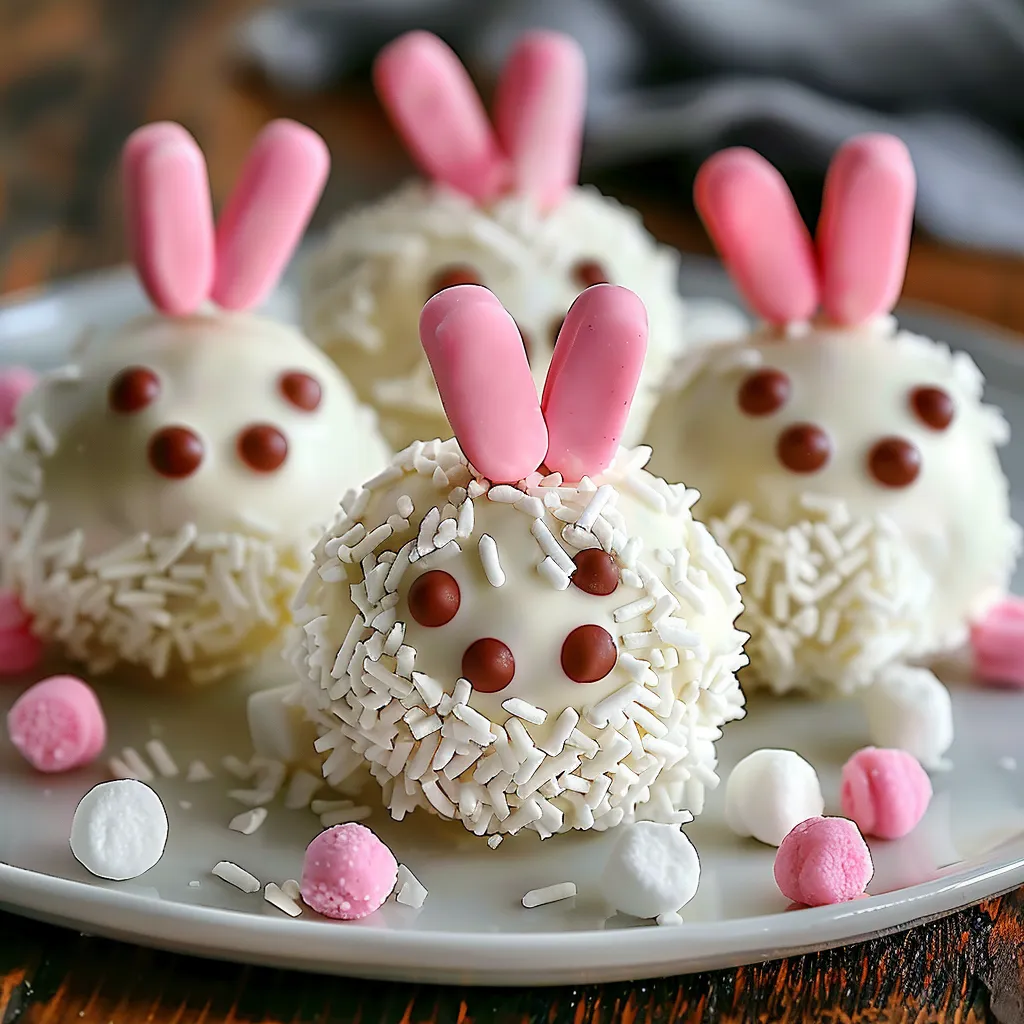
The moment you set these Bunny Butt Oreo Balls on your Easter dessert table, they instantly become the star attraction. With their fluffy white chocolate coating, adorable coconut "fur," and tiny pink feet, these bite-sized treats capture the whimsical essence of Easter while delivering irresistible flavor in every bite. I've been making these no-bake delights for our family Easter celebrations for years, and they never fail to bring smiles and giggles from guests of all ages. The combination of rich Oreo cookies, creamy cream cheese, and sweet white chocolate creates a truffle-like confection that's as delicious as it is adorable.
Last Easter, I brought these to my sister's gathering, where my five-year-old niece declared them "too cute to eat!" That hesitation lasted about three seconds before she took her first bite and promptly asked for another. Even my brother-in-law, who typically gravitates toward traditional desserts, couldn't resist these playful treats. Their charm lies in the perfect balance of whimsy and deliciousness.
Essential Ingredients and Selection Tips
- Oreo Cookies: Use regular Oreos with the filling intact for the perfect texture and flavor balance. While generic sandwich cookies can work, I've found that name-brand Oreos create the best consistency in the final mixture
- Cream Cheese: Full-fat cream cheese delivers the richest flavor and ideal texture. Allow it to soften properly at room temperature for at least an hour before mixing to avoid lumps in your truffle mixture
- White Chocolate: Quality matters tremendously here as it's both the coating and a primary flavor. Look for white chocolate with cocoa butter listed in the ingredients rather than palm oil for the smoothest melt and best taste
- Coconut: Unsweetened shredded coconut works best for the "fur" effect, as sweetened varieties can be too heavy and clumpy. For those who dislike coconut flavor, the fine texture provides the visual without overwhelming the taste
 Pin it
I've learned through experimentation that a food processor creates the ideal fine crumb for the Oreo mixture, but if you don't have one, placing the cookies in a sealed plastic bag and crushing them with a rolling pin works nearly as well. Just be sure to crush them to a very fine consistency for the smoothest truffle texture.
Detailed Cooking Instructions
- Create the Perfect Oreo Mixture:
- Place an entire 14-ounce package of Oreo cookies (filling included) in a food processor and pulse until they form very fine crumbs with no large pieces remaining. Transfer to a large mixing bowl. Add 8 ounces of well-softened cream cheese and incorporate it thoroughly using a rubber spatula, working from the bottom up to ensure even distribution. The final mixture should be a uniform dark color with a thick, moldable consistency similar to play dough. If it seems too dry, add an additional tablespoon of cream cheese; if too wet, add a few more crushed Oreos.
- Shape with Precision:
- Line a baking sheet with parchment paper. Using a 1-tablespoon cookie scoop or measuring spoon, portion the mixture evenly. Roll each portion between your palms to create smooth, perfect spheres. For professional-looking results, dip your hands in a small amount of water before rolling each ball to prevent sticking and create a smoother finish. Place the shaped balls on the prepared baking sheet, leaving space between each. Transfer to the freezer for 15-20 minutes or until firm but not frozen solid. This chilling step is crucial for the balls to hold their shape during dipping.
- Master the Chocolate Coating:
- Place 12 ounces of high-quality white chocolate or candy melts in a microwave-safe bowl. Heat in 30-second intervals at 50% power, stirring thoroughly between each interval, until just melted and smooth. Be careful not to overheat, as white chocolate can seize easily. The ideal dipping consistency should be fluid but not runny. If needed, add 1 teaspoon of coconut oil or vegetable shortening to thin the chocolate. Transfer a portion of the melted chocolate to a small piping bag or zip-top bag with a tiny corner snipped off for decorating details later.
- Develop a Dipping System:
- Working with just a few chilled Oreo balls at a time (keeping the rest in the freezer), place one ball on a fork or dipping tool. Lower it into the melted white chocolate, making sure it's completely submerged. Lift it out, gently tap the fork against the side of the bowl to remove excess coating, then carefully slide the coated ball back onto the parchment paper. Immediately, before the chocolate sets, sprinkle the top half with shredded coconut to create the fluffy "fur" effect. Continue this process until all balls are coated, working in small batches to ensure the Oreo balls stay firm.
- Create Adorable Bunny Details:
- While the white chocolate is still slightly soft, press a mini marshmallow or white candy pearl gently onto each ball to form the bunny tail. For the feet, melt a small amount of pink candy melts in a microwave-safe bowl using the same gentle heating method as before. Transfer to a small piping bag and pipe small oval shapes onto a separate piece of parchment paper. Allow these to set completely, about 5-10 minutes. Once set, use a small dab of melted white chocolate as "glue" to attach two little feet to each bunny bottom. For extra detail, pipe three tiny dots of white chocolate onto each pink foot to represent the bunny's toes.
- Allow Proper Setting Time:
- Let the completed Bunny Butt Oreo Balls sit at room temperature for at least 30 minutes to fully set. If your kitchen is warm, you can place them in the refrigerator for 10-15 minutes, but avoid longer chilling until the chocolate is completely hardened to prevent condensation. Once set, the finished treats should have a firm exterior that gives way to a soft, truffle-like interior when bitten into.
- Create an Appealing Display:
- For maximum visual impact, arrange your Bunny Butt Oreo Balls on a bed of tinted green coconut "grass" on a serving platter. Alternatively, place each one in a mini cupcake liner for easy handling at parties. If giving as gifts, carefully place them in clear cellophane bags tied with pastel ribbon for a professional presentation that showcases their adorable design.
I learned the importance of proper chilling time through experience when I once rushed the process and tried dipping balls that weren't firm enough. They began to fall apart in the warm chocolate, creating a messy (though still delicious) situation! Now I make sure they're properly chilled, and the process goes smoothly every time.
Creative Variations
While the classic white bunny butts are adorable, this recipe welcomes creative adaptations. For a fun twist, try using Golden Oreos with a touch of cinnamon added to the cream cheese mixture, creating a "carrot cake" flavor profile that's perfect for Easter. Another delightful variation uses cookies and cream candy melts for the coating, creating a marbled effect that resembles Dutch rabbits. For those who prefer a more sophisticated treat, add a teaspoon of orange or lemon zest to the Oreo mixture for a hint of citrus that brightens the rich chocolate flavor.
Make-Ahead and Storage Secrets
These Bunny Butt Oreo Balls are ideal for preparing in advance of Easter festivities. The undecorated Oreo balls can be made up to a month ahead and frozen in an airtight container. When ready to decorate, simply thaw in the refrigerator overnight before dipping and decorating. Fully completed treats keep beautifully in the refrigerator for up to a week – just store them in a single layer in an airtight container. For the freshest taste and appearance, allow them to come to room temperature for about 15 minutes before serving, which softens the interior to the perfect creamy consistency.
Kid-Friendly Participation
These treats make an ideal Easter activity to share with children. Kids as young as three can help roll the Oreo mixture into balls (with supervision for hand washing before and after). Older children can assist with sprinkling coconut and placing the marshmallow tails. Teenagers can handle the entire process, including the chocolate dipping with some guidance. Creating an assembly line with different family members handling different steps makes this a joyful group activity that creates holiday memories along with delicious treats.
I discovered these refinements through years of making these treats, including one memorable Easter when we turned the process into a family competition to see who could create the most realistic bunny bottom. My nephew won with his creation that included tiny fondant clover "flowers" placed near his bunny's feet as if the rabbit had paused while hopping through a spring garden.
The joy of these Bunny Butt Oreo Balls extends beyond their delicious taste – they bring playfulness and charm to your Easter celebration. There's something uniquely satisfying about watching guests' faces light up when they spot these whimsical treats among the more traditional Easter offerings. They capture the essence of what makes holiday food special: the ability to delight the eye, please the palate, and create moments of joy around the table.
 Pin it
Frequently Asked Questions
- → Can I make these Bunny Butt Oreo Balls ahead of time?
- Yes, these can be made 2-3 days in advance and stored in an airtight container in the refrigerator. They actually develop better flavor after resting for a day, allowing the Oreo and cream cheese flavors to meld together.
- → Can I use different flavors of Oreos for this recipe?
- Absolutely! While traditional Oreos work perfectly, you can experiment with seasonal flavors like Golden Oreos, mint, or even the birthday cake variety for different colors and flavors in your bunny butt treats.
- → Why are my Oreo balls sticky and difficult to shape?
- If your mixture is too sticky, chill it in the refrigerator for 30 minutes before shaping. You can also lightly coat your hands with powdered sugar or a small amount of coconut oil to prevent sticking while rolling.
- → What can I use instead of white chocolate for coating?
- White candy melts are a great alternative as they're specifically designed for coating treats. You could also use white almond bark or vanilla flavored coating. Regular white chocolate chips sometimes need shortening added to thin them for proper coating.
- → My white chocolate seized up. How can I prevent this?
- Chocolate can seize if any water gets into it or if it's overheated. Make sure all utensils are completely dry, and melt the chocolate slowly using 30-second intervals in the microwave, stirring between each interval. If it does seize, try adding a teaspoon of coconut oil or vegetable shortening.