
 Pin it
This whimsical no-bake treat transforms childhood cereal nostalgia into a sophisticated dessert perfect for St. Patrick's Day celebrations or anytime you need a colorful pick-me-up on your dessert table.
I first created these bars for my niece,rainbow-themed birthday party last spring. The green cheesecake layer with colorful marshmallows was such a hit that adults were sneaking seconds when they thought no one was looking.
Ingredients
- Mini Marshmallows: create the gooey binding agent that holds the crust together while adding classic rice crispy treat texture
- Lucky Charms Cereal: provides both the crunchy base and the colorful marshmallow topping that makes this dessert instantly recognizable
- Cream Cheese: use full fat for proper setting and richness of flavor
- Lemon Juice: balances the sweetness and helps the cheesecake set properly
- Heavy Whipping Cream: creates the light mousse texture look for cream with at least 36% fat content
- Green Food Coloring: adds festive flair select gel coloring for most vibrant results without adding excess liquid
 Pin it
Step-by-Step Instructions
- Prepare the Pan:
- Line your 9x9 square pan with parchment paper leaving overhang on the sides to easily lift out the finished bars. Spray lightly with cooking spray if desired for extra insurance against sticking.
- Create the Cereal Base:
- Melt butter in a large saucepan over low heat until completely liquified about 2 minutes. Add mini marshmallows and stir continuously until fully melted and mixture becomes smooth and glossy around 3 to 4 minutes. Remove from heat immediately to prevent scorching.
- Incorporate the Cereal:
- Working quickly add all 4 cups of Lucky Charms cereal to the marshmallow mixture. Fold gently but thoroughly with a spatula until every piece is coated. The mixture will be sticky and somewhat resistant so use firm pressure.
- Form the Base:
- Transfer the warm cereal mixture to your prepared pan. Press firmly and evenly using either a greased spatula or your fingers dipped in cold water to prevent sticking. Take time to create a compact even layer paying special attention to corners. Allow to cool completely about 30 minutes at room temperature.
- Prepare Cheesecake Mixture:
- Beat room temperature cream cheese and lemon juice in a large bowl until completely smooth with no lumps about 2 minutes. This step is crucial for texture so be thorough. In a separate bowl whip the heavy cream until soft peaks form then gradually add the granulated sugar continuing to beat until stiff peaks develop.
- Create the Green Layer:
- Fold the cream cheese mixture into the whipped cream using a gentle motion to preserve air bubbles. Add green food coloring a few drops at a time mixing between additions until you achieve your desired shade of green. A true kelly green requires more coloring than you might expect.
- Assemble and Freeze:
- Pour the green cheesecake mixture over the completely cooled cereal base using an offset spatula to create a smooth even layer. Cover with plastic wrap and freeze for a minimum of 4 hours though overnight yields the best results for clean slicing.
- Add the Finishing Touches:
- Just before serving separate Lucky Charms marshmallows from additional cereal. Sprinkle these colorful shapes across the top of the firm cheesecake layer adding rainbow sprinkles if desired for extra festivity. Slice into squares with a warm knife for cleanest cuts.
My favorite part of making these bars is sorting through the Lucky Charms with my kids to find the most colorful marshmallow pieces for the topping. It inevitably leads to a conversation about which shapes are luckiest and which ones taste best according to their very scientific research.
Storing Your Leftovers
These cheesecake bars maintain their best quality when stored in the freezer. Place any uneaten bars in an airtight container with parchment between layers to prevent sticking. When ready to enjoy remove from freezer and let sit at room temperature for about 10 minutes before serving for the perfect creamy yet firm texture. The bars will keep well for up to two weeks though the cereal base may gradually soften slightly over time.
Customizing Your Bars
The beauty of this recipe lies in its adaptability. Try substituting different cereals like Fruity Pebbles for a birthday theme or Cinnamon Toast Crunch for a fall flavor profile. You can also adjust the food coloring to match any holiday or event blue for baby showers pink for Valentine's Day or orange for Halloween. For a more sophisticated adult version consider adding a teaspoon of vanilla bean paste to the cheesecake mixture and topping with white chocolate shavings instead of additional cereal pieces.
Serving Suggestions
These festive bars stand beautifully on their own but can be elevated for special occasions. Serve on a platter surrounded by fresh mint leaves and additional Lucky Charms marshmallows for a charming dessert table centerpiece. For individual servings place each square in a colorful cupcake liner topped with a small dollop of whipped cream and a single marshmallow charm. These bars pair wonderfully with a glass of cold milk for children or a dessert coffee for adults.
 Pin it
Frequently Asked Questions
- → Can I use puff pastry instead of pie crust?
- Yes, puff pastry works well for this recipe. Just make sure to vent the top before baking.
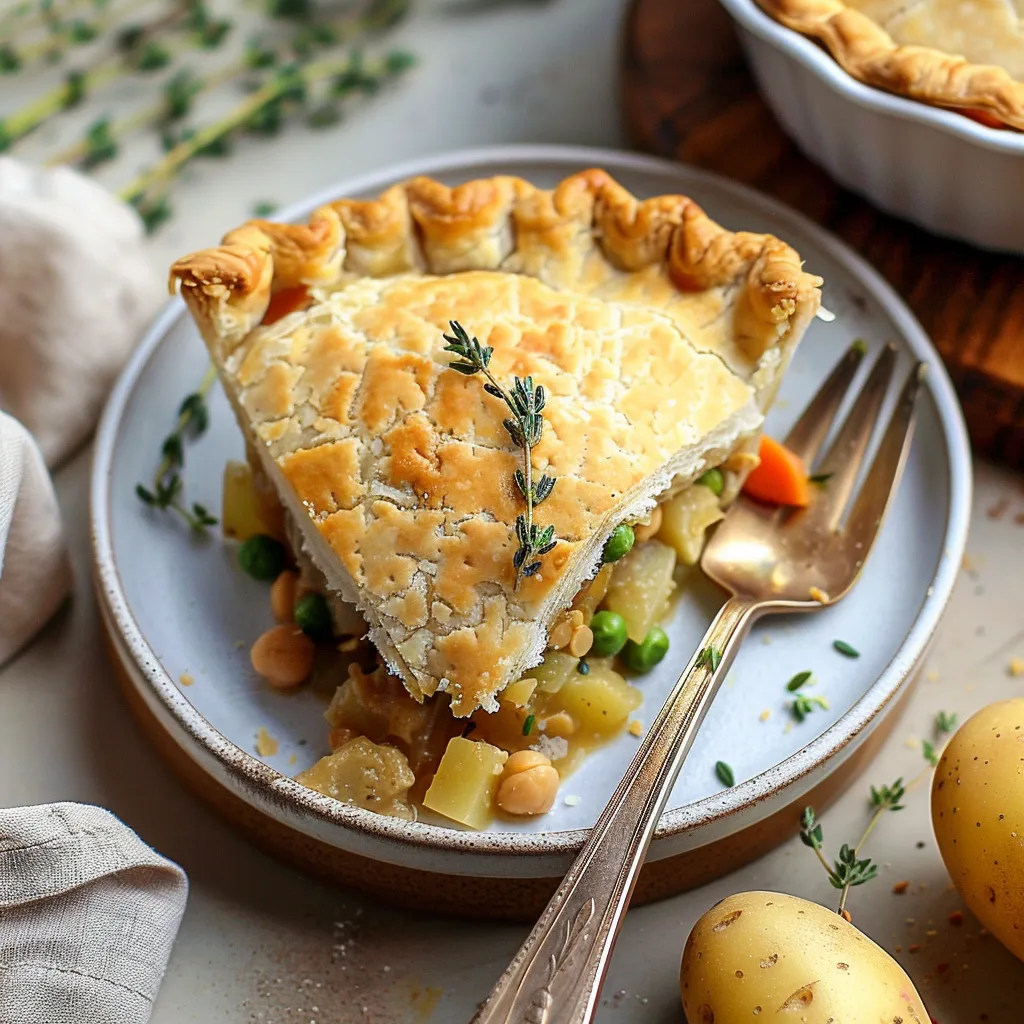
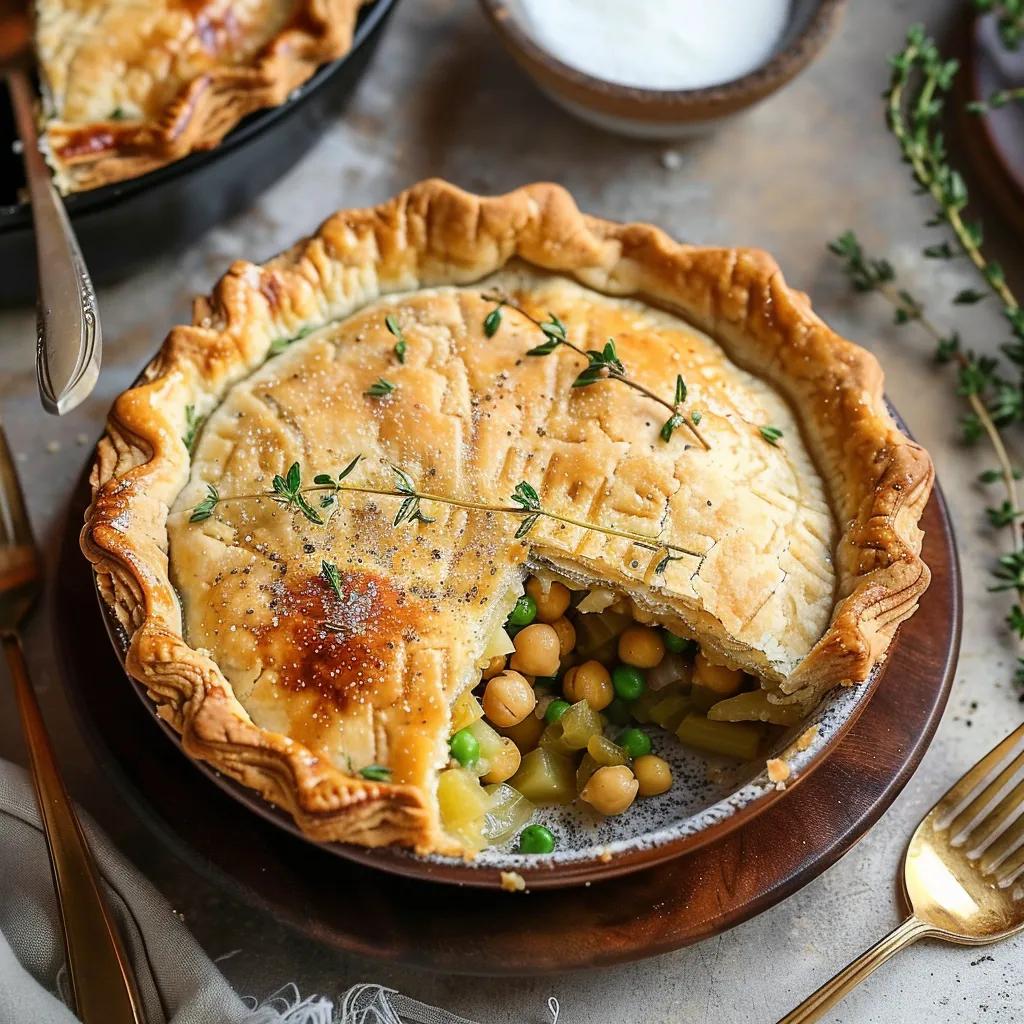
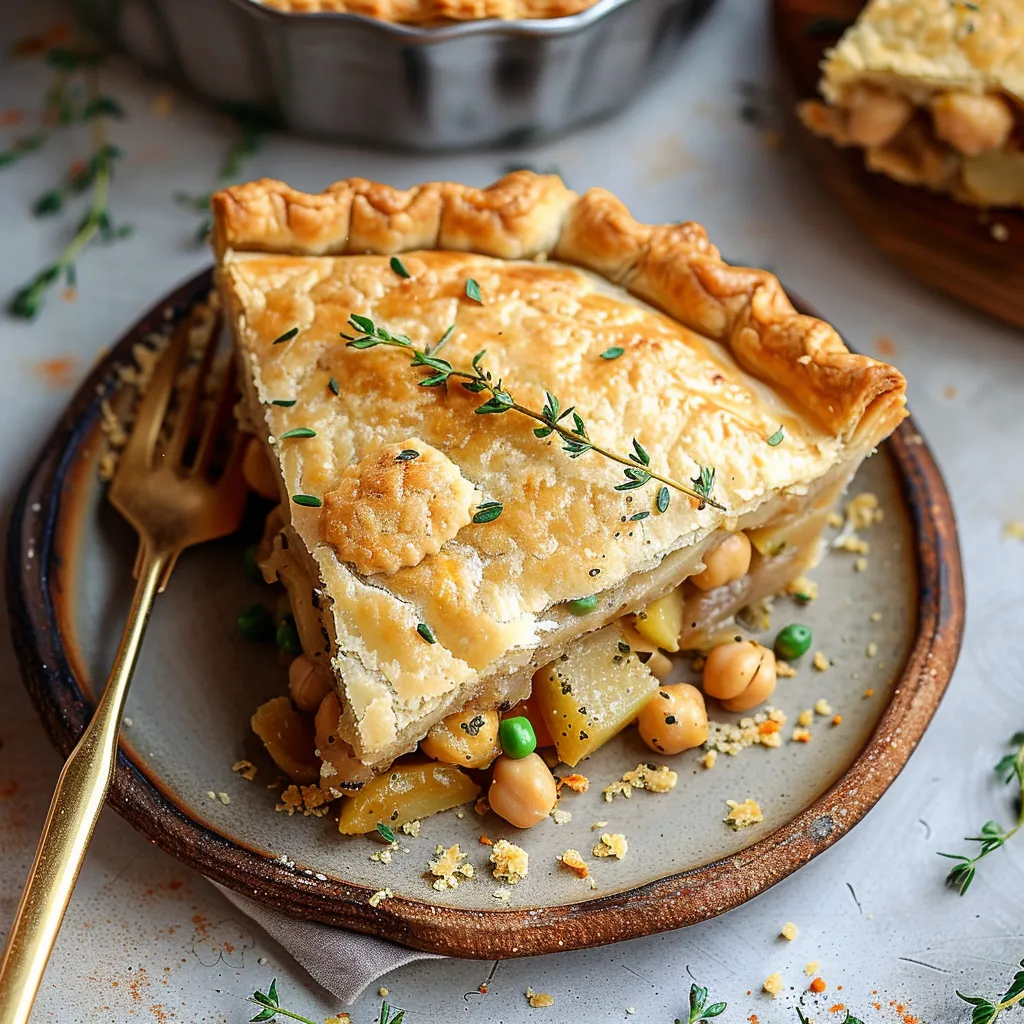
- → Is this Vegan Pot Pie gluten-free?
- Yes, if you use a gluten-free pie crust and chickpea flour, it's completely gluten-free.
- → How long does the pot pie last in the fridge?
- You can store leftovers in the fridge for up to 5 days.
- → Can I make the filling ahead of time?
- Yes, both the pie crust and chickpea filling can be prepared one day in advance.
- → What can I use instead of chickpea flour?
- You can replace it with all-purpose flour or brown rice flour.