 Pin it
Red Velvet Thumbprint Cookies with Cream Cheese Filling give you the best part of red velvet cake in a smaller, easier package. The cookies are soft and lightly cocoa-scented, with a creamy center that tastes like frosting without making the cookie soggy.
I like these for cookie swaps because they look dressed up, but the method is simple. The two details that matter are chilling the dough and filling only after the cookies have cooled.
Red Velvet Thumbprint Cookie Lineup
This dough gets its soft bite from butter, egg, and a careful amount of flour. Use natural cocoa for a mild chocolate note and full-fat cream cheese for a filling that pipes smoothly.
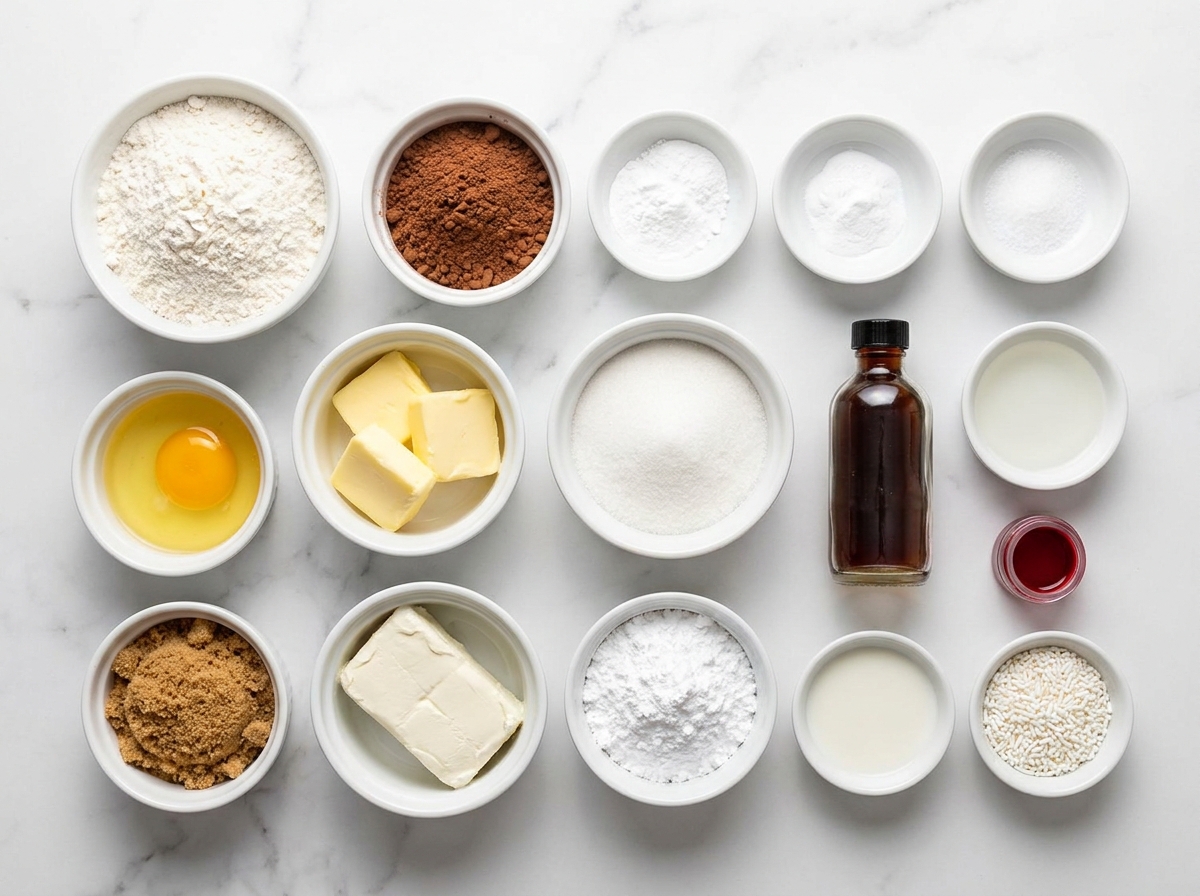
- All-purpose flour. Gives the cookies structure so the thumbprints hold their wells.
- Natural cocoa powder. Adds the quiet chocolate flavor that belongs in red velvet.
- Baking powder and baking soda. Lift the dough without making the cookies cakey.
- Unsalted butter. Keeps the cookie tender and rich.
- Granulated and brown sugar. Sweeten the dough while helping the centers stay soft.
- Egg. Binds the dough and gives the cookies enough structure to press.
- Red gel food coloring. Gives a strong red color without thinning the dough.
- Vanilla and vinegar. Round out the red velvet flavor with a little tang.
- Cream cheese. Makes the filling tangy, thick, and smooth.
- Powdered sugar. Sweetens and firms the filling so it sits neatly in each cookie.
Shape, Bake, Fill
- Whisk the dry mix. Combine the flour, cocoa, baking powder, baking soda, and salt so the cocoa spreads evenly through the dough.
- Mix the butter and sugars. Beat softened butter with both sugars until creamy, then mix in the egg, vanilla, vinegar, and red gel color.
- Bring the dough together. Add the dry mixture on low speed just until no flour streaks remain. The dough should be soft, not wet.
- Chill and roll. Chill for 30 minutes, then roll into small balls and set them 2 inches apart on parchment-lined baking sheets.
- Make the wells. Press a rounded teaspoon into each dough ball. Bake until the edges look set, then press the centers again while warm.
- Cool completely. Move the cookies to a rack and wait until they are no longer warm. Warm cookies melt the filling.
- Pipe the filling. Beat the cream cheese, butter, vanilla, and powdered sugar until thick and smooth, then pipe or spoon it into each center.
Thumbprints That Hold Shape
The dough should feel like soft modeling clay after chilling. If it sticks badly to your fingers, give it another 10-15 minutes in the refrigerator. That short pause keeps the cookies thick instead of flat.
Pressing the wells twice makes a big difference. The first press gives the dough direction before baking. The second press, done right after the tray comes out, opens the center back up without cracking the cookie. If you enjoy this red velvet style, the filled centers in Red Velvet Cookies with Cream Cheese Frosting have the same tangy finish in a softer frosted cookie.
Cream Cheese Filling Notes
The filling needs to be thick enough to hold its shape, but not so stiff that it tears the cookie when you bite in. Start with softened cream cheese and butter. Cold cream cheese leaves small lumps that are hard to fix once the powdered sugar is in the bowl.
Add the powdered sugar gradually and scrape the bowl well. If the filling looks loose, add more powdered sugar 1 tablespoon at a time. If it gets too thick, a few drops of milk will loosen it. For another cookie with a creamy center, try Lemon Poppy Seed Cookies with Cheesecake Filling.
Color, Cocoa, And Swaps
Natural unsweetened cocoa works best here because it gives mild chocolate flavor without dulling the red color. Dutch-process cocoa can make the dough look darker and more brown. Gel coloring is stronger than liquid coloring, so you can use less and keep the dough texture steady.
You can roll the dough balls in coarse sugar before baking for sparkle. A pinch of espresso powder deepens the cocoa flavor, but keep it small. Too much turns the cookie into a chocolate cookie instead of red velvet. If you want a candy center instead of cream cheese, Red Velvet Blossom Cookies are a good next bake.
Make-Ahead Cookie Strategy
For the neatest holiday tray, bake the cookies ahead and store the filling separately. Unfilled cookies keep well at room temperature for about 3 days in an airtight container. Filled cookies need refrigeration because of the cream cheese. The USDA has a helpful overview of safe refrigerator temperatures in its refrigeration guide.
If you are freezing, freeze only the baked cookie shells. Stack them with parchment between layers so the wells stay intact. Thaw overnight in the refrigerator, then fill close to serving time.
Serving A Cookie Tray
These cookies look best with a simple finish. A dusting of red crumbs, white sprinkles, or shaved white chocolate gives contrast without hiding the cream cheese center. Keep the cookies in a single layer if you are transporting them.
They pair well with chocolate cookies, sugar cookies, and anything citrusy. I like setting them beside Red Velvet Snowball Cookies because the white powdered sugar makes the red thumbprints stand out.

Summary
These cookies are best served slightly chilled or cool room temperature, when the cream cheese center is thick and the red velvet cookie stays tender.

FAQs
- Can I make Red Velvet Thumbprint Cookies with Cream Cheese Filling ahead of time?
Yes. Bake the cookies up to two days ahead and store them unfilled in an airtight container. Pipe in the cream cheese filling the day you plan to serve them for the cleanest look.
- Why did my thumbprints puff up in the oven?
That is normal for this dough. Press the centers again right after baking while the cookies are warm and soft. A rounded teaspoon or the handle end of a wooden spoon makes a neat well.
- Can I use liquid red food coloring instead of gel?
You can, but gel gives stronger color with less added moisture. If using liquid color, start with 1 tablespoon and expect a slightly softer dough. Chill a little longer if the dough feels sticky.
- How should I store cream cheese filled thumbprint cookies?
Once filled, store the cookies covered in the refrigerator for up to 4 days. Let them sit at room temperature for 10-15 minutes before serving so the cookie softens slightly.
- Can I freeze these cookies?
Freeze the baked cookies without filling for up to 2 months. Thaw in the refrigerator, bring to cool room temperature, then add the cream cheese filling. The filling can turn watery after freezing, so it is better made fresh.
- What can I use instead of cream cheese filling?
White chocolate ganache, vanilla buttercream, or a thick cheesecake-style frosting all work. Keep the filling thick enough to hold a small peak so it stays in the thumbprint.
- How do I keep the cookies from spreading too much?
Measure the flour carefully, chill the dough, and bake on parchment rather than a greased pan. If the dough warms up while you roll, put the tray in the refrigerator for 10 minutes before baking.
