 Pin it
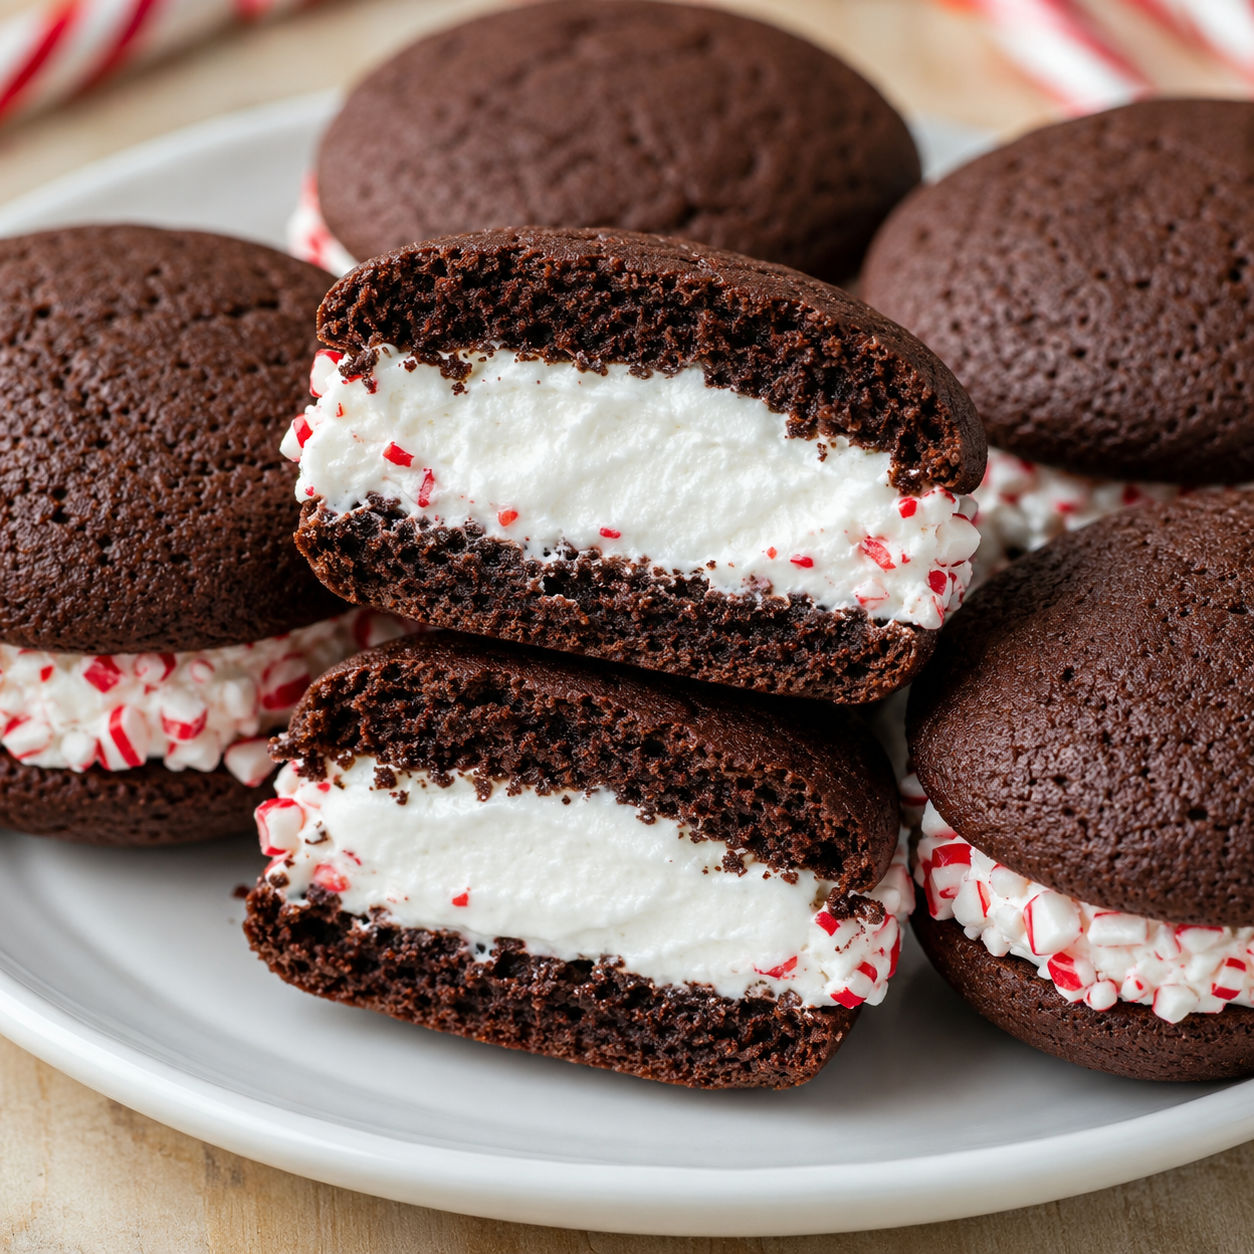
Chocolate Peppermint Whoopie Pies with Marshmallow Filling are the kind of holiday dessert that disappears before the cookie platter makes a second pass. The cakes are soft and dark, the filling is fluffy, and the peppermint keeps each bite from feeling too heavy.
The batter is closer to cake than cookie dough, so a scoop and parchment paper make the neatest rounds. Once the cakes cool, the marshmallow filling pipes on thick and smooth.
I like rolling the edges in crushed candy canes because it gives a little crunch without taking over. Use a light hand with peppermint extract. Too much can taste sharp fast.
The chocolate peppermint lineup
Use good cocoa powder, fresh buttermilk, and real marshmallow creme for the best texture. Measure the flour gently so the cakes stay soft, not bready.

- All-purpose flour. Gives the cake rounds structure while keeping them tender.
- Unsweetened cocoa powder. Brings the deep chocolate flavor that balances the sweet filling.
- Baking soda and baking powder. Help the rounds puff into soft little cakes.
- Unsalted butter. Adds richness to both the cakes and the filling.
- Brown sugar and granulated sugar. Sweeten the batter and help the crumb stay moist.
- Buttermilk. Makes the chocolate cakes tender with a light tang.
- Egg. Holds the batter together and helps the rounds bake evenly.
- Vanilla extract. Rounds out the cocoa and peppermint.
- Marshmallow creme. Makes the filling fluffy, glossy, and classic.
- Powdered sugar. Thickens the filling so it can be piped or spread.
- Peppermint extract. Gives the filling its cool holiday flavor.
- Crushed candy canes. Add crunch and a bright red-white edge.
Bake, fill, and roll
- Mix the dry ingredients. Whisk the flour, cocoa, baking soda, baking powder, and salt together until no cocoa lumps remain.
- Cream the butter and sugars. Beat softened butter with both sugars until lighter and creamy. This helps the cakes rise with a finer crumb.
- Add egg and vanilla. Beat in the egg and vanilla until the batter looks smooth and slightly fluffy.
- Finish the batter. Add the dry mixture in batches, alternating with buttermilk. Stop as soon as the flour disappears so the rounds stay tender.
- Scoop and bake. Scoop rounded tablespoons onto parchment-lined pans. Bake at 350 F for 9-11 minutes, until the tops spring back when touched.
- Whip the filling. Beat butter, marshmallow creme, powdered sugar, peppermint extract, vanilla, and salt until fluffy and thick.
- Assemble the pies. Pipe or spread filling on the flat side of half the cakes. Top with the remaining cakes and roll the edges in crushed candy canes.
Keep the cakes soft
The best whoopie pie cakes are tender enough to bend a little when you bite them. Overmixing is the fastest way to lose that texture. Once the buttermilk and flour go in, mix on low and scrape the bowl once or twice. Stop when the batter is even.
A cookie scoop helps every round bake at the same pace. If you have made Peppermint Chocolate Whoopie Pies before, the same spacing rule applies here. Leave about 2 inches between scoops because the batter spreads as it puffs.
For more consistent measuring, a kitchen scale helps. King Arthur Baking keeps a practical ingredient weight chart that is useful when cocoa and flour need to be accurate.
Peppermint without harshness
Peppermint extract can go from fresh to toothpaste-like with one heavy pour. Start with 1/2 teaspoon in the filling, then taste. If you want a stronger mint flavor, add another 1/4 teaspoon and beat again.
The crushed candy cane edge gives you extra peppermint aroma without changing the whole filling. Crush the candies into small pieces, not powder. Powder melts into the filling and can look streaky after a few hours.
If you want a gentler version for kids, leave the extract at 1/2 teaspoon and use colorful sprinkles on half the batch. For more peppermint desserts on the same tray, add Easy 4-Ingredient Peppermint Oreo Bark.
Filling that holds shape
The marshmallow filling should be thick enough to mound on a spoon. If it slides or looks loose, beat in powdered sugar 2 tablespoons at a time. If it gets too stiff, add 1 teaspoon of milk and beat until smooth.
Softened butter matters here. Cold butter leaves little lumps. Melted butter makes the filling runny. Aim for butter that dents easily when pressed but still holds its shape.
For clean sandwich edges, pipe the filling in a ring around the outside and a small mound in the center. Press the top cake on gently until the filling reaches the edge. This keeps the sides even when you roll them in candy.
Storage and party timing
Filled whoopie pies keep best in the refrigerator because the filling contains butter and marshmallow creme. Store them in a single layer in an airtight container for up to 4 days. The texture is best after they sit at room temperature for 10-15 minutes.
For food safety timing at parties, use the guidance from FoodSafety.gov cold storage charts and keep dairy-based desserts chilled until close to serving. If they will sit on a buffet, bring out a smaller plate and refill as needed.
You can freeze assembled whoopie pies too. Wrap each one tightly, freeze flat, then move them into a freezer bag. Thaw overnight in the fridge.
Serving them on a tray
These are sturdy enough for cookie boxes once chilled. Place parchment between layers so the candy edges do not stick. A small dusting of cocoa on the serving plate looks nice, but keep it away from the candy edges so the red and white stay bright.
For a chocolate-heavy dessert board, serve them with S'mores Lasagna Graham Chocolate Marshmallow or Chocolate Chip Cookie Dough Brownie. The whoopie pies bring the soft cake texture, while bars and chilled desserts add contrast.

Summary
Soft chocolate cake rounds, peppermint marshmallow filling, and crushed candy cane edges make these whoopie pies a festive dessert for cookie boxes, parties, and winter baking days.

FAQs
- Can I make chocolate peppermint whoopie pies ahead of time?
Yes. Bake the cake rounds one day ahead and keep them covered at room temperature. Fill them the day you plan to serve, or refrigerate filled whoopie pies overnight so the marshmallow filling stays firm.
- Can I use marshmallow creme instead of marshmallow fluff?
Yes. Marshmallow creme and marshmallow fluff work the same way in this filling. Beat it well with softened butter and powdered sugar until the texture turns light and spreadable.
- How much peppermint extract should I use?
Start with 1/2 teaspoon in the filling. Peppermint extract is strong, and adding too much can make the filling taste medicinal. Taste after mixing, then add another 1/4 teaspoon only if you want a stronger mint flavor.
- Why did my whoopie pies spread too much?
The batter may have been too warm or the baking sheets may have been hot from a previous batch. Scoop onto cool parchment-lined pans and leave space between rounds. If your kitchen is warm, chill the scooped batter for 10 minutes before baking.
- Can I freeze whoopie pies with marshmallow filling?
Yes. Wrap each filled whoopie pie tightly and freeze for up to 2 months. Thaw in the refrigerator, then let them sit at room temperature for 15-20 minutes before serving.
- What can I use instead of candy canes?
Try crushed peppermint candies, mini chocolate chips, festive sprinkles, or finely chopped dark chocolate. You can also skip the edge coating if you want a softer, cleaner bite.
- What should I serve with these whoopie pies?
They are rich enough to stand alone, but they are great with coffee, cold milk, or hot cocoa. For a dessert tray, pair them with White Chocolate Peppermint Pie or Hot Cocoa Cookies.
