
 Pin it
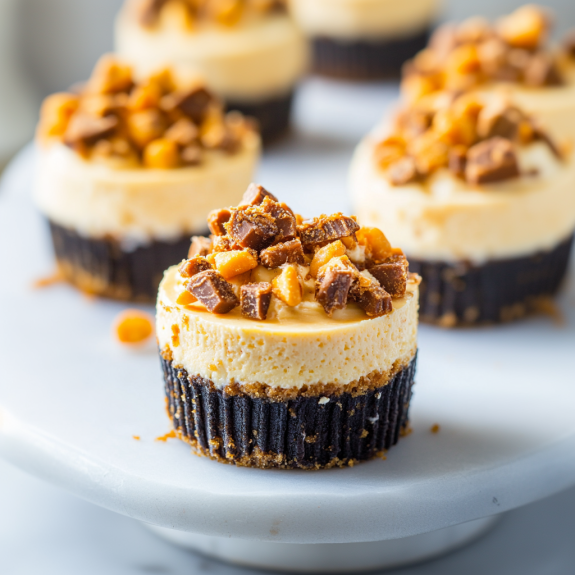
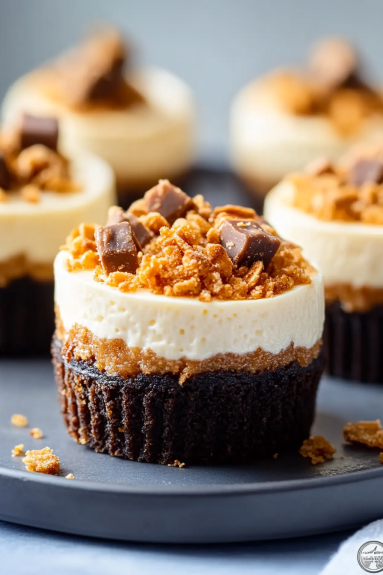
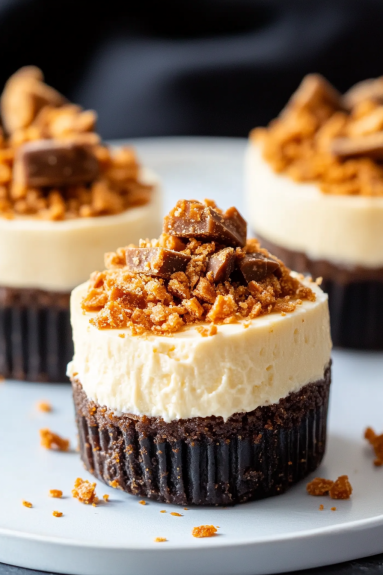
This rich and indulgent Butterfinger Cheesecake Cupcakes recipe transforms the beloved candy bar into a creamy, peanut buttery dessert that perfectly balances sweet and salty flavors. The combination of smooth cheesecake filling studded with crunchy Butterfinger pieces atop a chocolate cookie crust creates an irresistible treat for any occasion.
I first made these for my daughter's birthday party when she requested something with her favorite candy bar. The guests were fighting over the last cupcake, and now these have become our signature dessert for every family gathering.
Ingredients
- For the Oreo Crust
- Oreo cookies: create the perfect chocolatey base that complements the peanut butter filling
- Unsalted butter: helps bind the crust and adds richness
- For the Peanut Butter Butterfinger Cheesecake Filling
- Brick style cream cheese: provides the classic tangy base – look for full fat for best texture
- Sour cream: adds moisture and a subtle tang that balances the sweetness
- Creamy peanut butter: infuses the cheesecake with nutty flavor – choose a quality brand
- Granulated sugar: sweetens without overwhelming the other flavors
- Eggs: provide structure and richness to the cheesecake
- All purpose flour: helps prevent cracking and creates a velvety texture
- Butterfinger candy bars: add that iconic crunch and flavor throughout
- For the Peanut Butter Glaze
- Creamy peanut butter: creates a smooth topping that sets beautifully
- Confectioners sugar: adds sweetness and helps the glaze set properly
Step-by-Step Instructions
- Prepare the Pans:
- Preheat your oven to 325°F and prepare a muffin tin with paper liners. A light spray of nonstick spray will ensure easy removal later. This temperature allows the cheesecakes to bake gently without cracking.
- Create the Cookie Base:
- Process Oreo cookies until they form fine crumbs then mix with melted butter until the texture resembles wet sand. Press a tablespoon into each liner creating a firm even layer. The brief baking time helps set the crust and prevents it from becoming soggy.
- Mix the Filling:
- Beat the cream cheese, sour cream, and peanut butter until completely smooth. Any lumps now will remain in the final product. Add sugar and beat thoroughly then incorporate eggs one at a time. The gradual addition prevents too much air from being incorporated. Gently fold in flour just until combined then stir in chopped Butterfinger pieces.
- Fill the Cups:
- Divide the batter evenly among the prepared cups filling each to just below the rim. Tap the pan gently on the counter to release any air bubbles and create a level surface. The perfect filling amount ensures they won't overflow during baking.
- Bake to Perfection:
- Bake until the edges are set but centers remain slightly jiggly, about 22 to 24 minutes. This slight wobble is crucial as they will continue cooking from residual heat and firm up during cooling. Overbaking leads to dry, cracked cheesecakes.
- Cool and Chill:
- Allow the cheesecakes to cool completely at room temperature before refrigerating for at least 2 hours. This gradual temperature change prevents the tops from cracking and allows the flavors to develop fully.
- Create the Glaze and Garnish:
- Melt peanut butter gently and whisk in confectioners sugar until smooth and glossy. Top each chilled cheesecake with a teaspoon of glaze and sprinkle with additional Butterfinger pieces. The contrast between the smooth glaze and crunchy candy creates the perfect textural experience.
 Pin it
The first time I made these was during a power outage. I had just finished putting them in the refrigerator when we lost electricity for nearly 8 hours. I was certain they were ruined, but they set perfectly and everyone declared them the best dessert I had ever made. Sometimes kitchen mishaps lead to the most memorable family stories.
Make Ahead Magic
These cheesecake cupcakes are ideal for preparing in advance. The flavors actually improve after 24 hours in the refrigerator as they have time to meld and develop complexity. If making ahead, store the cheesecakes without the glaze and garnish in an airtight container. Add the finishing touches just before serving to maintain the perfect appearance and texture contrast between the smooth cheesecake and crunchy candy pieces.
Perfect Substitutions
While traditional Butterfinger candy provides the iconic flavor, you can experiment with other candy bars like Reese's Cups, Snickers, or Heath bars for different flavor profiles. The peanut butter in the filling and glaze can be substituted with other nut butters such as almond or cashew butter for guests with peanut allergies. Just remember that natural nut butters may separate more easily, so choose processed versions for the most consistent results.
 Pin it
Troubleshooting Tips
The most common issue with cheesecakes is cracking, which occurs primarily from overmixing or overbaking. To prevent this, always have ingredients at room temperature before starting, mix just until combined rather than whipping, and remove the cheesecakes from the oven while the centers still have a slight jiggle. If your cheesecakes do crack, no worries – the peanut butter glaze will cover any imperfections beautifully.
Frequently Asked Questions
- → Can I use a different crust instead of Oreos?
Yes, you can substitute the Oreo crust with graham cracker crumbs or any other favorite cookie crumbs combined with melted butter.
- → What type of peanut butter is best for this recipe?
Use creamy peanut butter for the smoothest texture. Avoid natural peanut butter as it may separate and affect consistency.
- → Can I make these cupcakes ahead of time?
Absolutely! Store them in the refrigerator for up to five days without the glaze. Add the glaze and garnish just before serving.
- → Can I freeze these cheesecake cupcakes?
Yes, freeze the cupcakes without the glaze for up to 2 months. Thaw in the refrigerator overnight before adding the glaze and topping.
- → What should I do if the cheesecake filling cracks?
A slight jiggle in the center when baking ensures a smooth top. Overbaking may cause cracks, but topping it with the glaze and garnish will easily cover imperfections.