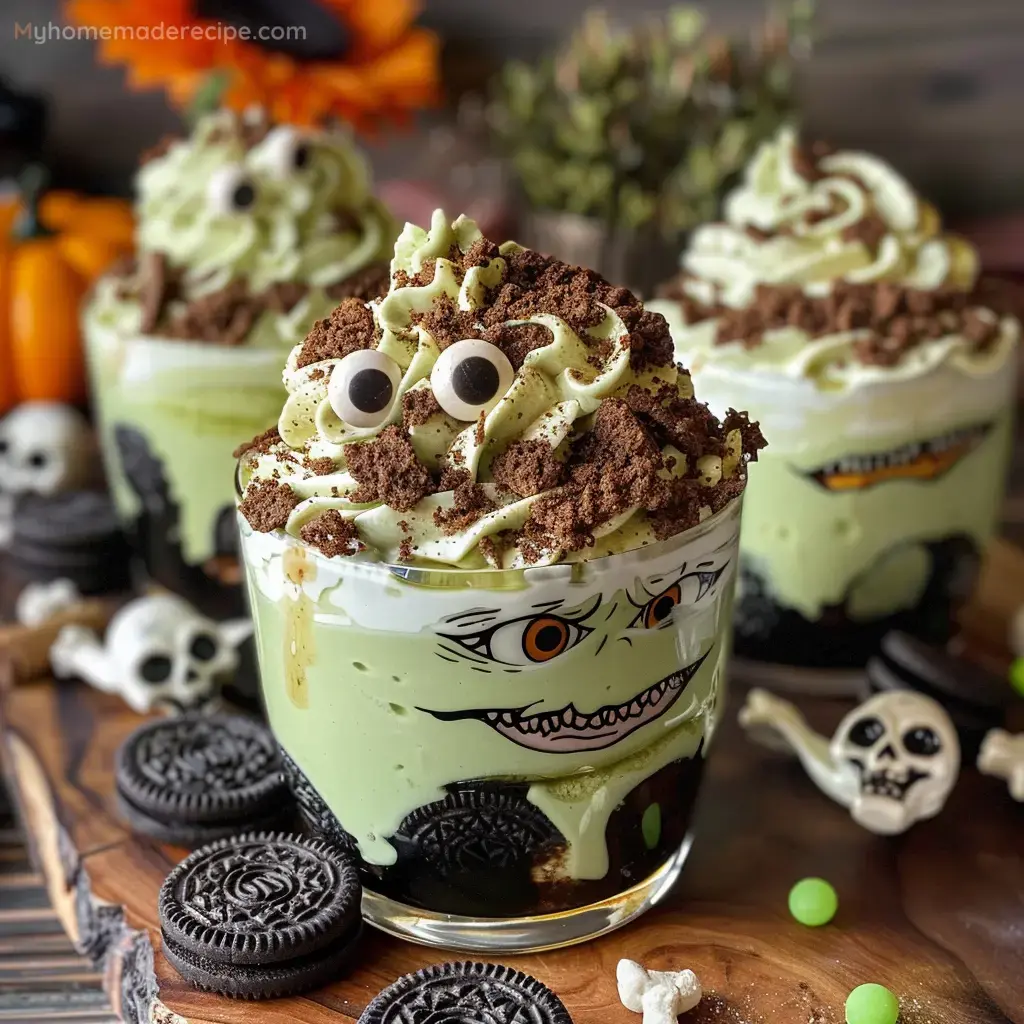
Zombie Dirt Pudding Cups are a fun and spooky Halloween treat that combines the smooth, creamy texture of pudding with the crunch of Mint Oreos and a mint twist. These no-bake desserts are perfect for all ages and add a festive touch to your Halloween celebrations.
Ingredients
- Mint Oreos: 18.7 ounce package (39 cookies), providing the delicious minty crunch for the dirt layers.
- Instant White Chocolate Pudding Mix: 3.3 ounce box, creates the creamy base for the pudding.
- Whole Milk: 2 cups, chilled, to mix with the pudding.
- Green Food Color: 6-8 drops, gives the pudding its spooky green hue.
- Cool Whip: 8 ounce tub, thawed, to fold into the pudding for a light and airy texture.
- Large Candy Eyeballs: 8-12, used to create the zombie faces.
- Small Candy Eyeballs: 8-12, for additional zombie decoration.
- Bone or Skeleton Sprinkles: Optional garnish, adds a fun, festive touch to the tops of the pudding cups.
Instructions
- Step 1: Prepare the Oreo Cookies
- Gently twist one side off 12 of the Oreo cookies so the filling remains intact. Set the cookie with exposed filling aside. Crush the remaining Oreos into a fine dirt-like texture in a food processor and set aside.
- Step 2: Make the Pudding
- In a large bowl, whisk together 2 cups of chilled whole milk, a 3.3 ounce box of instant white chocolate pudding mix, and 6-8 drops of green food color for 1-2 minutes, or until the pudding thickens. Fold the thawed 8 ounce tub of Cool Whip into the green pudding until well combined.
- Step 3: Assemble the Pudding Cups
- Sprinkle 1-2 tablespoons of Oreo crumbs into the bottom of your serving glass. Add a layer of the green pudding on top of the cookies. Continue creating layers of crushed cookies and pudding, ending with a layer of crushed Oreos.
- Step 4: Chill the Pudding Cups
- Chill the pudding cups in the refrigerator for an hour to allow the pudding to set.
- Step 5: Create the Zombie Decorations
- When you are ready to serve, gently press one large and one small candy eyeball into the exposed filling of the separated cookies to create the zombies. Press the zombies into the pudding so they are standing upright. Decorate the tops with bone or skeleton sprinkles if desired.
Serving and Storage Tips
Here are some tips on how to serve and store your Zombie Dirt Pudding Cups:
- Serve the pudding cups cold for the best texture and flavor.
- These pudding cups are perfect for Halloween parties, school events, or family gatherings.
- If you have leftovers, store them in an airtight container in the refrigerator for up to 3 days.
- For a fun twist, you can add gummy worms on top to create a more gruesome effect.
Helpful Notes
Here are some helpful notes to enhance your cooking experience:
- Make sure the Cool Whip is fully thawed before folding it into the pudding to ensure a smooth and creamy texture.
- If you don’t have a food processor, you can place the Oreos in a plastic bag and crush them with a rolling pin.
- Feel free to customize the layers with different types of cookies or add additional mix-ins like chocolate chips or crushed candy bars.
Tips from well-known chefs
Here are some tips from famous chefs around the globe:
- Chef Ina Garten: "Using high-quality chocolate and fresh ingredients always elevates the taste of your desserts."
- Chef Nigella Lawson: "Don’t be afraid to get creative with your decorations to make your desserts more visually appealing."
- Chef Alton Brown: "Chilling your desserts properly helps set the flavors and textures, making them more enjoyable."
 Pin it
