 Pin it
Ingredients
- 1 ½ cups chocolate cookie crumbs: You can use graham crackers or crushed Oreos for the base.
- ⅓ cup unsalted butter, melted: Helps to bind the cookie crumbs together for the crust.
- 2 cups semi-sweet chocolate chips: Melts into the creamy cheesecake filling.
- 3 (8 oz) packages cream cheese, softened: The base of the cheesecake, providing a rich and creamy texture.
- 1 cup powdered sugar: Adds sweetness to the cheesecake filling.
- 1 tsp vanilla extract: Enhances the flavor of the filling.
- ½ cup heavy cream: Whipped and folded into the mixture for a light and airy texture.
- 1 cup chopped Snickers bars: Adds a delightful surprise of caramel, peanuts, and chocolate.
- Pink food coloring (gel or liquid): Gives the cheesecake its vibrant pink hue.
- Whipped cream: For garnishing the top of the cheesecake.
- M&Ms: Adds a pop of color and fun to the topping.
- Chopped Snickers bars (optional): For an extra touch of Snickers flavor on top.
Instructions
- Step 1: Crust Time!
- Grind the chocolate cookies into crumbs using a food processor or a sealed bag and some muscle power. Combine the crumbs with melted butter and mix well. Press the mixture firmly into the bottom of a springform pan. Chill in the fridge for at least 30 minutes to set.
- Step 2: Chocolate Meltdown
- In a saucepan over medium heat, melt the chocolate chips, stirring constantly to avoid burning. Remove from heat and let cool slightly.
- Step 3: Creamy Dream
- With an electric mixer, whip the softened cream cheese, powdered sugar, and vanilla extract in a separate bowl until smooth and creamy. Slowly add the cooled chocolate, beating until well combined.
- Step 4: Snickers Surprise!
- Gently fold the chopped Snickers bars into the chocolate mixture.
- Step 5: Pinkify It!
- In a small bowl, add a few drops of pink food coloring to a bit of the chocolate mixture. Mix well. Add it back to the main bowl, mixing after each addition, until you reach your perfect shade of pink.
- Step 6: Whip It Good!
- In another bowl, whip the heavy cream to stiff peaks. Gently fold the whipped cream into the pink chocolate mixture until just combined. Don't overmix!
- Step 7: Assemble & Chill
- Pour the pink chocolate filling over the chilled crust. Smooth the top with a spatula. Cover the pan with plastic wrap and refrigerate for at least 4 hours, or until completely set.
- Step 8: Decorating Fun!
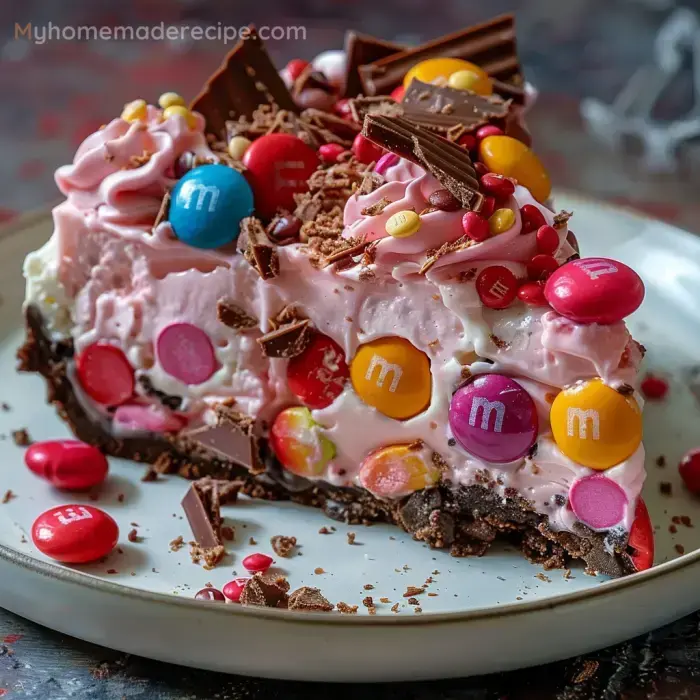
- Once chilled, remove the cheesecake from the pan. Garnish with whipped cream, colorful M&Ms, and chopped Snickers bars (optional) for an extra touch of fun. Enjoy this vibrant, fun, and delicious no-bake cheesecake at your next celebration!
Serving and Storage Tips
- Serve the Pink Paradise: No-Bake M&M Snickers Cheesecake chilled for the best taste and texture.
- Garnish each slice with a dollop of whipped cream and a sprinkle of M&Ms for a festive presentation.
- Store any leftovers in an airtight container in the refrigerator for up to 5 days.
- For longer storage, you can freeze the cheesecake for up to 2 months. Thaw overnight in the refrigerator before serving.
Helpful Notes
- If you don’t have a springform pan, you can use a regular pie dish, but lining it with parchment paper will make it easier to remove the cheesecake.
- Feel free to experiment with different colors of food coloring for various themes and occasions.
- To make slicing easier, dip your knife in hot water and wipe it clean between each cut.
Tips from well-known chefs
- Chef Gordon Ramsay recommends using high-quality chocolate for the best flavor and texture.
- Chef Nigella Lawson suggests adding a pinch of sea salt to the crust mixture to enhance the overall flavor.
- Chef Martha Stewart advises letting the cheesecake sit at room temperature for a few minutes before serving to soften slightly and enhance the flavors.
