
 Pin it
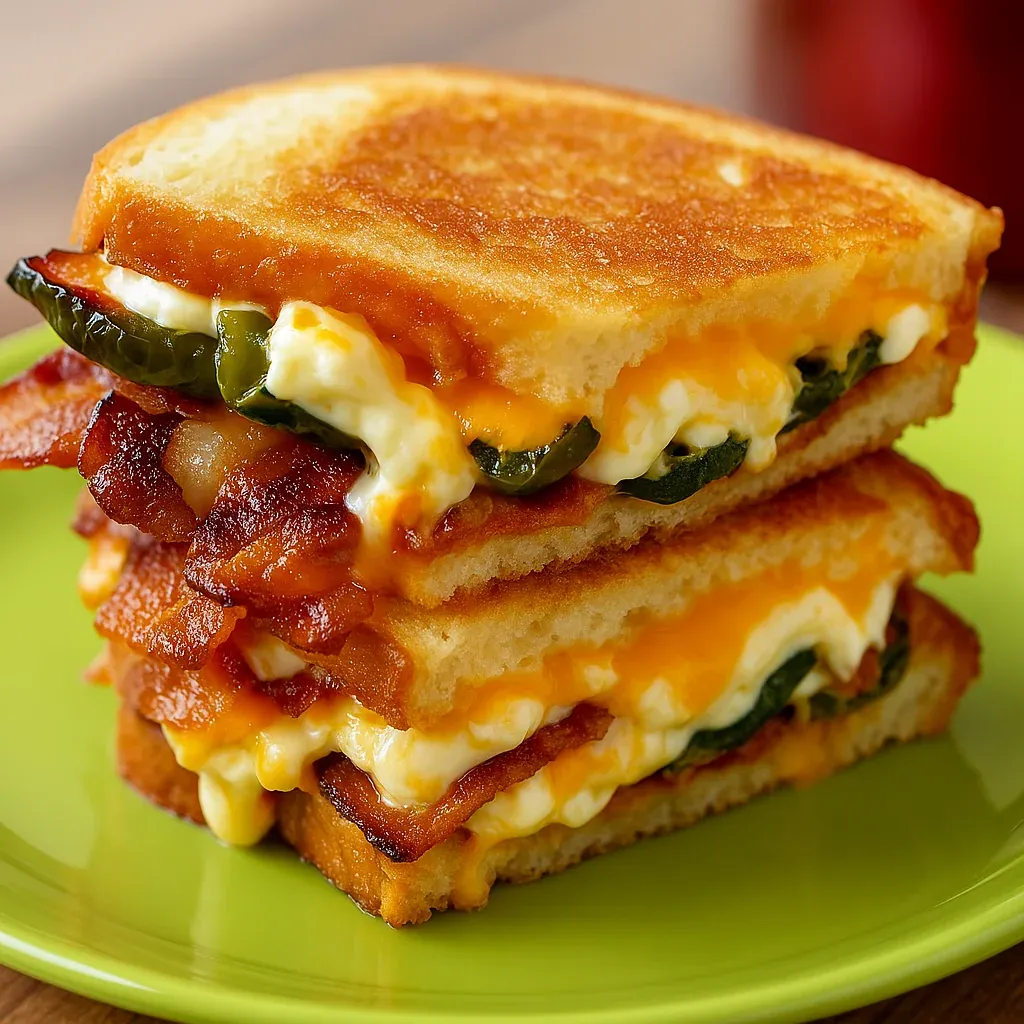
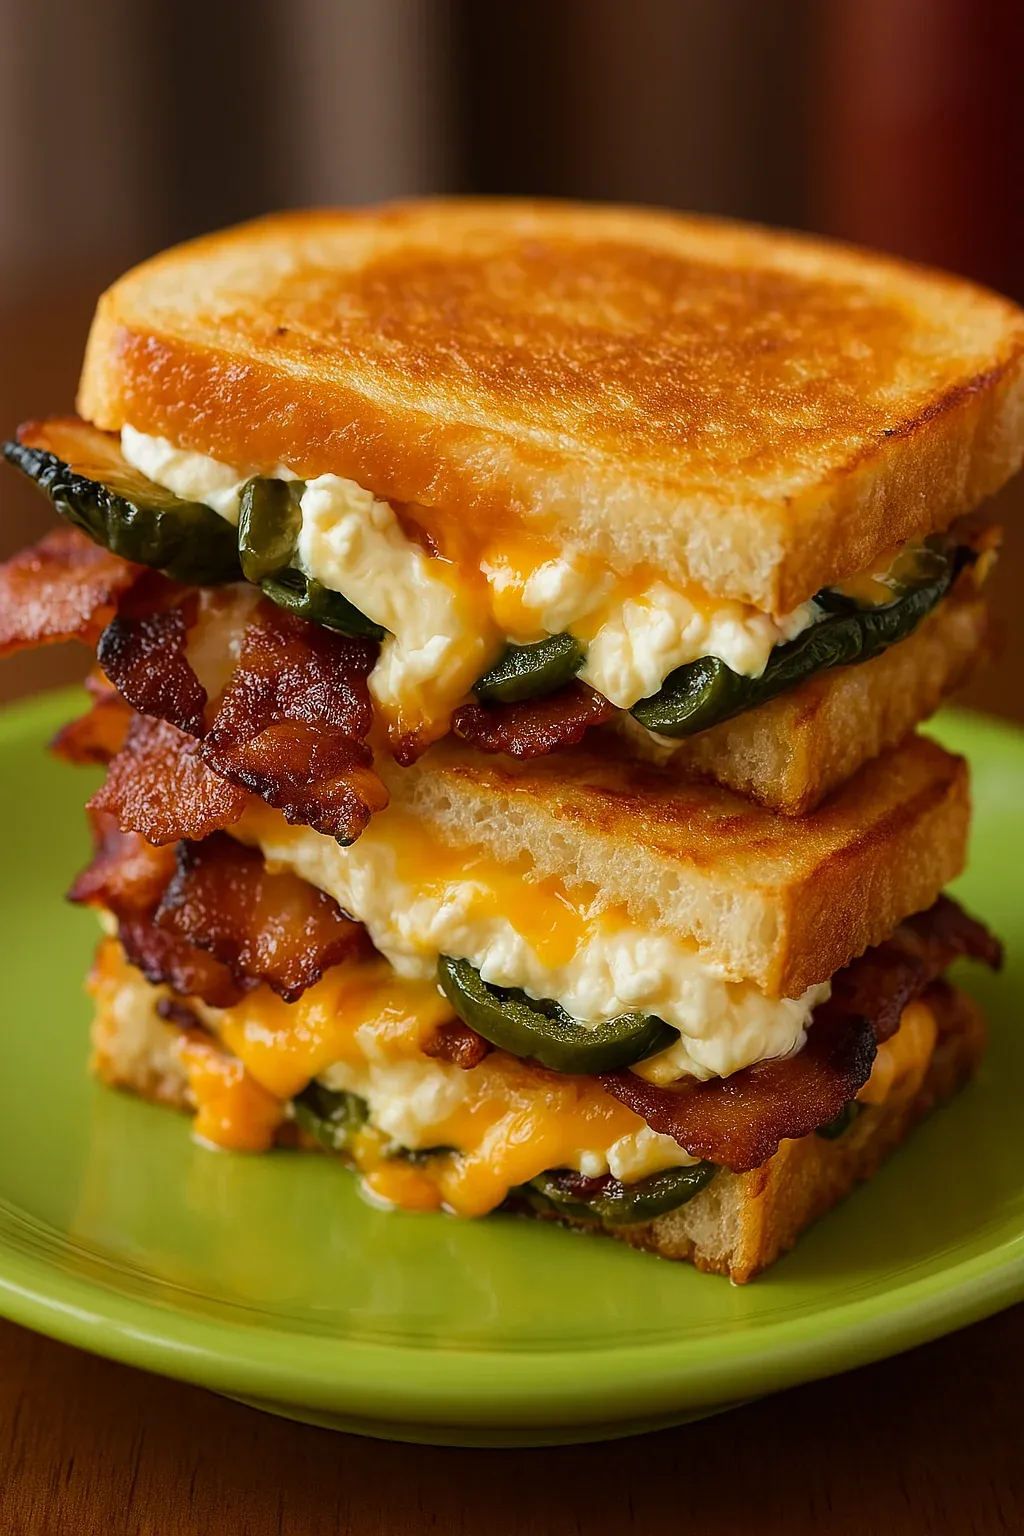
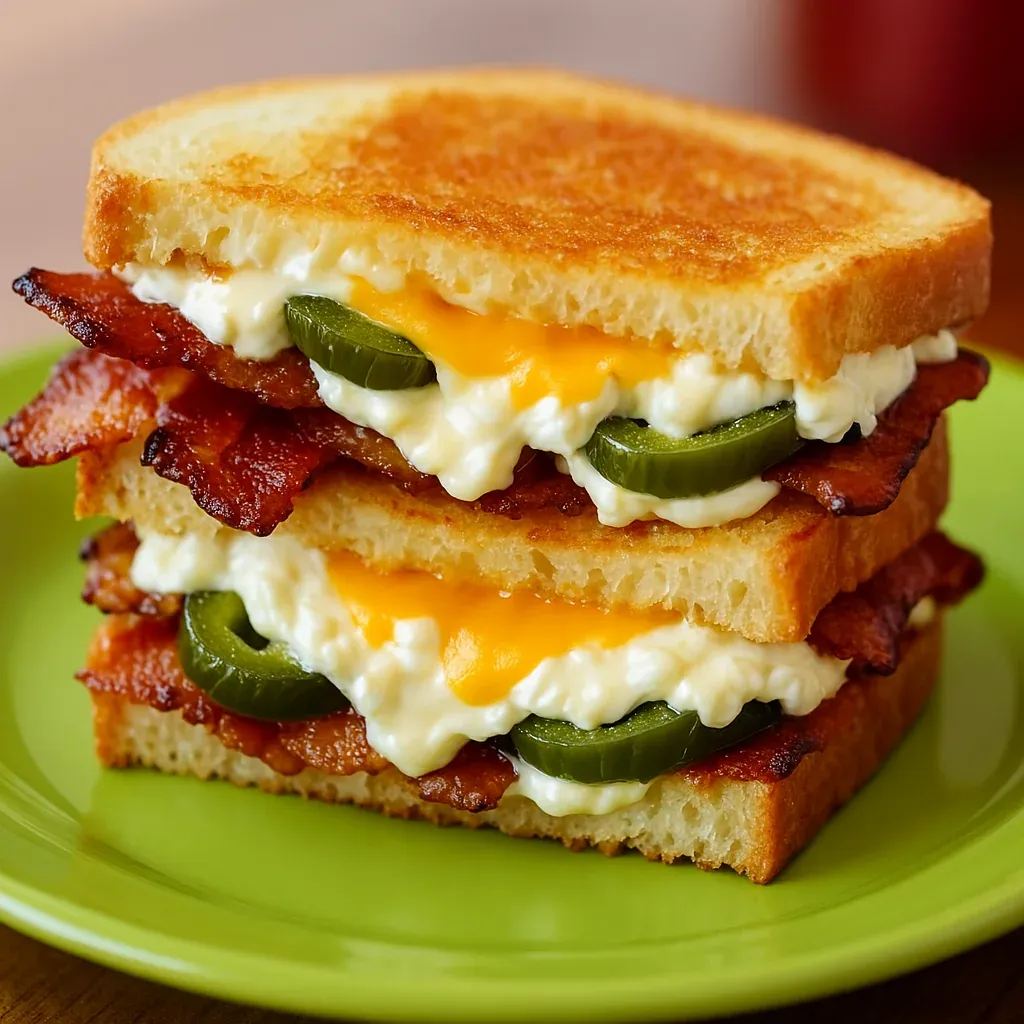
The humble grilled cheese sandwich gets a fiery makeover in this spectacular jalapeño popper version that combines everything you love about the classic appetizer with the comfort of melty, golden-brown grilled cheese. This indulgent creation takes your taste buds on a journey with each bite delivering creamy, spicy, smoky, and cheesy notes.
I made these for a weekend lunch when some friends dropped by unexpectedly, and they couldn't believe something so amazing came together so quickly. Even my brother-in-law who typically avoids spicy food came back for seconds!
Essential Ingredients
- Jalapeño Peppers - Select smooth, bright green peppers for milder heat; those with white lines or red spots will be significantly spicier
- Cream Cheese - Provides cooling creaminess that balances the pepper heat; use full-fat for the best meltability
- Bacon - Adds smoky flavor and essential crunch; thick-cut provides the best texture contrast
- Cheddar and Monterey Jack Cheeses - This combination gives you both sharp flavor and incredible meltability
- Quality Bread - A thick, sturdy bread is crucial for holding the hearty fillings; bakery Italian or sourdough works perfectly
- Butter - Creates that perfect golden-brown exterior that makes grilled cheese irresistible
I've found that letting the cream cheese come to room temperature before stuffing the peppers makes the process much easier and results in more even melting during baking.
Step-by-Step Cooking Instructions
- Step 1:
- Prepare the jalapeños safely - Preheat your oven to 375°F. Put on disposable food handling gloves to protect your skin from oils that can cause burning. Using a sharp knife, slice each jalapeño lengthwise and use a small spoon to carefully scrape out all seeds and white membranes to reduce heat. Rinse the hollowed peppers under cold water to remove any remaining seeds.
- Step 2:
- Create the pepper poppers - Pat the peppers dry with paper towels. Using about one ounce of cream cheese per pepper half, mound the cream cheese into each jalapeño cavity, being careful not to overfill. The cream cheese should sit comfortably in the pepper without overflowing.
- Step 3:
- Bake the stuffed peppers perfectly - Arrange the stuffed jalapeños on a parchment-lined baking sheet, cream cheese side up. Bake for 25-30 minutes until the peppers have softened but still maintain some structure and the cream cheese is bubbling with light golden spots. Remove from oven and let cool slightly.
- Step 4:
- Prepare the sandwich base - While the peppers are baking, cook 4 slices of bacon until crispy. Drain on paper towels and set aside. Have your cheese slices ready and at room temperature for better melting.
- Step 5:
- Assemble with precision - Lay out 4 slices of bread. Place one slice of cheddar cheese on two bread slices and one slice of Monterey Jack on the other two slices. Slice the cooled stuffed jalapeños into bite-size pieces, approximately 1/2-inch segments. Distribute the jalapeño pieces evenly over the bread slices with cheddar. Break the bacon slices in half and place them on top of the bread slices with Monterey Jack. Sprinkle chopped fresh cilantro over the bacon if desired.
- Step 6:
- Create the sandwiches - Carefully bring the topped bread slices together to form two complete sandwiches, creating layers of different cheeses and fillings between the bread.
- Step 7:
- Butter generously - Place several small pats of butter (about 1 tablespoon total) on the top of each sandwich, spreading it to cover the bread surface entirely.
- Step 8:
- Grill with patience - Heat a heavy skillet over medium-low heat. Once warm, place the sandwiches butter-side down in the skillet. Immediately butter the top sides of the sandwiches with more pats of butter while the bottom side cooks. Allow to cook slowly, about 3-4 minutes on the first side, until golden brown and crispy.
- Step 9:
- Flip with care - Using a wide spatula, carefully flip the sandwiches and cook for another 3-4 minutes on the second side. The slower cooking ensures that the cheese melts completely while the bread gets evenly toasted. If needed, cover with a lid for a minute to help the cheese melt.
- Step 10:
- Rest briefly before cutting - Remove the sandwiches to a cutting board and let them rest for 1-2 minutes before slicing diagonally. This brief rest helps the molten fillings set slightly so they don't completely ooze out when cut.
The first time I made these, I rushed the cooking process with the heat too high, resulting in browned bread but unmelted cheese. Taking the time to cook these low and slow makes all the difference in achieving that perfect gooey interior with crispy exterior.
 Pin it
My dad always preferred his food mild, while my mom loved spice. This sandwich became the perfect compromise in our house - Dad would use the younger, milder peppers with all seeds removed, while Mom would leave some seeds in her portion for extra kick.
Perfect Pairing Ideas
This hearty sandwich pairs wonderfully with a light side like a simple green salad dressed with vinaigrette to cut through the richness. The acidic dressing provides a welcome contrast to the creamy, cheesy sandwich.
For soup lovers, a cup of tomato soup makes the perfect dunking companion, with the acidity of the tomatoes balancing the sandwich's richness while staying true to classic grilled cheese traditions.
If you're serving these for a casual gathering, accompany them with some pickle spears and kettle chips for an elevated pub-style meal that will impress everyone at the table.
 Pin it
Storage and Make-Ahead Tips
To save time, you can bake the cream cheese-stuffed jalapeños a day ahead and store them in the refrigerator. Allow them to come to room temperature before assembling the sandwiches.
The fully assembled sandwiches don't store well, but you can prep all components separately and assemble just before cooking for a quick meal solution.
I've been making variations of this sandwich for years, but this particular combination hits all the right notes. There's something magical about how the cream cheese mellows the jalapeño heat while the bacon adds smoke and crunch. It's become my go-to when I want to make something a little special without spending hours in the kitchen. Every bite delivers that perfect balance of flavors that keeps you coming back for more - creamy, spicy, smoky, and unbelievably satisfying.
Frequently Asked Questions
- → How spicy is this jalapeno popper sandwich?
- The spice level is moderate since removing the seeds and membranes from the jalapenos reduces their heat considerably. Baking the jalapenos also mellows their spiciness. If you prefer more heat, you can leave some seeds and membranes intact, or if you want it milder, you can substitute with poblano peppers.
- → Can I make the stuffed jalapenos ahead of time?
- Yes! You can prepare and bake the cream cheese-stuffed jalapenos up to 2 days in advance. Store them in an airtight container in the refrigerator, then bring to room temperature before assembling your sandwiches.
- → What can I substitute for the Italian bread?
- Any sturdy bread works well for this sandwich. Sourdough, Texas toast, ciabatta, or artisan white bread are all excellent alternatives. The key is using bread that's substantial enough to hold all the fillings and won't get soggy while grilling.
- → Can I make this sandwich vegetarian?
- Absolutely! Simply omit the bacon or replace it with vegetarian bacon alternatives. The sandwich will still be delicious with just the cheeses and jalapeno poppers.
- → What sides pair well with this jalapeno popper sandwich?
- This rich sandwich pairs nicely with lighter sides like a simple green salad with vinaigrette, tomato soup, sweet potato fries, or pickle spears. The acidity or freshness of these sides helps balance the richness of the sandwich.