
 Pin it
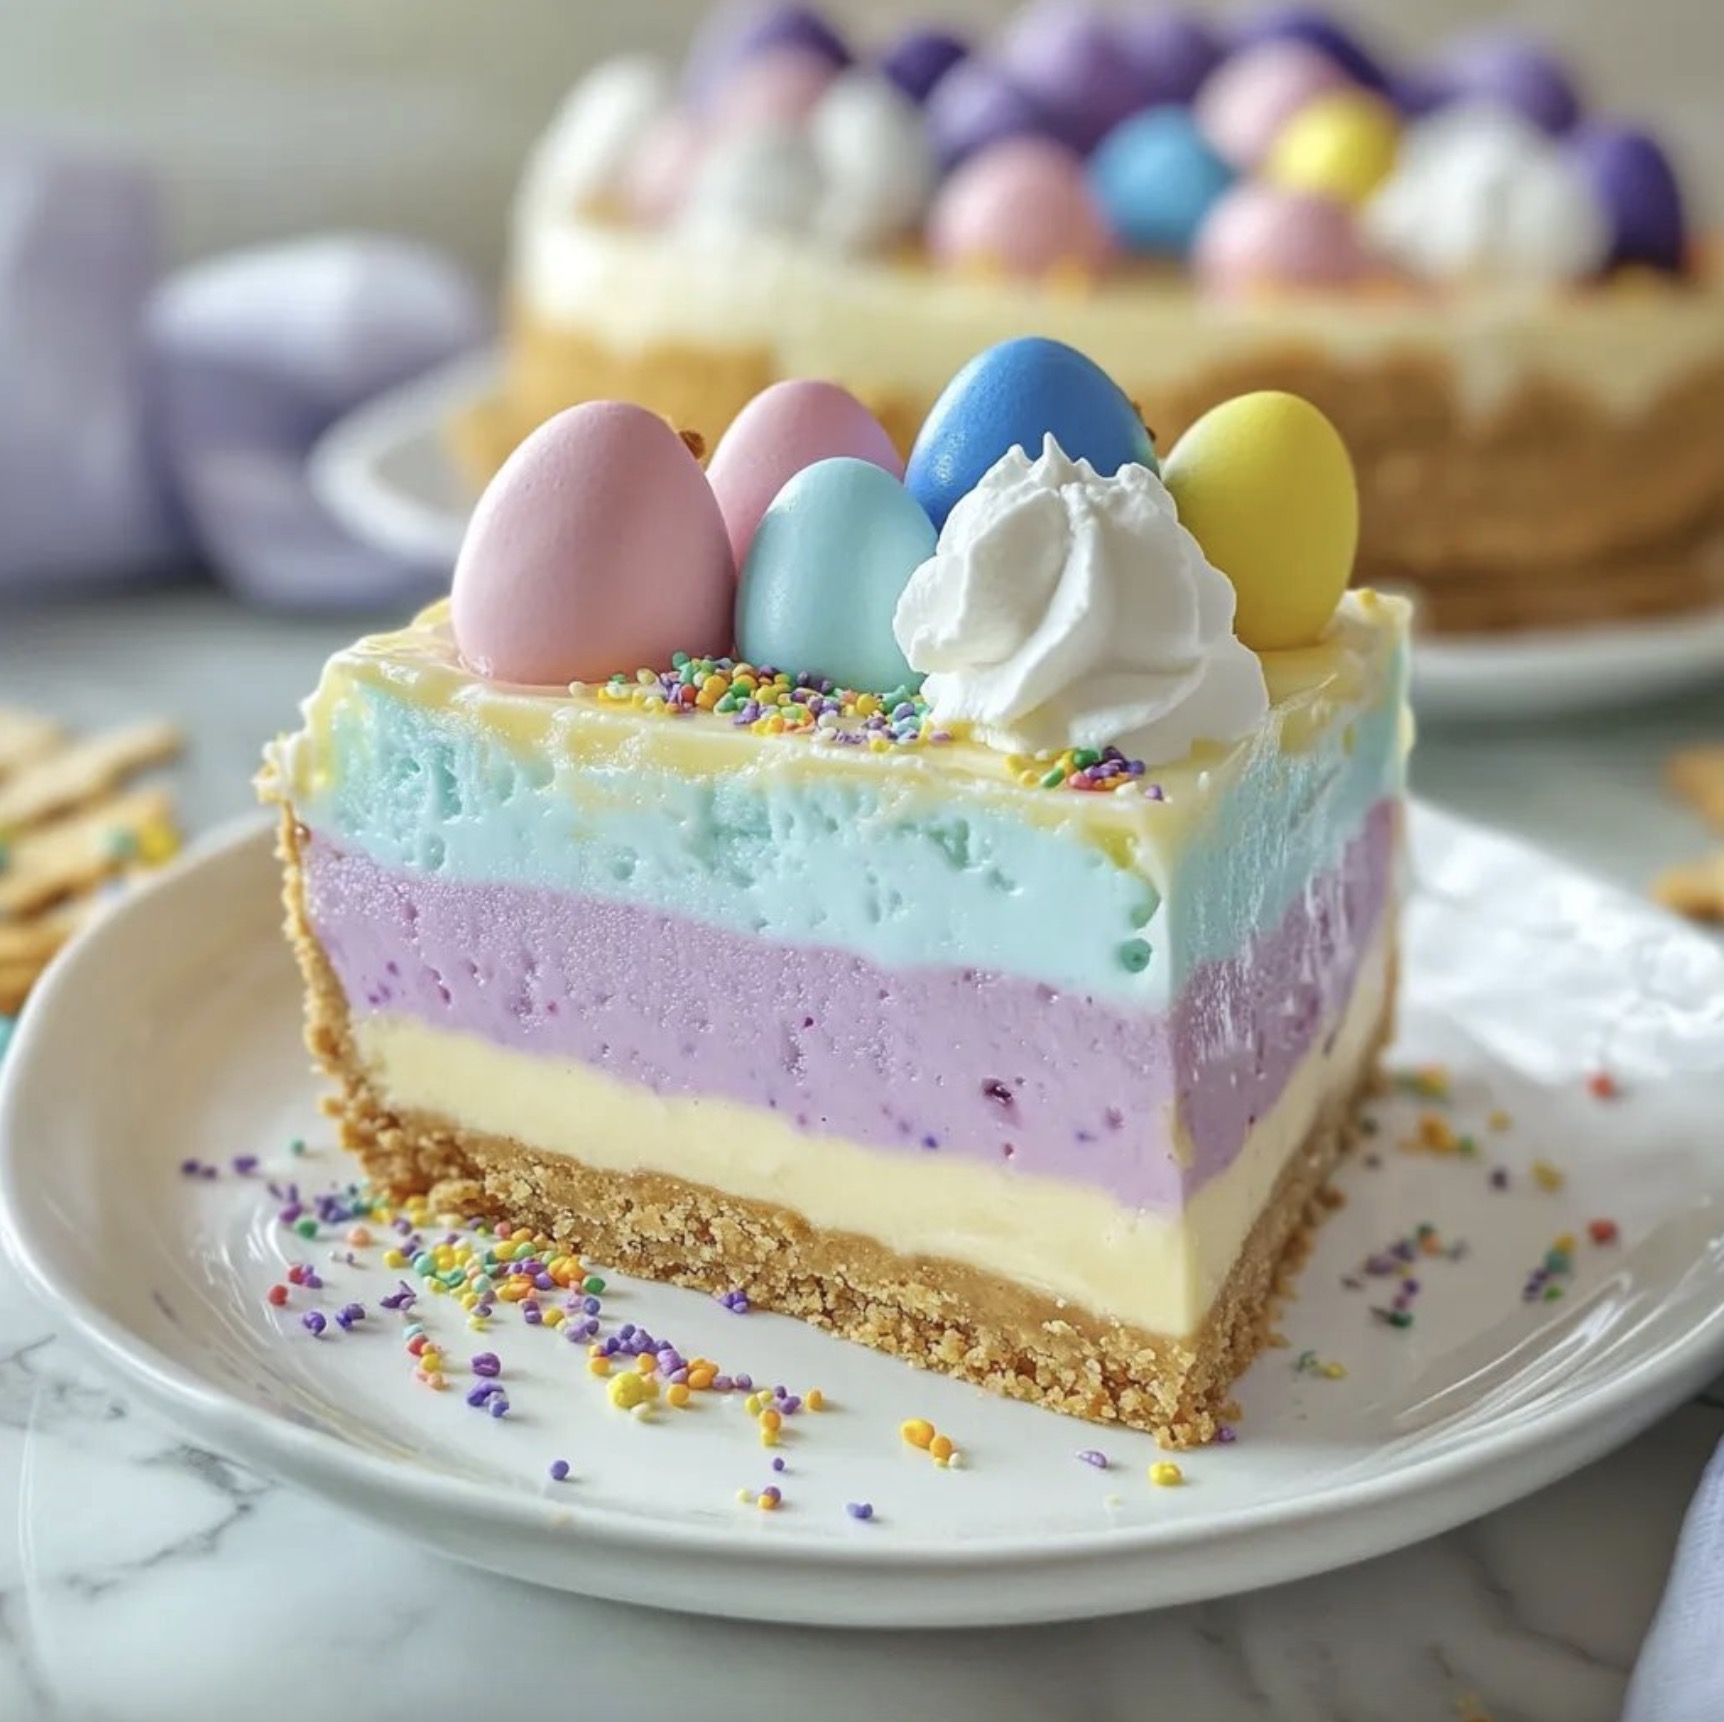
I found this Easter Jell-O pie by accident last year when I needed a fun, bright dessert for a family get-together. The smooth, pastel layers make an eye-catching treat that looks complicated but isn't hard at all. It's now what I always make for Easter and spring parties when I want something that's both playful and reminds me of childhood.
My niece spotted this pie at Easter dinner and couldn't hide her amazement. "It looks like a rainbow trick!" she squealed before asking for the largest piece. There's definitely something about those bright, gem-colored layers that wins over everyone from kids to grandparents.
Basic Supplies
- Flavored Jell-O: The trio of colors builds that stunning stacked look
- Cream cheese: Brings creaminess and changes the texture from bouncy to velvety
- Whipped topping: Makes everything airy for a cloud-like bite
- Graham cracker crust: Gives that needed crispy base against the soft filling
- Fun extras: The little sprinkles and candy eggs scream Easter fun
 Pin it
Assembly Steps
- Color Strategy
- Putting the palest shade (lemon) at the bottom creates the best visual impact when you cut a slice. This sequence - yellow, then blue, then purple - makes a beautiful spring-like gradient. I've played with other color combos, but this particular order works best for looks and taste. The lemony base adds a zingy foundation that plays well with the sweeter berry flavors above it.
- Cooling Breaks
- Those half-hour chill times between adding each layer aren't optional - they stop colors from mixing together. I found out the hard way that rushing makes a blurry mess instead of sharp layers. I always set an alarm so I don't forget the next step. My first attempt, I got busy with something else and left one layer in the fridge too long, which made spreading the next one tricky. Now I aim for just right - firm enough to hold up but not totally hardened.
- Working With Cream Cheese
- Your cream cheese absolutely must be room-temperature soft for easy mixing - cold blocks will leave bumps throughout your layers. I take mine out at least an hour before I start. When combining it with Jell-O, I grab a whisk and work fast so everything stays smooth before setting begins. The cream cheese doesn't just add richness - it helps stabilize everything for clean slices. Splitting it into exact thirds keeps all layers consistent.
- Layer Addition Tricks
- When you're adding a fresh layer over one that's set, pour super slowly and carefully, maybe over a spoon's back. This breaks the liquid's fall and keeps it from punching through your previous work. I usually hold my spoon just above the surface and let the mixture trickle gently down. Taking your time here makes the difference between crisp, distinct layers and a swirled mess.
- Final Touches
- Put the whipped topping and decorations on right before you serve for the freshest look. If you're planning ahead, you can make the main pie a day early, but save those final pretty touches until you're ready to show it off. I've noticed that Easter candy eggs sometimes leak color onto whipped cream if they sit too long. Sprinkles last better but still look best when they're just added.
- Cutting Method
- For super clean cuts, wet your knife in hot water and dry it between slices. This stops the layers from smearing and keeps each piece magazine-worthy. I've found that knives with thin blades work better than thick ones for keeping those pretty layers intact. When serving, a skinny pie server slips under the crust without breaking it apart.
My grandma, who usually sticks to old-fashioned desserts, tried this pie and immediately said, "This tastes just like what my mom used to make for Easter!" It's funny how simple recipes can sometimes bring back memories and family traditions when you least expect it.
Tasty Companions
This bright dessert is perfect after a springtime brunch. For birthday parties, it's a show-stopping treat kids go crazy for. At Easter dinner, it's a lighter choice compared to rich traditional sweets. My family loves having it with fresh coffee, where the bitter coffee notes balance out the pie's sweet fruitiness.
Tasty Twists
Switch up your Jell-O flavors for new color mixes - lime, orange and strawberry make a sunny citrus version. Try a chocolate graham crust for a totally different taste foundation. For fancy serving, make single portions in clear cups to show off the pretty layers. Last Easter, I added some fresh lemon zest to the yellow layer and tucked in a few blueberries to the blue section, which gave amazing little pops of real fruit flavor.
 Pin it
I've brought this Easter Jell-O pie to family meals, church gatherings, and kids' parties, and it always gets everyone excited. There's something almost magical about those vibrant, creamy layers that brings happiness to any spring celebration. My little girl has already asked if we can make the "color stack pie" for her birthday, even though it's months from Easter. Sometimes the recipes people remember most are ones that use simple stuff but add a touch of fun to create something that seems fancy but really isn't.
Frequently Asked Questions
- → Can I use different Jell-O flavors for this Easter pie?
- Absolutely! You can customize the flavors to your preference or to create different color combinations. Just maintain the same proportions (3 oz box per layer) and follow the same preparation steps. Try lime, strawberry, or orange for other spring colors.
- → How far in advance can I make this Easter Jell-O pie?
- You can make this pie up to 2 days before serving. Keep it refrigerated and add the whipped cream topping and decorations just before serving for the freshest presentation.
- → My layers are mixing together. What am I doing wrong?
- Make sure each layer is well-chilled and partially set (about 30 minutes) before adding the next layer. Also, pour each new layer gently over the back of a spoon to disperse the liquid and prevent it from breaking through the previous layer.
- → Can I make this pie without cream cheese?
- Yes, you can substitute the cream cheese with 8 oz of sour cream or plain Greek yogurt for a different but still creamy texture. Alternatively, you can simply use more whipped topping for a lighter version.
- → Is there a way to make this dessert vegetarian?
- Standard Jell-O contains gelatin, which is not vegetarian. For a vegetarian version, use plant-based gelatin alternatives like agar-agar or vegetarian gelatin mixes (follow package instructions for substitution amounts), and ensure your graham cracker crust doesn't contain honey.