
 Pin it
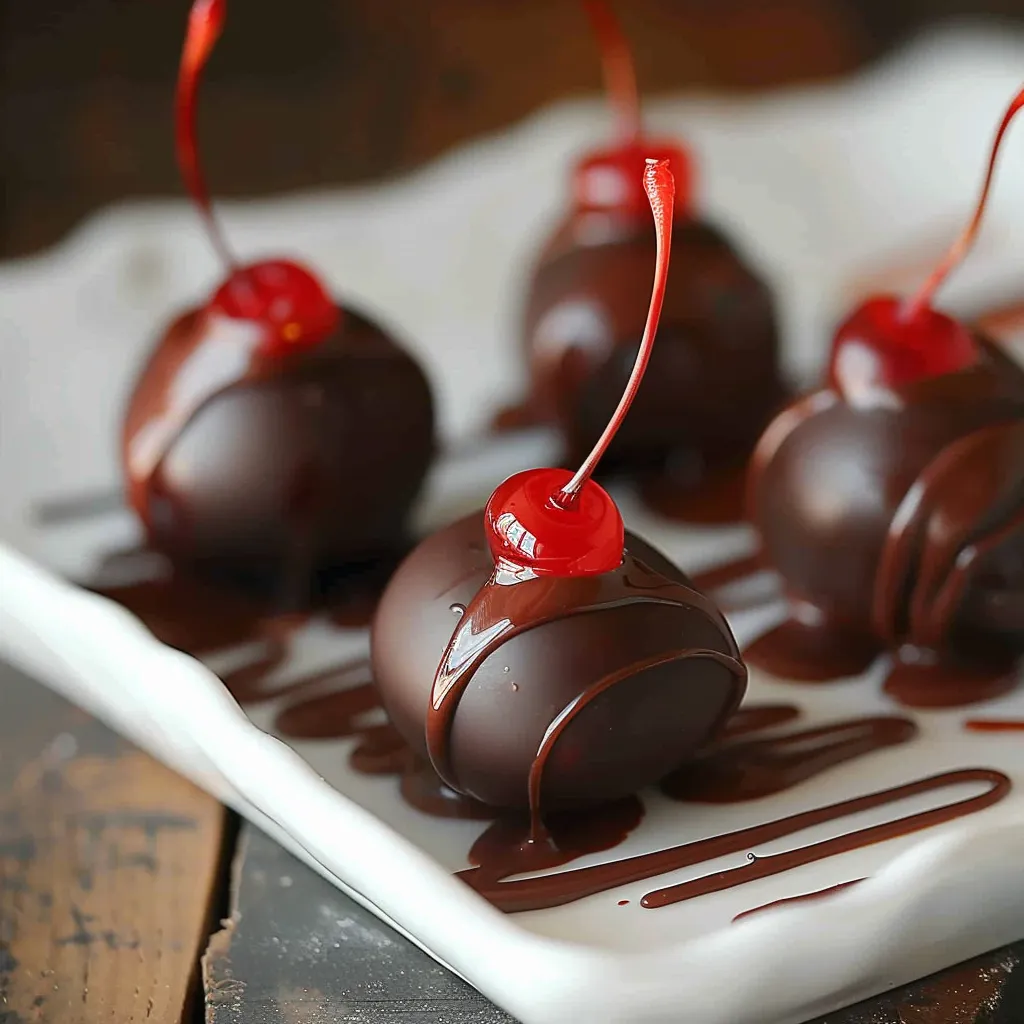
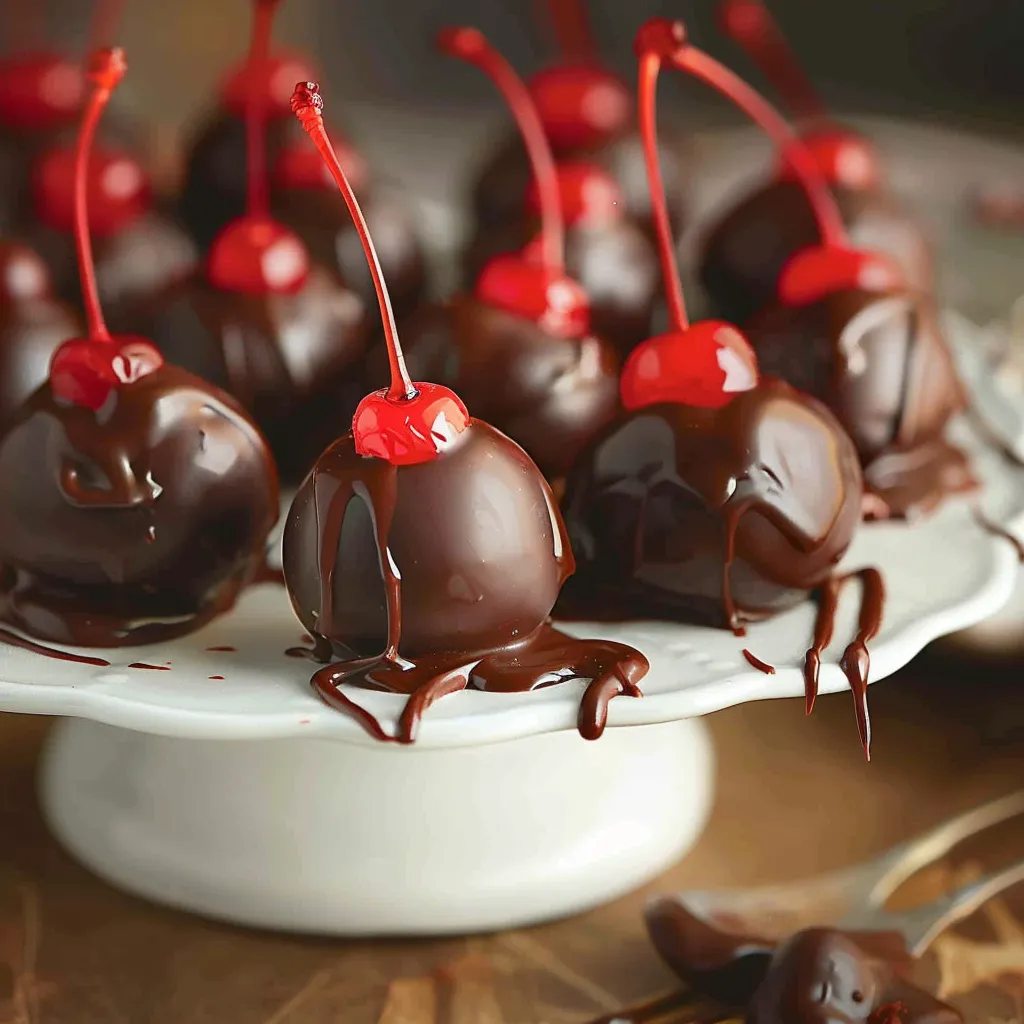
The moment you bite into a homemade Amish Chocolate Covered Cherry, you experience pure magic – that delicate chocolate shell giving way to reveal a sweet fondant layer, then finally releasing that burst of cherry and cordial liquid at the center. It's an explosion of textures and flavors that's nearly impossible to find in store-bought versions. In my kitchen, these cherries have become a holiday tradition that family members begin requesting as soon as autumn leaves start to fall.
Last Christmas, I packaged these in small decorative boxes for teacher gifts. My daughter's math teacher pulled me aside at the next parent conference and confessed she'd hidden them from her family so she wouldn't have to share. The secret? Taking the time to properly dry the cherries and allowing the finished candies to develop that magical liquid center naturally.
Essential Ingredients and Selection Tips
- Maraschino Cherries: Look for plump, firm cherries with good color. I prefer cherries with stems for a traditional look, but stemless work perfectly for a cleaner eating experience. If possible, choose cherries without high fructose corn syrup for a more natural flavor.
- Powdered Sugar: Use fresh powdered sugar without lumps. The fine texture creates the smooth fondant that will eventually transform into that luscious liquid center. I always sift mine first to ensure perfect results.
- Butter: Use salted butter at room temperature for easy mixing. The salt provides a subtle contrast to the sweetness of the fondant. European-style butter with higher fat content creates an even richer result.
- Chocolate: Choose a high-quality coating chocolate with cocoa butter (not palm oil) for the smoothest melt and best flavor. I use 60% cacao chocolate for the perfect balance between sweetness and chocolate intensity.
 Pin it
Detailed Cooking Instructions
- Prepare the Cherries:
- Open your jar of maraschino cherries and drain the juice through a fine-mesh strainer set over a bowl, capturing ¼ cup of the ruby-red liquid for your fondant mixture. Place the cherries on a triple layer of paper towels and gently pat them dry with additional towels. Allow them to air dry for at least 30 minutes, turning occasionally to ensure all sides dry evenly.
- Mix the Fondant:
- In a large mixing bowl, combine 3 cups of fresh powdered sugar with 3 tablespoons of room-temperature salted butter. Add the reserved ¼ cup of cherry juice. Using an electric mixer on medium speed, beat until the mixture begins to come together. Gradually add the remaining 1 cup of powdered sugar, ¼ cup at a time, continuing to mix until a soft, pliable dough forms.
- Chill the Fondant:
- Cover the bowl with plastic wrap and refrigerate for 20 minutes. This firming-up period makes the fondant easier to handle and helps it maintain its shape around the cherries.
- Shape Around Cherries:
- Remove the chilled fondant from the refrigerator. Scoop a portion approximately the size of a large marble (about 1 tablespoon) and roll it between your palms to form a ball. Flatten the ball into a disc about ¼-inch thick. Place a dried cherry in the center of the disc, stem pointing up if using stemmed cherries. Gently wrap the fondant around the cherry, completely encasing it except for the stem.
- Chill Again:
- Return the fondant-covered cherries to the refrigerator for at least 20 minutes or until firm.
- Melt the Chocolate:
- Place 12 ounces of high-quality chocolate in a microwave-safe bowl. Microwave on 50% power in 30-second increments, stirring thoroughly between each interval.
- Dip the Cherries:
- Remove the chilled cherry balls from the refrigerator. Working one at a time, drop a fondant-covered cherry into the melted chocolate, ensuring even coating.
- Allow to Set:
- Let the chocolate-covered cherries set at room temperature in a cool, dry place until the chocolate is completely firm, about 1-2 hours.
The first time I served these at a holiday gathering, a friend who claimed to dislike chocolate-covered cherries tried one reluctantly – then went back for three more. She explained that she'd only ever had the mass-produced kind and was amazed by the difference in flavor. It's that fresh, homemade quality that makes these cherries truly special.
I'll never forget making these cherries with my grandmother when I was young. She told me that good things come to those who wait as we carefully packed the freshly dipped candies into tins lined with waxed paper. That week of anticipation taught me patience in the kitchen – a lesson that has served me well in all my cooking endeavors since.
 Pin it
Frequently Asked Questions
- → How long do homemade chocolate covered cherries last?
- Homemade chocolate covered cherries will last for 1-2 weeks when stored in an airtight container at room temperature. The fondant around the cherry will liquefy somewhat over time, creating that classic chocolate covered cherry experience.
- → Can I use fresh cherries instead of maraschino cherries?
- Fresh cherries aren't recommended for this recipe as they contain too much moisture and don't have the same shelf stability. Maraschino cherries work best because they're preserved and have the right texture and flavor.
- → Why is my fondant too sticky to work with?
- If your fondant is too sticky, add more powdered sugar a tablespoon at a time until it reaches a workable consistency. Also, make sure to thoroughly dry the cherries before wrapping them in fondant, as excess moisture can make the mixture sticky.
- → Can I make these without stems?
- Yes, you can use stemless maraschino cherries. Instead of holding them by the stem to dip in chocolate, use a fork to lower them into the chocolate and lift them out, allowing excess chocolate to drip through the tines before placing on parchment paper.
- → How do I prevent the chocolate from seizing when melting?
- To prevent chocolate from seizing, melt it slowly using 30-second microwave intervals and stirring between each, or use a double boiler with simmering (not boiling) water. Make sure all utensils are completely dry, as even a drop of water can cause chocolate to seize.