
 Pin it
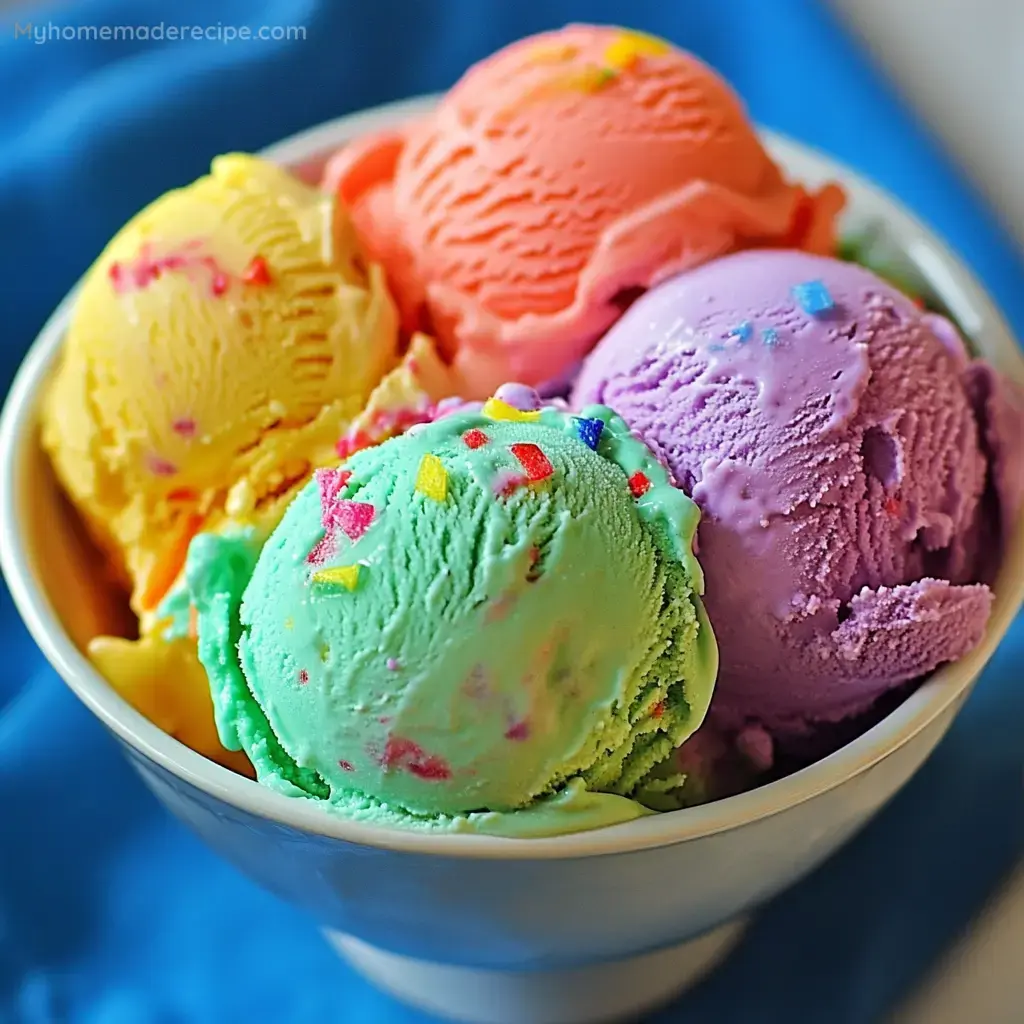
Homemade Rainbow Ice Cream is a fun and vibrant treat that's perfect for adding a splash of color to any occasion. Whether you're hosting a party, celebrating a special event, or just looking to brighten up your day, this ice cream is sure to be a hit. Made with a creamy base and tinted with an array of colorful food dyes, each scoop is a delightful mix of flavors and colors. Let's explore the ingredients that make this ice cream as delicious as it is beautiful.
Ingredients
- Heavy Cream: 2 cups. Provides the rich and creamy texture that makes this ice cream so indulgent.
- Whole Milk: 1 cup. Adds a smooth consistency to the ice cream base.
- Granulated Sugar: 3/4 cup. Sweetens the ice cream, balancing the richness of the cream.
- Vanilla Extract: 2 teaspoons. Adds a subtle, warm flavor that complements the sweetness of the ice cream.
- Food Coloring: Red, orange, yellow, green, blue, and purple. These colors are used to create the rainbow effect, making the ice cream visually appealing and fun to eat.
Instructions
- Step 1: Prepare the Ice Cream Base
- Start by whisking together 2 cups of heavy cream, 1 cup of whole milk, 3/4 cup of granulated sugar, and 2 teaspoons of vanilla extract in a large bowl. Mix until the sugar is completely dissolved. This forms the creamy foundation for your rainbow ice cream.
- Step 2: Chill the Base
- Cover the bowl with plastic wrap and place it in the refrigerator to chill for at least 2 hours. Chilling the base ensures that the ice cream churns properly, resulting in a smoother and creamier texture.
- Step 3: Divide for Coloring
- Once the base is thoroughly chilled, divide it evenly into smaller bowls, depending on how many colors you want to create. Each bowl will be tinted with a different food coloring to achieve the rainbow effect.
- Step 4: Color the Base
- Add a few drops of food coloring to each bowl and stir until the desired color is achieved. You can adjust the intensity of the colors by adding more or less food coloring. The vibrant colors are what make this ice cream so visually appealing.
- Step 5: Freeze the Ice Cream
- If Using an Ice Cream Maker: Follow the manufacturer’s instructions to churn each color separately. After churning, transfer each batch to a freezer-safe container, layering the colors to create a rainbow effect. For a marbled look, gently swirl the colors with a knife or skewer.
If You Do Not Have an Ice Cream Maker: Pour each colored base into a shallow dish, cover, and place it in the freezer. Freeze until firm, about 45 minutes, then stir vigorously with a fork or whisk to break up any ice crystals. Repeat the freezing and stirring process every 30 minutes until the ice cream is creamy and smooth. Layer the colors in a container as described above. - Step 6: Final Freeze
- Once all the layers are added, cover the container and freeze the rainbow ice cream until it is firm enough to scoop, at least 4 hours or overnight. This step ensures the ice cream sets properly and is ready to be served.
- Step 7: Serve
- Scoop the rainbow ice cream into bowls or cones and enjoy! This colorful treat is perfect for parties, celebrations, or just adding a bit of cheer to your day.
Serving and Storage Tips
- Homemade Rainbow Ice Cream is best served straight from the freezer to preserve its vibrant colors and creamy texture. Scoop it into bowls or cones for a fun and visually appealing dessert.
- If you're planning to serve this ice cream at a party, consider pre-scooping it and storing the scoops in the freezer until ready to serve. This makes for easy and quick serving, especially for large groups.
- Leftover ice cream can be stored in an airtight container in the freezer for up to 2 weeks. To prevent ice crystals from forming, press a piece of plastic wrap directly onto the surface of the ice cream before sealing the container.
- If your ice cream becomes too hard in the freezer, let it sit at room temperature for a few minutes before scooping to allow it to soften slightly.
- For an extra festive touch, top your rainbow ice cream with sprinkles, whipped cream, or even a drizzle of chocolate sauce. These additions will make your colorful dessert even more delightful.
Helpful Notes
- Adjust the amount of food coloring to your preference. For a pastel effect, use fewer drops, or add more for a bold and vibrant look.
- If you want to create a tie-dye effect, layer the colors in the container and use a skewer to swirl them together before the final freeze.
- This recipe is highly customizable—feel free to experiment with different flavors and colors. For example, you can add fruit purees or flavored extracts to the base for a unique twist.
Tips from Well-Known Chefs
- Chef David Lebovitz recommends using high-quality vanilla extract to enhance the flavor of the ice cream base.
- Chef Christina Tosi suggests adding a pinch of salt to the base to balance the sweetness and bring out the flavors of the cream and vanilla.
- Chef Jacques Torres advises chilling the ice cream base overnight for the best texture and flavor development before churning.