
Alright, folks, let’s huddle up and talk skillet smackdown! When you’re hankering for a burger that’s juicier than a reality TV show feud, your pan choice is clutch. Now, I know you might be thinking, “Isn’t a skillet just a skillet?” Oh, my dear grill-less friend, it’s time to level up your kitchen game.
Importance of Even Heat Distribution
First up on our burger journey is the quest for that perfect sear. You know, the kind that makes your taste buds do a happy dance? The secret sauce to that sear is even heat distribution. Nobody wants a burger that’s charred on one side and lookin’ like a pale ghost on the other, right?
Cast Iron vs Non-Stick Pans
Enter the heavyweight champ, the cast iron skillet. This bad boy spreads the heat like gossip in a small town and holds onto it like your grandma hangin’ onto her secret cookie recipe. But hey, if wrangling a cast iron is not your rodeo, a heavy-bottomed non-stick pan can sneak in like a ninja and do the job just fine 🥋. But remember, no metal utensils on that surface unless you want a scratch art masterpiece.
Preparing Your Pan for Cooking
And talk about preparation, it’s not as tough as assembling IKEA furniture, promise. You wanna get that skillet hotter than the summer asphalt. If you’re workin’ with cast iron, go ahead and give it the spa treatment with a little oil – it’s like moisturizer for your pan, keeps it young and non-sticky. Non-stick pans, a touch of oil or butter will do – they’re low-maintenance like that.
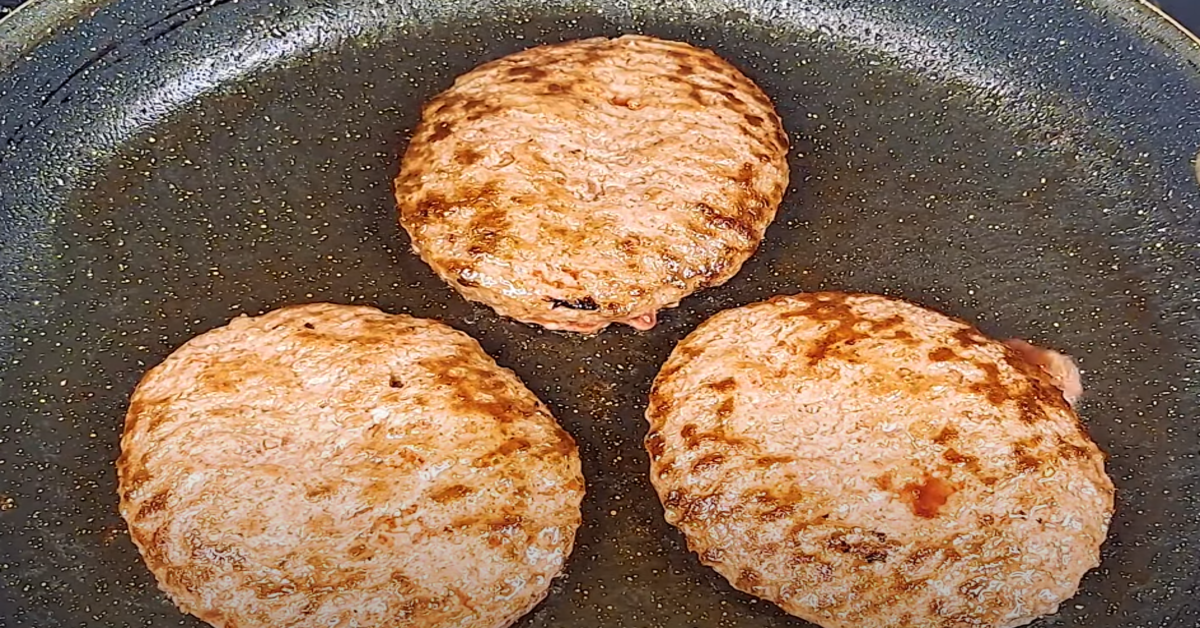
Alright, next up on our burger bash is diving into the frosty realm of cooking from frozen. Yeah, you heard me. Stay tuned as I reveal the magical mysteries of turning your frozen patty into a sizzling sensation without the thaw. Spoiler alert: it’s all about that heat, baby! 🔥
The Art of Cooking from Frozen
Listen up, folks! Thawing? Ain’t nobody got time for that when hunger strikes like a freight train. So, what’s a ravenous soul to do? Cook those burgers straight from the Arctic tundra of your freezer, that’s what. Now, don’t get frostbite – I’m here to guide you through the sizzling safari of cooking from frozen.
First off, let’s tackle the pros and cons. Cooking from frozen means no prep time, which is pretty sweet if you ask me. But, and this is a big but, you risk the chance of a charred outside and a center colder than your ex’s heart if you don’t do it right. Fear not, my friends, that’s where temperature control comes into play.
Fire up that stove to a medium-high heat. You’re looking for a sweet spot where the outside gets a golden-brown tan without turning into a burnt crisp. Think Miami Beach, not Death Valley. Now, when it’s time to flip that patty, wait until you see those juices pooling on top – a sign she’s ready to turn over. Timing is everything; too soon and you’ll leave all the good stuff stuck to the pan, too late and your smoke alarm might get a workout.
And while we’re flipping burgers and taking names, here’s a hot tip from a fellow burger aficionado: check out this nifty guide on cooking brats. Because variety is the spice of life – and speaking of spice, that’s our next thrilling topic!
But let’s not forget our frozen friends in the pan. As they sizzle away, remember – patience, young grasshopper. It’s the secret ingredient to burgers that’ll make your taste buds sing. So, keep an eye on the prize, and let’s get ready to dive into the world of Seasonings and Spices: Jazzing Up Your Burger next!
Seasonings and Spices: Jazzing Up Your Burger
Oh boy, let me tell ya, when it comes to burgers, spices are your BFFs. Now, don’t get me wrong, salt and pepper are like the dynamic duo of the seasoning world, but why stop there? Let’s kick it up a notch and dive into the spice drawer to make those taste buds do the tango! 🌶️
Creative Seasoning Combinations
Picture this: Your everyday burger, but she’s got a new ‘do. We’re talking smoky paprika, earthy cumin, and a touch of garlic powder. Maybe even a whisper of onion powder, because why not? It’ll be like a flavor party in your mouth and everyone’s invited. Don’t be shy to mix in some herbs too – a little oregano or thyme can bring a surprising twist to the mix. So, go ahead, be the mad scientist of your kitchen and conjure up a concoction that’ll make your neighbors wanna hop the fence for a bite.
When to Season for Best Flavor
Timing is everything, right? Sprinkle those spices on your patties right before they hit the pan. This way, the heat wakes up those sleeping flavors and gets ‘em ready to mingle. And if you’re feelin’ extra, why not let those spiced-up patties chill in the fridge for an hour before cooking? Gives ‘em time to soak up all that goodness. Trust me, your palate will thank you.
Tips for Even Spice Distribution
- Grab a bowl, drop those patties in, and let’s get tossing – gently, now. You want those spices spread out like gossip in a small town.
- If you’re lookin’ for a crusty outer layer with a pop of flavor, press the spices onto the surface of the patty. It’ll create a little spice crust that’s just divine.
- Make sure your patties are feeling the love all around – a uniform sprinkle means every bite is as delectable as the last.
Now don’t just sit there like a bump on a log; go ahead and give these tips a whirl! And remember, the burger is just the beginning – next up, we’re gonna talk flipping techniques. Because, let’s face it, nobody wants a burger that’s cooked on the outside but colder than your ex’s heart in the middle. Stay tuned, burger aficionados! 🍔
Mastering the Flip for a Succulent Patty
Now, let’s talk strategy – flipping your burger without losing all that juicy goodness. It’s an epic saga, with the spatula as your sword and the skillet as your battlefield.
The Perfect Flip Timing
First off, you gotta know when to flip. Too soon and you’ll miss out on that golden sear; too late and you’re looking at a hockey puck. Aim for about 3-4 minutes on the first side. You’ll know it’s time when the edges brown up and the patty lifts off easy like a prom date’s corsage.
Flipping Techniques That Keep Juices In
Alright, you’ve got the timing down, but what about the flip itself? Here’s the scoop – slide that spatula gently under the patty, lift it just enough to clear the skillet, and then give it a swift, confident turn. Don’t play hot potato; one smooth motion is the ticket. And please, oh please, don’t press down on the patty after flipping. That’s like pushing the emergency stop on the juice train – big no-no!
Avoiding the Dreaded Break-Apart
- Keep your spatula oiled – a sticky spatula is a sad spatula.
- Wait for that crust to form – it’s the glue that holds the patty together.
- Use a wide spatula – the wider, the better for stability.
Now, I know you might be itchin’ to see if your burger’s done yet, but hold your horses. We’re about to dive into achieving the desired doneness with ease, and trust me, you don’t want to miss these juicy details.
So, you’ve flipped, now what? Stick around – we’re just getting to the meat of it.
So, you’ve got your skillet sizzling and your frozen patty cooking – now let’s talk about hitting that sweet spot of doneness. Trust me, you don’t need to be a grill master to nail the perfect medium rare or well-done in your very own kitchen, and yeah, you can totally do it without a thermometer. You know how your Aunt Sally insists you can “feel” when a cake is done? Well, she wasn’t totally off her rocker.
Achieving the Desired Doneness with Ease
Look, I get it. Not everyone wants to live life on the edge with a little pink in the middle of their burger. So here’s the scoop on cooking your stovetop patties to your preferred doneness – no blood, sweat, or tears required.
Visual and Tactile Doneness Cues
Let’s get visual… and tactile! Press down on the center of the patty with your spatula – if it’s firm with a little give, you’re looking at medium-well. Feeling adventurous? Gently press the center with your finger. If it’s soft and bouncy – welcome to medium rare territory, my friend.
Testing for Doneness Without Cutting
Who wants to slice into a perfect burger before it’s time to eat? Not me, that’s for sure. Instead, give the sides a little nudge. If they’re still squishy, keep that patty cooking. If the juice runs clear or it starts firming up, it’s time to wrap up the show. It’s all about finesse – think less Hulk smash, more gentle caress.
Adapting Cooking Time for Varying Preferences
Now, for the couples out there who can never agree – Tom likes it practically mooing, while Jerry’s out for that charred crunch – here’s the lowdown: For a well-done patty, you’ll cook about 4-5 minutes each side on medium heat. But for a little bit of pink, a.k.a. medium rare, aim for 2-3 minutes each side. And don’t forget – these babies need a minute to rest before serving. They’re tired from all that sizzling.
Remember, the thickness of your burger will play a huge role in cooking time. Waving around a thin patty? Shave off a minute or two. Wrestling with a thick one? Add a little more time. You got this!
Alright folks, let’s gussy up those patties – it’s time to talk toppings and accoutrements. You thought the burger was the star of the show? Wait till you see what’s next…
Toppings and Accoutrements: Elevating Your Burger
Alright, you’ve got that burger sizzling on the stove to a tune that’s music to your ears. But wait, there’s more. Let’s jazz up this shindig with toppings crisper than a fresh dollar bill! You know, those extra bits that turn your average patty into a masterpiece fit for a king – or a ravenous middle-aged blogger who knows what’s up. 😉
Now, we ain’t talking just a slab of tomato and some lettuce. Nah, we’re swinging for the fences with Pico de Gallo, caramelized onions (oh, the sweetness!), and maybe some avocado slices if you’re feeling fancy. Want a kick? Slap on some jalapeños. Want to be transported to cheese paradise? Gorgonzola or a sharp cheddar could pave the way! 🧀
- Suggested Toppings for a Gourmet Experience
- Fresh or sautéed mushrooms – adds umami like nobody’s business.
- Crispy bacon – because bacon is, well, bacon. ‘Nuff said.
- Artisan pickles – pucker up for flavor town.
- A fried egg – gooey yolk sunshine on a cloudy day.
If we’re getting fancy with the toppings, let’s not forget about layering. A pro-tip: put those leafy greens under your hot patty to prevent the bun from getting soggy. Nobody likes a soggy bottom! 🚫
How to Prepare and Layer Toppings
Chop, slice, dice, or grate, make sure your toppings are prepped and ready to rock once that burger is done. Keep ’em fresh, and make sure those flavors complement each other like PB&J. It’s all about balance. You don’t want those power-packed onions overtaking every other taste on that patty!
Ready to keep the party going? You betcha! Next up, we’re diving deeper than a philosophical debate in a coffee shop. We’re talking how to serve these stovetop beauts as if they deserve their own food magazine cover. Let’s keep those salivary glands working overtime!
No Grill? No Problem! Serving Stovetop Burgers
Grilling might be the poster child of a sizzlin’ summer burger bash, but hey, when the weather’s not cooperating or you’re fresh out of charcoal, your trusty stovetop is a shining knight in stainless steel armor 🛡️. So, let’s chat about how to serve up those stovetop beauties like you’re the gourmet guru of your very own diner.
You’ve just slaved over that skillet, flipping patties like they’re hotcakes, and now it’s showtime. You’re aiming for jaw-dropping presentation, right? Plating your burger is more than just slapping it on a bun; it’s an art form, my friend.
Pro Tip: Always toast those buns, folks! A little crispiness adds a world of texture and keeps them from going soggy the second they meet your masterpiece patty.
- Let’s Talk Layers – Start with a glossy toasted bun, add some vibrant green lettuce for contrast, and lay on that juicy patty. Then it’s a free-for-all: slices of ripe tomato, a ring of red onion, and that ooey-gooey cheese.
- Color is King – Research says we eat with our eyes first, so make it a feast for the senses 🤩. A pop of color with some pickles or a special sauce drizzle does the trick.
- Texture Tango – Mix it up with some crunchy elements, like crispy onions or a fresh slaw, and you’ve got yourself a burger that’s a symphony of sensation.
Sure, that burger is the belle of the ball, but we can’t leave out her charming sidekicks: the sides. A beautiful burger deserves a posse of complementary sides to round out the meal. Why not throw together some sweet potato fries with a sprinkle of sea salt? Or maybe some onion rings for a classic touch?
And finally, the secret to keeping those masterpieces ready for the runway? A low oven or a bread warmer is your best bud, keeping everything toasty but not overcooked while you’re plating like a pro .
As the fragrant smell of your stovetop burgers fills the room and you plate up a storm, remember that the next step is to help everyone overcome the intimidating task of achieving the perfect doneness — but more on that burger whispering magic in the next section. So, pick up that spatula, it’s time to flip the script on burger night!
Hey there, folks! So, you’ve got a couple of frozen burger patties, and you’re staring at them like they’re a Rubik’s cube. Well, maybe it’s not that perplexing, but you get my drift. No worries, I’m here to be your stovetop hero and tackle those burning questions without any of the fluff (or the burns, for that matter!).
First off, let’s answer a question I get more than my kids asking for allowance: Can You Cook Burgers from Frozen? The short answer? Absolutely, you can – and I’m talking about turning those chilly bricks into juicy, delectable patties without having to plan a day ahead. Magic, right? Nope, just good ol’ cooking smarts.
Next up on the docket: How Long Should Frozen Burgers Cook? Not gonna lie, it’s not as quick as microwaving popcorn. Ideally, you’re looking at about 18-20 minutes for a medium burger – and that’s over medium heat, champ. Flip those bad boys every 3-5 minutes for even cooking, and you’ll avoid that ice center nobody wants. Well unless it’s a fancy drink, of course.
- Start on a medium flame: Keeps the outside from turning into charcoal.
- Be patient: Rome wasn’t built in a day, and your burger needs time too!
- Boom, flip time: Remember, 3-5 minutes each side keeps ’em nice and even.
Okay, so you’re not a fan of the burger sticking to the pan like it’s found its soulmate? Join the club! Here are some spicy tips to keep those lovebirds apart. Grab a decent Non-Stick Frying Pan, and always, and I mean always, let it get hot enough before you gently lay the burger down. If you’re working with cast iron, a little oil won’t hurt to create a non-stick surface. But please, don’t drown it. We’re cooking burgers, not setting up a slip-n-slide.
Overall, whether you’re an impatient eater or just a fan of the last-minute meal planning (no judging here), frozen burgers on the stovetop are your ticket to yum-town. Armed with these tidbits, you’ll keep those patties sizzling without a hitch.
Thanks for tuning in, burger enthusiasts! Keep those spatulas flipping and as always, “Stay hungry, stay foolish… for those sizzling stovetop delights!” 😉